meals

Pot Pies + Friday Links

DSC_0176-1

We are here again, aren't we. Yet another week flew past and I am amazed it's the WEEKEND tomorrow! WOOT! Woot! I am going to have to tell myself to take it slow and not work this weekend. But, hey when is the job is about food, it is really hard to want to take a break :).

Yet, it is SPRING!!! Finally! Yay! So happy to be wearing skirts again, without thick leggings. I mean just sweet tans ticking out. Ok, yeah, I am brown and always tanned. Well, perks of being a tropican! {Ok, I made up that word, but, doesn't it sound cool? Tropican! Love how it rolls ;-)} Anyway, I looking forward to taking a stroll and waiting for the cherry blossoms to bloom, lazing in the sun and watch the dogs run carefree, run a bit and maybe shop for short, flowing dresses...

Right, so, what do I have for you today? These pot pies, of course. A bunch of links for you that I hope you enjoy. And, and, that I have been working feverishly on a couple of projects. Here is a

sneak peak

to one of them. More on that next week! I am super kicked to share it with you. Plus, it is only a small part of a big project I will be unveiling this month. #starsineyes

DSC_0139-1

Honestly, working for myself is more fun than I had expected. Ok, really, I wasn't expecting much. I have never worked for myself, before now. I am not always an easy person to work for; I always knew that. I put a lot of pressure on myself. But, guess what, it works. I am loving it. Also, it is great to have a proper work and studio space in my new space. Oh, and I love Brooklyn. The vibe, the jauntiness, that I have the park by me and a

coffee shop

that I simply cocoon into.

Let me nip in a quick note about the pot pies here. I have always loved the idea of pot pies. There is something very appealingly noble about them. Rustic yet elegant, very British and I always had a crush on all things British since my Enid Blyton reading days. Besides, my mindless go-to meal is making a tart. So this is smack in the comfort food zone for me.

DSC_0150-1-2

I made these with homemade bacon.

I owe you a post on that.

.

Here is my experience and recipe

for that. Never thought I would make bacon at home, but the taste is a world of difference. Loved it. But, the gist of it is that it is super easy, needs little work, a lot of patience as it cures for a few days and make all that "work" very worth it. Other than that, just a bunch vegetables from the market and some frozen peas from Summer last. I have kept the seasoning to just salt and pepper, so the flavors of the bacon and the vegetables come through without clutter. For the same reason, this pie is best made with the best produce you can find.

Each pie is a one person portion and is great with a light salad and perfect packed as lunch or for picnics. Because they are fully encased in a crust, they are super easy eaten without utensils, ergo good for kids.

Now, for some things I am loving ..

-

This

is bloody awesome!

- This

recipe

brings back memories and the sprouts salad my mom made very often

- A wonderfully honest and realistic

piece

on relationships. Two qualities that I typically find missing on the subject.

-

Their

gelato. They have savory flavors like Olive Oil. Also, their cafe next door is simply adorable and they sell new season olive oils from Italy. I'll say the Italians know a lot about good slow food.

- Starting to get curious about

Kombucha

- Loving

her art work

and geometric design. This collection is a mix of photography and art installation.

- If you thought those people hogging the tables at your coffee shop with their laptops {Ooops! caught red handed} are a recent phenomenon, take solace in that

it was always this way

! ;-)

- Loving

this magazine

! I wish someone would send me a copy :D

- Went

here

last week and became a child again

That's it from me for this week folks! Have a happy frolicking weekend.. xx

Spring-Winter Bacon and Vegetable Pot Pies

{makes 4 individual pies}

For the crust:

2 cups whole wheat flour

8 T cold butter, cut into 1/2 inch cubes

pinch of salt

1 tsp baking soda

a few T cold water or milk {I use milk}

For the filling:

2 T of chopped bacon

1 small onion, diced

2 garlic cloves, minced

2 potatoes, peeled and diced into 1/2 inch cubes

2 carrot, peeled and diced into 1/2 inch cubes

2 cups kale, torn of the stem

handful of frozen pies, thawed

1 cup vegetable stock

1 T bacon fat + 1 T flour for the roux

salt, pepper and olive oil as needed

Start by making the crust. Sift together the flour, salt and baking soda. Rub the butter in the mixture until it resembles a coarse clumpy mixture. Add four tablespoons of liquid and then a table spoon at a time, until dough comes together into a crumbly ball. Without adding any more water, knee gently to create a homogenous dough. Wrap in cling film and refrigerate for at least 30 mins.

You can always make tart dough and store in fridge for 2-3 days or freezer for a month.

Preheat the oven to 375F.

In a heavy bottom pan, sauté the bacon until the fat renders out. Drain all from one table spoon of the fat from the pan. Add the onions and garlic and sauté with the bacon, until softened.

Add the potatoes and carrot. Saute for a few minutes and then add the stock to the mixture. Bring to a boil and cook until soft.

Add the kale and thawed peas and cook for a couple of minutes.

When the kale is added, in a small sauce pan, mix together a tablespoon of reserved bacon fat and a tablespoon of flour. Over low flame, cook until the rawness of the flour is gone.

Add the cooked roux to the vegetable medley and cook on medium until the liquid thickens. Remove from heat.

While the vegetables are cooking, divide the dough into four parts. Cover three with cloth while working on the remaining piece.

On a well floured surface, divide the dough into 2 pieces approximately 2/3 and a third. Roll out the larger portion into a circle to fit your pie mold of 4 inches wide, leaving some overhang. Divide a quarter of the vegetable mixture into this pie. Gently place the smaller disc on top of the filling and fold over any overhang to seal the pie. Make a small tear on top of the pie to let steam escape.

Repeat with the remaining three pieces.

Bake for 30-35 minutes, until the crust is golden and flaky. Remove from oven and cool on rack for 5 minutes before unmolding.

Serve immediately or cool to room temperature before refrigerating. To reheat, heat in a 300F oven for 15 minutes.

Staying in the NOW

It is still Winter in the North East and ergo, more root vegetables, roasted!

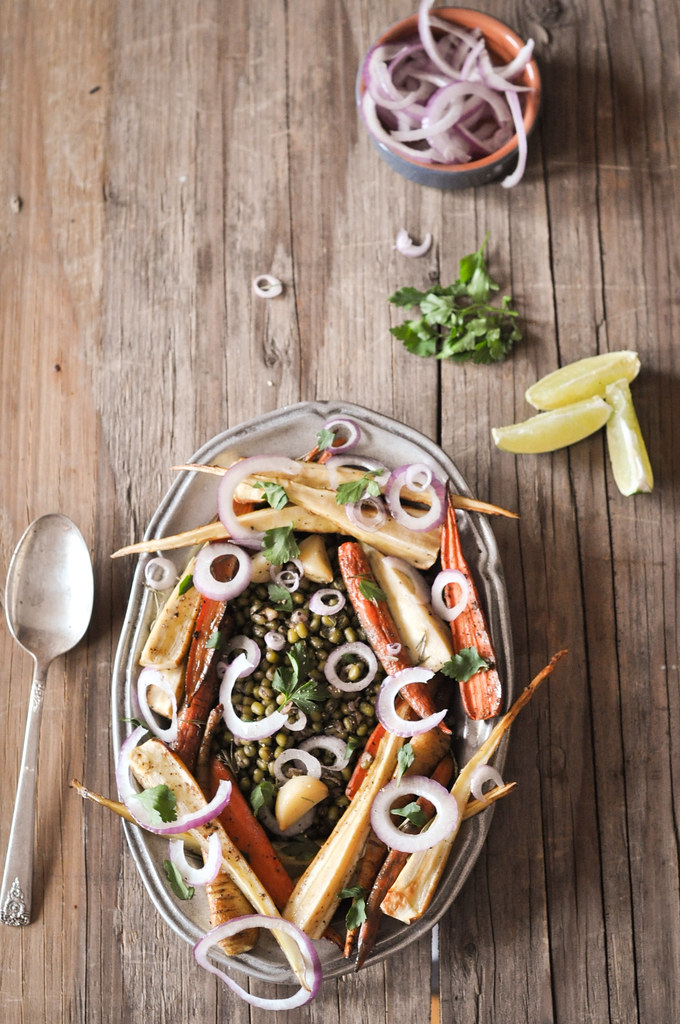
Mung Dal Salad with Rosemary Roasted Parsnips & Carrots

Last week I was in Utah. A state that I have never been to before, and, now, I wonder exactly what was wrong with me to have been so egregiously blind! Oh yes, one small teensy problem. I can't drive! Hmm.. That is being worked on in the immediate future.

Anyway, it was shorts weather there. Really. Ok, fine I had to do a last minute pants purchase. Thanks to the generosity and large heartedness of my fellow hikers (I forgot my wallet!), I managed to stay thawed in the near zero temperatures of the early mornings. Yet, it really warms up quickly through the day. Two days of hiking and biking and a lot of sunning and warmth. Plus, some very intangible experiences. I will write about that another time, when I have collected my feelings sufficiently.

Until then, I'll lead you on with a couple of snaps that also serve as my

excuse

reason for the absence here in the last week. I mean, it would be sacrilegious to look for wireless amongst these red rocks, don't you agree?!

Snow Canyon Park, UT
Zion National Park, UT

Meanwhile, back to the reality of the North East. It is chilling. Bone Chilling. It's March. No respite.

Eating seasonal is becoming a bit of a challenge. I am rising to it. It's time to dust off that red sand and get the creativity going. There is a limit to the number of ways you can consume root vegetables. No, there isn't. There is always another cuisine I have not yet experimented with. Mongolian for starters. Em, what is their cuisine. Hmm. Homework!

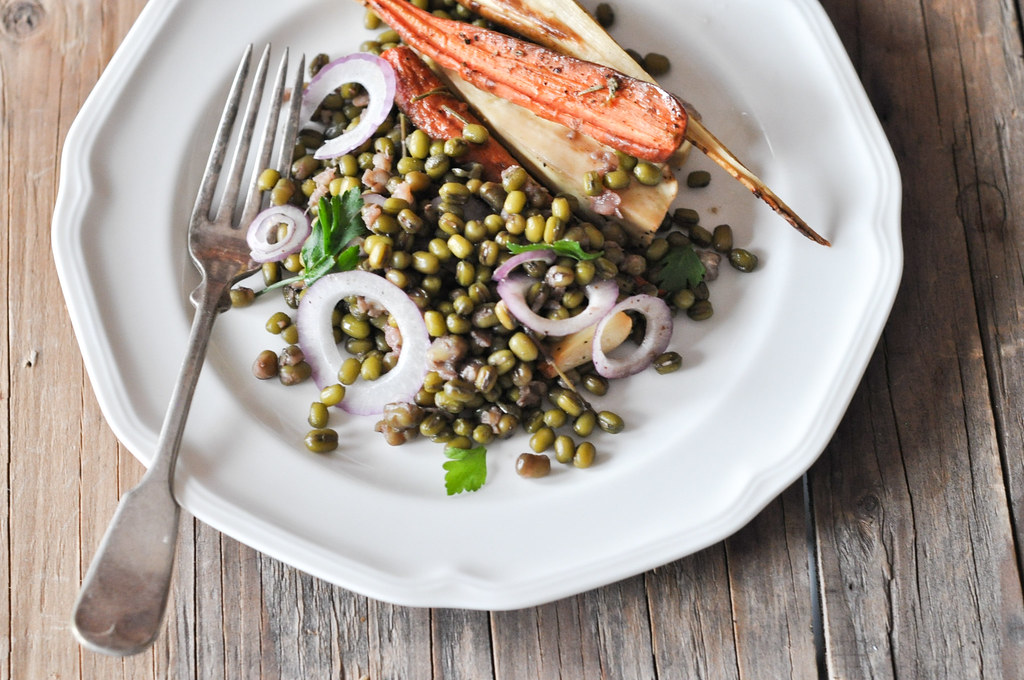
This time, I bring you a dish that is a collage of Indian nostalgia and Western cooking. Winter root vegetables roasted in woody rosemary. Not so new. Tossed in a salad of boiled green mung beans, a lot pungent red onions and a generous squeeze of lime. Despite the lack of garlic, this is a punchy dish, I promise. The nostalgia bit is the beans and the onion.

Mung Dal Salad with Rosemary Roasted Parsnips + Carrots

Growing up, we made a 'salad' of sprouted green mung beans, with diced onions, some grated carrot and a lot of lime (or key lime as it was) juice. The quotes around the salad because it was always a side, never a full meal. Something raw and fibrous that was served along with the main meal (roti or rice with vegetables or meat, mostly vegetables). I loved these raw roughage bits. I ate loads of them. I loved how the juices would come out and I would slurp them up, loudly. Yeah! I was voluble in my appreciation.

You could do the same with this salad, for the warmer times of the year, whenever, it decides to come along. But, while Winter continues her icy fingered stranglehold, a warmer version, with boiled beans is more inviting, which, is what I just did. Cooking the lentils in homemade stock, lends a lot of flavor to it and little forethought is needed in making this composed salad.


Warm Winter Mung Bean Salad with Rosemary Roasted Parsnips and Carrots

{serves 2)


1 cup whole green mung beans, soaked in boiling hot water for 30 mins

1-1/2 cups homemade stock

1 cup water

1 small onions, sliced in rings

handful of parsnips, sliced or diced (as you prefer)

handful of carrots, sliced or diced (as you prefer)

1 stem of rosemary, leaves picked and chopped (reserve the stem for stock)

salt and pepper as needed

Olive oil to drizzle

lemons or limes to squeeze over

chopped parsley to finish

Pre heat oven to 400F (380F fan).

Toss the carrot and parsnips in a little oil, salt, pepper and rosemary leaves. Spread in a baking tray and bake for 30 minutes under tender and crisped.

Meanwhile, drain the beans and bring to a boil with the stock and water. Season with salt.

Lower the heat to a simmer and cook covered until all the water has been absorbed.

The beans should be tender at this point. If still crunchy in the kernel, add some hot water and keep cooking until soft but not mushy.

The beans and vegetables should be done about the same time.

Toss them into a salad bowl and drizzle olive oil to ease the socializing.

Toss in the onions and parsley and squeeze a healthy dose of lemon.

Serve immediately with more parsley for garnish.

ME(al) Time - Asian Inspired Meatball, Shiitake and Red Bean Broth

This is second installment of the cooking and

eating well for one series

.

Asian inspired meatball, shiitake and red bean broth

Or, put another way, how can you create an awesome meal with about a quarter pound of leftover mince meat that translates into a whole meal and more. You are probably wondering, how I had that little left over. Simple. I had bought a pound, or as he measured it, two fistfuls, of ground beef from the butcher. I wanted to make chili for two to last 2 meals (dinner and next day lunch). So, obviously I didn't need a pound of meat for that. I could use it all, of course, but as I

make a case here

, I would rather make more dishes than give into the momentary desire of gluttony.

So, anyway, the chili was fantastic and all that, and I put away the remaining uncooked meat back in the fridge with the intention of making something off it when inspired. I won't lie. I already had meatballs in my head. I just had not decided meatballs

and what

.

Couple of days later, while standing at my fridge door and contemplating lunch, meatballs danced in front of my eyes. I also had a bag of shiitake mushrooms that I had picked up at the weekend farmers' market. Sadly, they were not wild picked but farmed. Atleast I had the solace that they were not wrapped in plastic. Ok, tree killing paper bags, I know. I am sorry. Next time, I'll carry a small bag just for such delicate items so they don't have to juggle with the potatoes and brussel sprouts in the bag.

Shitake Mushrooms

The idea of making dumplings stared at me. But well, I was not about to be convinced into the process of making the dough. Hence, nixed. Yet, the idea of Asian was stuck. I decided to do something more Japanese influenced. Befitting the weather, it was particularly cold couple of days back, I chose to do a light flavorful broth with meatballs, mushrooms

and something else

. Noodles were trying valiantly to get my attention. I had some, but not buckwheat. Uninspired. They beat a sad retreat. Dry red beans. I always have them. Eureka! They rounded out the soup.

I soaked my beans for about 30 minutes in boiling hot water to reconstitute them. If you plan ahead, you can soak them overnight in normal water. But, I was not that organized. I also cooked the beans in the broth with the mushroom and meatballs. So the soup is cloudy from the starch released from the legumes. If you want a clearer broth, you can cook the beans separately (either in a pot or pressure cooker) but that would strip away the richness as well as the wholesomeness of the dish.

This recipe makes enough for a meal with leftovers for lunch. It is perfect for a weeknight meal or lunch on a cold or wet day.

Asian Inspired Meatball, Shiitake and Red Bean Broth

Asian inspired meatball, shitake and red bean broth

{I did not have ginger when I made this. If you do, adding will create a lovely depth of flavor. Use about 1 tsp of minced ginger in making the broth}

1/4 lb ground beef

handful of shiitake mushrooms, sliced or whole

1/4 cup dry red beans {they will double in volume when soaked}

1 T of parsley

1 small red onion, diced fine

4 cloves of garlic, diced fine

1 tsp sesame seeds

1/2 tsp coriander seeds

3 whole peppercorns

a touch of sriracha

1 egg yolk

1 cups homemade stock

2 cup water

good quality soy sauce

salt and pepper

If you haven't already, soak the beans in boiling water.

In a bowl, add the meat, yolk, parsley, pepper, sriracha and half of the minced onion and garlic. Knead together and season with soy sauce. Make tiny balls of about 1 inch diameter and refrigerate until ready.

In a deep pot, sauté the remaining onion, garlic (and ginger if using) with the sesame seeds, coriander seeds and whole peppercorns. Add the mushrooms and let them lightly caramelize. Deglaze with a little soy sauce.

At this point you can either remove all of the sautéed stuff and cooking the beans and then add them back or just add the beans and all the liquid and let them cook together. I did the latter, it is a lot simpler.

Bring the water to a boil and then lower the heat and simmer until the beans are nearly cooked, about 30 minutes or so. Adjust the level of water adding more if too much has been soaked.

Gently drop the meatballs into the broth and simmer for another 10 minutes until fully cooked. Adjust seasoning.

Serve with a squeeze of lemon and sprinkle of parsley for brightness.

The Oven Stays on This Winter

The best way to make your rising heating bills work for you is Two Timing!

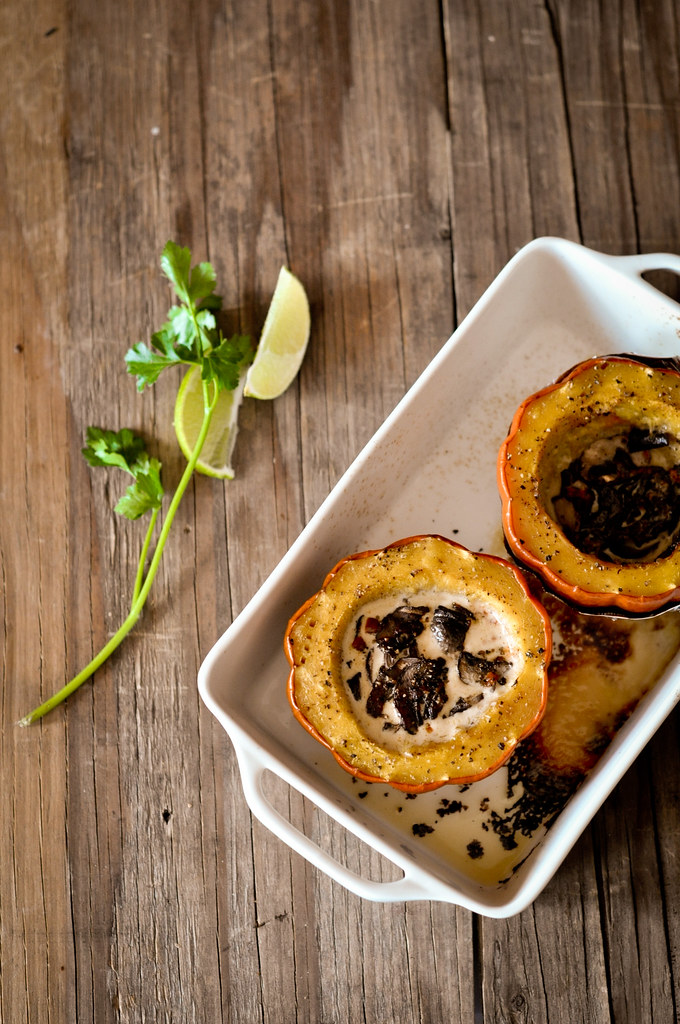
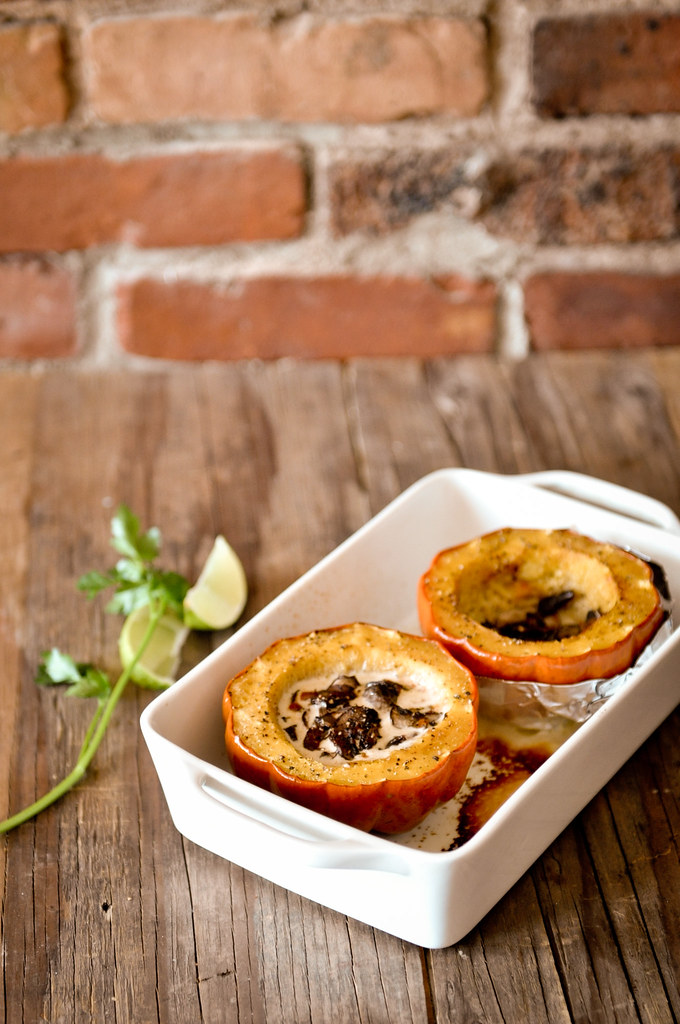
Baked Acorn Squash with Mushroom Sauce

Okay, I know I got you all to sit up and take notice with that opener. Whoa! Two time? Not the Real Housewives kind or the intriguing kind in House of Cards. Okay, I just started watching the latter series and intrigue is only the starting point. I have just seen 3 episodes of Season 1, so DO NOT tell me what happens. I am hopping with excitement. I want to just do a marathon of all the episodes with popcorn and bottles of wine. But, well, today is Monday and work needs to get done {wan smile}. So, like a guilty pleasure I am doling out the episodes over the week with promises of longer romp next weekend IF I get ahead of the curve. :)

So, what does this have to do with today's post? Nothing, other than that due to this dish's abject simplicity, it took me 7 minutes flat to prep while the show carried on in the background. Into the oven and back I hopped onto the couch with a brimming glass to give the episode my full attention. Paused again to take it out and serve timing my finish plus a few truffles as dessert with the closing captions. That was 50 minutes of past paced political chess and being enamored by Mr. Spacey while I prepped, cooked, ate and felt sated, in so many ways!

Oh and the two timing? Well, having the oven on basically warms up your house so much that you can turn the actual heating down, way down. And, that lasts for a few hours until the oven cools down completely.

Bottom line, bake more in Winter. It is good for you, in so many ways...

Prep to Bake Acron Squash

So, let me tell you a bit about the dish itself. Acorn squashes are wonderful winter produce. They are of the pumpkin family, with more robustness both in body and ability to hold up to baking. They have a touch of sweetness in their flesh that accentuates as they ripen. Yes, they do ripen. They start a dense forest green on the skin and as they become more fruit, the skin turns a glorious orange just like Fall. It is a brilliant hue to witness in the middle of a grey, cloudy Winter, really. I personally prefer the more ripe squashes for two reasons. The flavor is a touch sweet and that sweetness caramelizes headily during the baking process. Besides, the squash is easier to work with at this stage. Raw squash can be pretty tough to cut through.

This late in the season, it is more often that I find perfect squashes for my preference. There are so many ways you can use them, from slicing and roasting them with a kiss of chili flakes for some heat or making purees to be used in risottos or the quintessential soup. Now, with the show running, I didn't have time to make multiple dishes or go through multiple steps as for soups. It simply had to be a oven to table meal, light but filling and hearty and not leaving me wanting a main.

I had made this before for an impromptu dinner as a first course. And, I figured I would try it out as a full blown mail. It works beautifully as either. As an appetizer, it can be shared between four to six, depending on the size of the squash. For a main, it works very well with some fresh crusty soda bread or sourdough to soak up the rich earthy sauce.

Baking the mushrooms in the cream, infuses the cream with a wonderful earthy note as the mushrooms cook down. I used cremini because they looked best at the market. This dish will be absolutely fantastic with shitake or chanterelle.

Baking Acorn Squash
Acorn Squash Baked with Mushroom Cream

Other Squash recipes I think you should try -

The rich intensity of caramel,

Molasses Glazed Acorn Squash

Simple and elegant,

Roasted squash wedges with grapefruit and pomegranate

I love meals in a bake,

Quinoa stuffed acorn squash

Because it is Winter,

Acorn Squash and Sweet Potato Soup

And, for another something different,

Butternut squash cake


Baked Acorn Squash with Mushroom Cream


1 medium semi-ripe acorn squash

6-7 medium sized cremini mushrooms or other, sliced thin (take a handful and go with how much you need to fill the cavity)

1/4 cup of non-homgenized, non-ultra-pasteurized cream

touch of sriracha sauce

wedges of lime

1 tsp chopped parsley

salt and pepper to taste

Preheat oven to 375F (400F if using non-convection oven).

Slice the tip end of the squash just enough so the squash will balance on a sheet. Cut the squash in half horizontally. Scoop out the seeds. Place the halves on a baking dish.

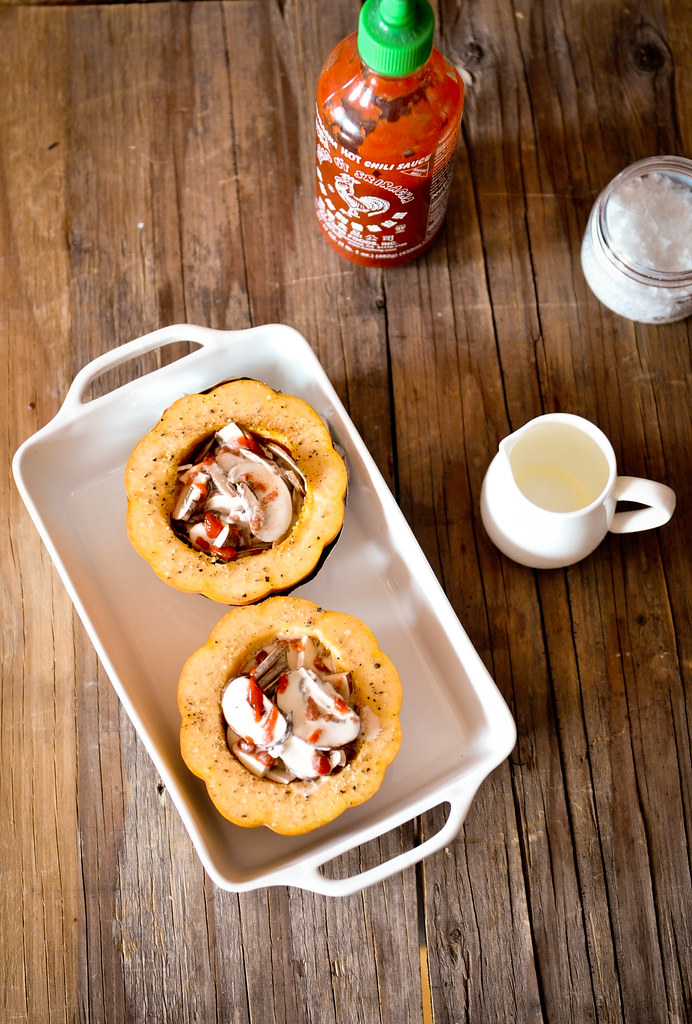
Dust the insides with a little salt and pepper. Stuff the insides with mushrooms. Pack it in; they shrink fair amount while cooking.

Drizzle the sriracha on top and then pour in the cream. You may need more if you squashes are leaner in flesh. Ideally you want enough cream to come to the lip of each half. If you run out of cream, its ok, use what you have.

Cover the dish with foil and bake for 15 minutes. Remove the foil and bake for 10 minutes until the flesh is really tender and a fork goes through like through butter.

Remove from oven and rest the squash for a couple of minutes. Sprinkle parsley and serve halves in bowls with lime wedges and bread to soak up the sauce.

If making for a larger crowd or serving as a smaller portion, skip the bread, slice each half into thirds or less and divide the sauce into each plate.

Winter's Best

Where do you get your best produce?

Vegetables for Soup

Last weekend, here, was yet another blistery one with winds gusting, making an already cold day, freezing. A day when most of us would rather curl up cozily under a wrap and stay home and sip on hot beverages.

Yet, the Grand Army Plaza farmers market was still in full force. I went in quest of vegetables for the week. I was cursing that I had to trudge through packed ice and snow for 20 minutes to get there. That it was freaking cold and I was muttering that this was all probably a wasted effort because the market probably isn't going to be there etc. etc., you know, moaning away in general. However, when I got there and saw rows of stands as they usually are with fresh produce, flowers, breads and everything, I instantly warmed up and felt pangs of remorse. After all, they trudged at least two hours in the early hours driving through icy roads to get there.

I was impressed. I admire their committment. I respect them for it and thank them for making my winter days warmer. There they were huddling in their coats, hands stuffed in pockets, stamping their feet in rhythm to stay warm. But, they were there. Sure as day!

DSC_0263-1

This frosty winter brings to focus, the sense of eating seasonal ever more. One would think that given the harsh conditions, harvests must suffer. Actually, they don't.

Seasonal winter produce

, especially root vegetables, are naturally immunized to the cold. They thrive in them. So, as long as farmers can protect against seeping damp rotting vegetables both unpicked as well as stored, you are going to find a brilliant selection of them at the market.

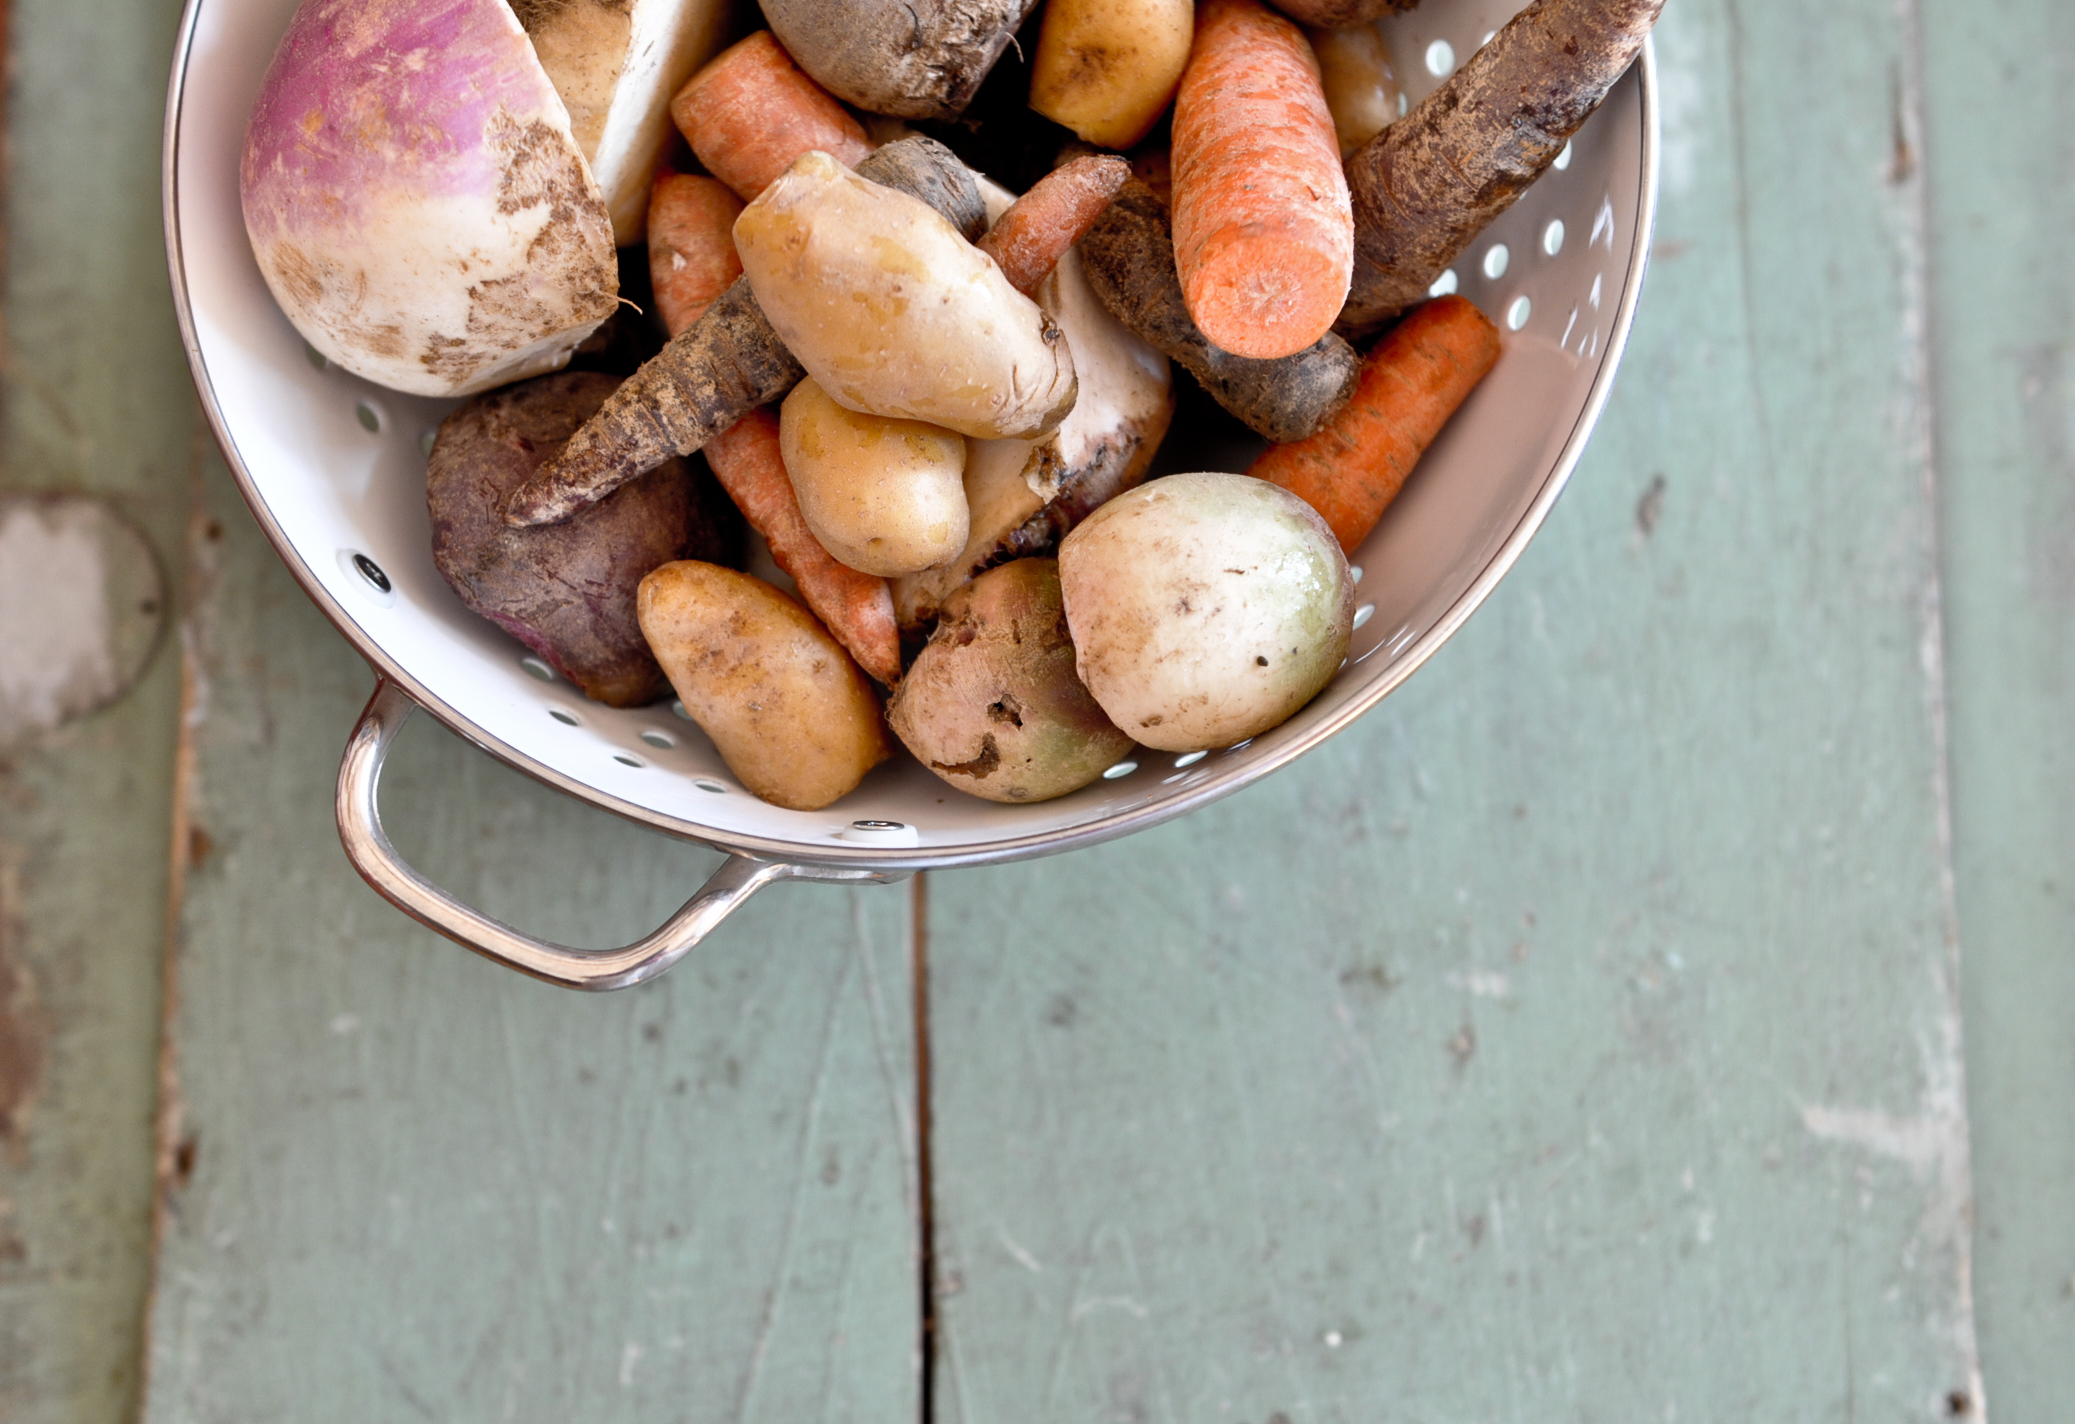
As I walked around, I saw a glorious variety of potatoes, turnips, parsnips, carrots and beets. I genuinely love the mud that comes off the produce as I sift through them to find the ones that I want. As I was browsing around, content in knowing that, I am going to have soup later that day, I came upon a huge bag of assorted produce, tagged at $5. Yes, about 3 pounds of all those root vegetables that I mentioned in a bag for just that!

DSC_0273-1

To say I was thrilled is an understatement. I genuinely think that the farmers markets in New York are priced affordable as is, but such finds are always a treasure! They were gnarled and some had bits of it chopped off but they were perfect for soup! And more.. like roast vegetable salad and making stock. Posts on those coming next.

Anyway, back home, it was only matter of peeling (save the peels!) and simmering with the mildest seasoning to bring joy to the palate. This soup is nothing but about the produce that goes in. The flavor comes from all the root vegetable, which, is why it is essential to pick the best you can get. Also, I use a ton of ginger and garlic. Not only do I love the flavor of slow cooked garlic but it is a natural immunity booster. Ginger is a warming spice and boosts the body's metabolism, helping you burn more and generate heat as well as the extra intake you inevitably have during this season. I find mine at the farmers market.


Winter Root Vegetable Soup

(makes a massive pot)

The color of the soup comes from what vegetable you put in. I added a fair bit of purple carrots and beets and got a reddish brown soup. If you want a lighter soup, then leave out the dark vegetables.

___________________________________


1 lb assorted root vegetables, diced (I used potatoes, parsnips, carrot, beets, turnips)

1 large onion, diced

5-6 cloves of garlic, crushed

1/2 inch chunk of ginger, crushed

2 tsp ground turmeric

2 tsp chili flakes

1 tsp fennel seeds

6 cups of water (you don't need vegetable stock since it is all vegetables. Also the trick I use when eyeballing is to cover the vegetables with water and then an inch more)

salt and pepper to taste

Toast the fennel seeds in olive oil and add the onion, garlic and ginger. Saute until they are soft. Add the turmeric and chili flakes and cook for a couple of minutes. Add all the diced vegetables and water, toss to coat.

Bring the mixture to a boil and then simmer on medium for 40 or so minutes, until all the vegetables are tender and the water has reduced to about half the original amount.

Puree the mixture to the require texture. If you find the soup too thick, add more water and heat through on the stove. If not, you can serve immediately with a touch of olive oil or cheese or chopped nuts.

The soup can be refrigerated unto 10 days and frozen for a month. It does thicken in the fridge from the starch of vegetables, so when you reheat add water and bring to a boil.