cake

I Heart Thee - Couple's Velvet Cake {Valentine's Day Post}

Couple's Velvet Cake

YAY! This cake got voted to FoodBuzz Top 9 on 14 Feb 2010. Thanks for all the LOVE!!


With Valentine's day just a couple of days away, the blogosphere is filled with yummy things Red and lovely. It isn't surprising that the spirit carried over to the Twitter World. What with mouth watering posts popping up all over from tweet friends, it was only inevitable that one starts thinking up stuff for the cause, even though Mr. FSK and I do not observe the "day" (that is only 'coz our anniversary is a few days earlier! :)).

So when Aparna asked me if I wanted to bake a red velvet cake in time for V-day with fellow Velveteers, Pam and Alessio, I jumped on it. Truth be told, I have not found the cake very appealing primarily because of the amount of artificial coloring that goes into it. Somehow, the idea of making it red by adding a poundful of color just didn't seem right. But, I remembered the history of the cake and the color from a Throwdown episode I had seen a while back and I wanted to try my hand at some of this practical chemistry (it was one of favorite subjects in school.. Loved organic chemistry, not so much inorganic).

The original cake made eons ago, relied on the reaction between the buttermilk and vinegar in combination with the chocolate to produce the reddish tinge that gave the cake the name. I wanted to have some fun with food chemistry and the rule to NOT use artificial coloring for baking with these awesome bloggers was just the right motivation.

So, I did research. I found out that to have any chance of the natural reaction, I needed to use regular cocoa and not the Dutch processed (which is usually coveted) because of the latter's alkaline nature. Fortunately, that was the cocoa I had at home. Then I learnt that the cultured buttermilk that you get in the stores are pretty tame pH wise to cause a pop. So, I decided to make my own buttermilk...

Velvet cake sliced
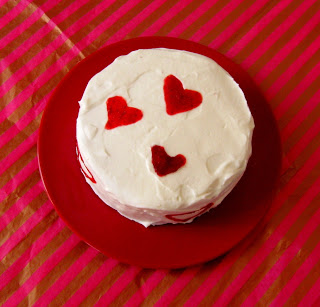
Clearly I have quite a ways to go on piping frosting prettily!


I remember my mom used to skim the cream off the boiled milk everyday and store it in a jar till there was enough to make butter. Then she would churn it by hand to separate the butter and buttermilk. A major portion of that butter would then be converted to ghee. It all seemed a long, tedious process to me and I was a bit deflated, at first, when I realised I had to make buttermilk.

Glory to Google, it wasn't to be so bad! This day and age, all you do is add heavy cream to the blender and whip at high speed, till the butter separates out. It was such a cool feeling!! The nice part is you can use the butter and the buttermilk you make in this cake. Now, nothing can beat all that homemade LOVE!!! :))

So, I was set and ready to bake. I whisked the buttermilk and vinegar, but, nothing seemed to happen, even after upping the amount of vinegar. I proceeded anyway and made the batter which was not quite the chocolate cake color but a duller brown, with a very very slight slant to red (or perhaps that was just me hoping!). Anyway, I wanted something red in it, so I added a couple of tablespoons of mashed thawed raspberries. They didn't do much to the overall color, just a few flecks of red here and there but I think they added to the moisture of the cake.

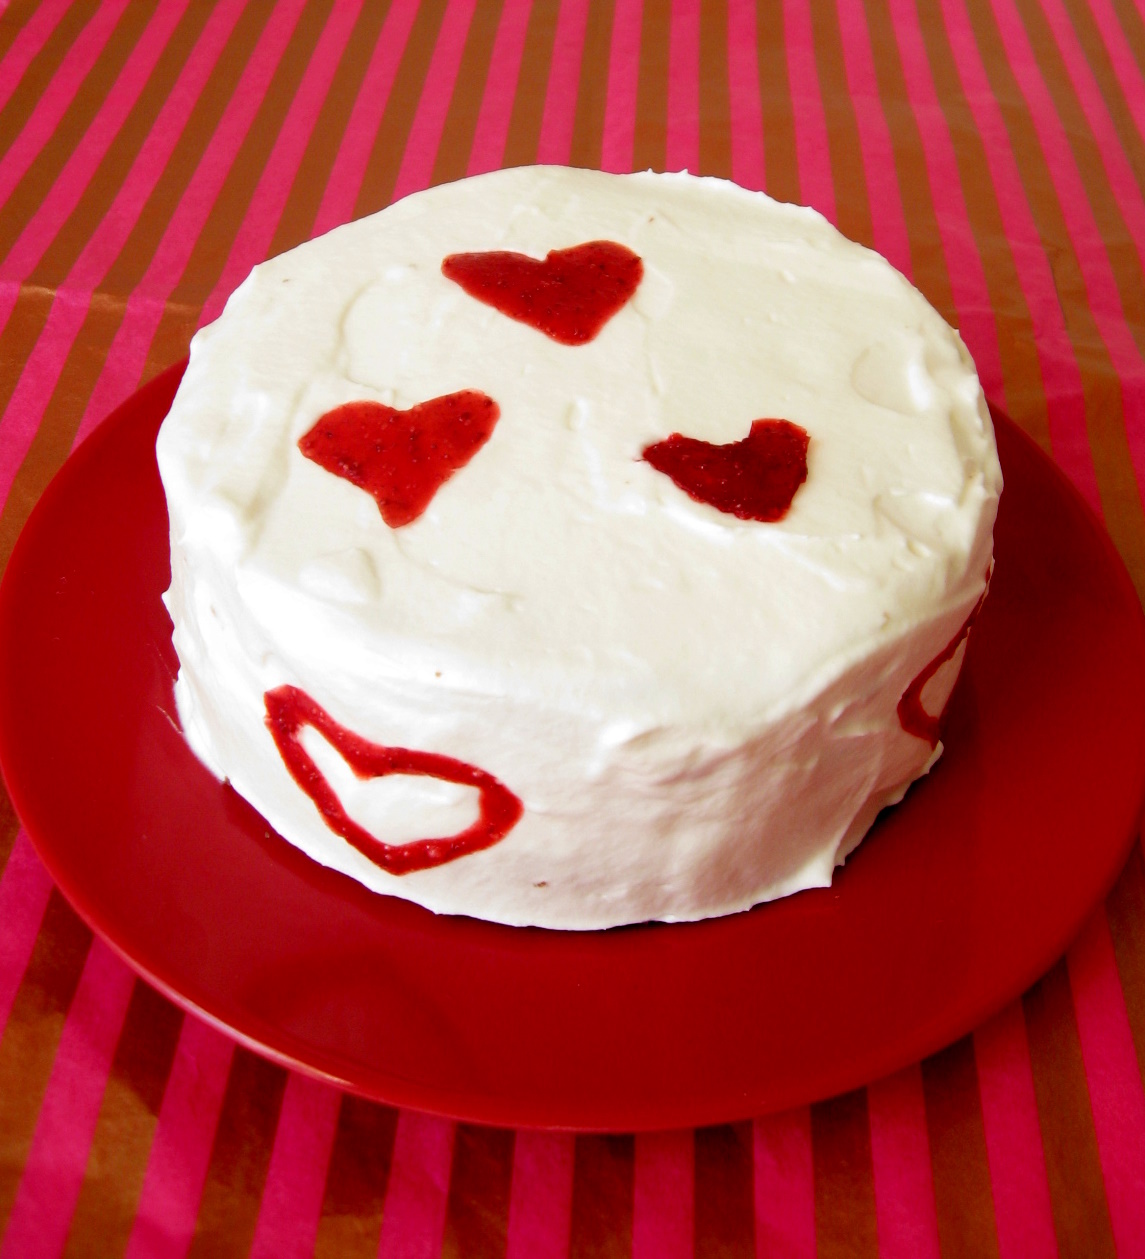
Now for the decoration. Typical frosting for red velvet cake is cream cheese based. But, I am not a big fan of it because cream cheese has a pronounced tang which needs a ton of sugar to make sweet. So I decided to go with a whipped cream frosting which is way lighter as well and lends better to delicate flavors.


Slice and sliced cake

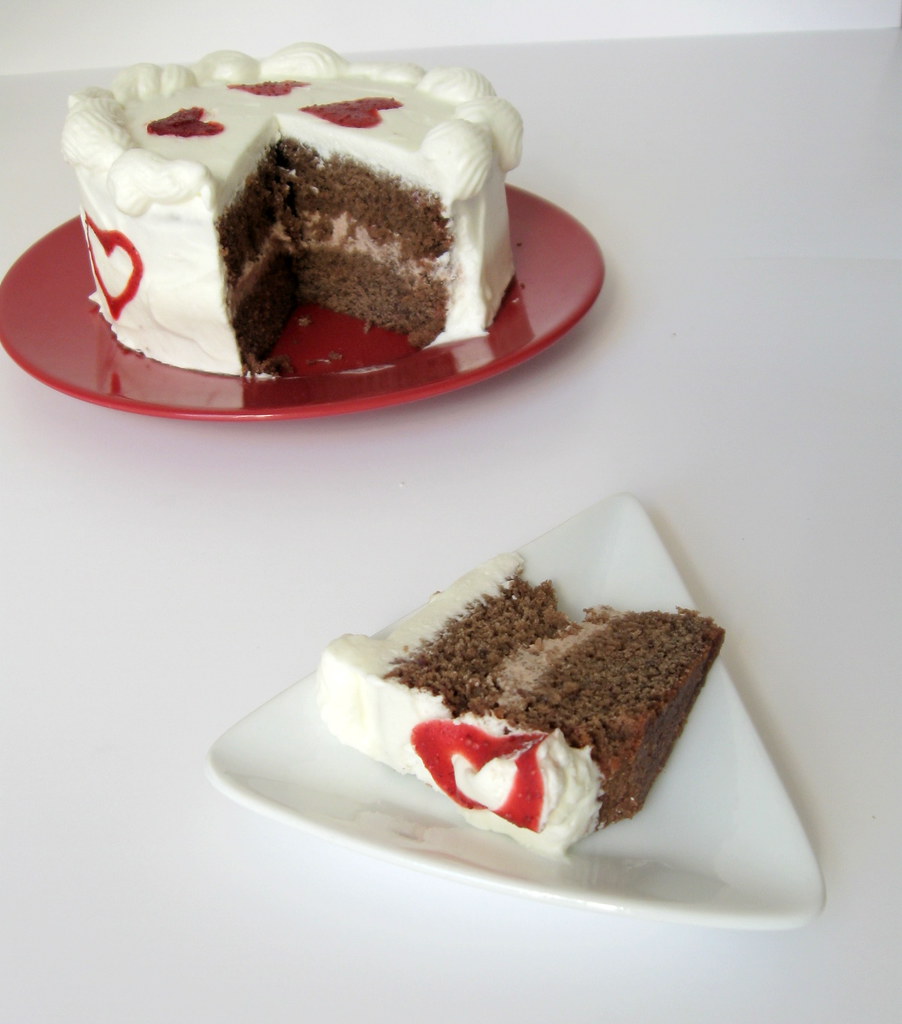
Since it was a chocolate cake of sorts, I made the inside filling of chocolate & rum whipped cream and the outer frosting of rose whipped cream; rose being the symbolism for the day and all. Besides, I like rose flavor (love rose milk!). And, since I am mischievious by nature, I decided to go over the top and decorate with mini-hearts made of strawberry gelee. LOL..

Alhtough the cake did not come out red, it sure was velvety. The texture was serious melt-in-your-mouth. I think the buttermilk adds to the nice texture (Check out Alessio's post for an actual lesson in food chemistry.. fantastic!). There was just a hint of chocolate, which I didn't mind at all. And I loved the cream frosting; it was light, airy and mild (oh and rum soaked..haha). This is now my favorite cake recipe.

All in all, I thoroughly enjoyed working with the cake and giving in to some whimsical fancies, even if I failed at the chemistry (hey! it's all about the learning, not the grades, right?!).

Check out what the other Velveteers have created, all naturally colored -

Aparna - Eggless Red Velvet Cake
Pam - Red Velvet Cake (with beetroot juice)
Alessio - Raspberries Red Velvet Cake


Velvet Cake For Two

** Since it's for a couple, I sized it accordingly, you can triple portions for a 9 inch cake.

I was generous with the alcohol given the occasion. For a kid-friendly version, skip the alcohol**

Cake:
(Recipe adapted from Epicurious)

3/4 cup sifted cake flour (or 3/4 minus 2 T cup AP flour plus 2 T corn starch)
1 T unsweetened cocoa powder (natural, not Dutch processed)
1/3 tsp baking powder
1/3 tsp baking soda
pinch of salt
1/3 cup buttermilk
1 tsp distilled white vinegar
1/2 tsp almond extract
1/2 cup sugar
3 T unsalted butter, room temperature
1 egg, room temperature
2 T mashed, thawed raspberries

5 T rum
5 T water
1 T sugar

Preheat oven to 350°F. Butter and flour a 5inch by 3 inch cake pan. Sift together the flour, cocoa, baking powder, baking soda, and salt. Whisk buttermilk, vinegar, and extract in a small bowl. Using an electric mixer, beat sugar and butter in large bowl until well blended. Add the egg, beating until well blended. Add in dry ingredients alternating with the buttermilk mixture starting and ending with the dry. Beat in the mashed raspberries.

Pour batter into the pan (there may be a bit more than can fit. Don't over stuff). Bake for 30-35 minutes or until tester comes out clean. Cool in pans on racks 10 minutes. Turn cakes out onto racks and cool completely. Meanwhile, mix together the water, rum and sugar and set to cool.

Using a cake knife cut the cake into two horizontally (you can also bake in two pans. I only have one). Pour the rum mixture evenly on both halves and let it soak in. Generously spread the chocolate cream onto the base layer making it slightly thicker in the center as it will spread when the second layer is placed. Gently place the top layer and coat with a thick layer of the rose cream frosting. Decorate with strawberry hearts.

Frosting:

Chocolate and Rum Cream
1/2 cup heavy whipping cream
2 tsp unsweetened cocoa
1/3 cup + 2 T powdered sugar
2 T rum

Add the cocoa and rum to the cream and set aside for 5 minutes in the refrigerator. Start whipping at low speed and increase to the highest speed on your mixer. When it has doubled in volume, add the sugar slowly. Continue whipping until soft peaks form. Cool for atleast 15 minutes before spreading on cake.

Rose Cream
3/4 cup heavy cream
1/2 cup powdered sugar
1 T rose water

Use same procedure as above

Strawberry gelee hearts

1/4 cup strawberry puree
1/4 cup water
1-1/4 tsp gelatin

Bring the puree and water to a boil. Off the heat, add gelatin, whisk to incorporate completely. Cool to room temperature and then cool in fridge till it is just starting to set is fluid enough to pipe.

Pour into a ziplock bag. Make a tiny cut and pipe hearts onto a silpat sheet. Cool overnight to set. Peel off the hearts and place on frosting.


Roasted Butternut Squash and Apple Mini Cakes

YAY!! These cakes were voted on to FoodBuzz Top 9 on 13 Jan 2009!!!! :))))

butternut squash & apple cake

Good Morning everyone! Ok, I know it's afternoon even in this part of the world but hey, it's still morning on the West Coast! So, I am covered. Anyway, I consider morning as the few hours that follow my waking up, irrespective of when that falls in the traditional day cycle. hehe..

Ah well, I blame the cold for this out-of-the-box thinking ;-). NYC is at its coldest, of the last five years I have been here, and it really makes it more appealing to stay tucked in warm and cozy. Then, once up, it's time to browse my favorite food blogs and drool over the photos, learn of a new recipe that needs to be tried out very soonly and then perhaps actually getting around making it. Besides, I have had a lot of catching up to do on blog reading since my vacation days.


So, when I came across Meeta's call to make something of Winter Vegetables and Fruit for her Monthly Mingle, I was super thrilled. You see, I had made mini cakes with squash and apples sometime back and had not found the opportunity to post about them. And here was the perfect time to talk about them. This month's mingle is being hosted by Sudeshna of Cook Like A Bong.

apple & squash cake

And what a close call?! Just a day before the doors closed! I can just hear them slowly closing and me just about wiggling through like in the movies. ok, yes yes, hyper active imagination and all, I know .. :)

Ok, so without further ado, let me introduce my Roasted Butternut Squash and Apple Mini Cakes. Why mini-cakes? Well, I went to the baking supply store and saw these cute 3 inch shallow paper molds and just had to use them! :) And, the squash because I like the sweetness that roasting brings out of it and thought it would add great flavor and moisture to the cake itself.

butternut squash and apple cake


Roasted Butternut Squash and Apple Mini Cakes

(makes about five 3-inch cakes)

1 small butter nut squash, peeled and diced, about 1-1/2 cups
1 golden delicious apple, peeled and diced + a few thinly sliced to arrange on top
1 cup all purpose flour
6 T melted butter
2 eggs
1 T cocoa powder
1/2 cup brown sugar + 2 T for roasting the squash
4 T milk
1 tsp baking soda

Preheat oven to 350 F degrees. Toss the diced squash in 2 tablespoons of brown sugar and roast for 20-30 minutes until caramelised. Remove the squash and keep the oven on.

Sift the dry ingredients (flour, cocoa, baking soda) together. Add the butter, milk, sugar and eggs and whip to a smooth batter. Fold in the roasted squash and apples into the batter.

Pour into buttered molds and bake for 30 minutes. Let cool to room temperature, dust with powdered sugar and enjoy!

Celebrating Fall with Apple Angel Cake


There is usually a story inspiring my posts? Some have a good plot, with attention arresting twists and turns while quite a few eh not much to write home about. Still, there is the story.

I really don't have any for this one. It is just Fall and that means apples and pumpkins and all things warm and cozy; Freshly baked just fits the theme and has an all-new allure. I mean, you just can't let Fall and the fresh nip in the air go by without saluting it with a warm baked apple, can you?! Nooo...


I still had apples from the nice big bucket we picked up at the farm. So, I was thinking, pie, but then, it just seemed too cliched. I know, it is a cliche only coz it works... everytime! But, still, I am thrill seeker and I wanted a new rush. So I thought, cake. Yes I know, nothing imaginative in that but with the twist of making it light and airy with a nice caramalised top of apples, the idea really appealed.

And, so it came to be; Angel Cake with Apples,Nuts and a hint of spice.


Traditionally, angel cakes are made in tube pans, which, I don't own. I made mine in a nice tall souffle dish over a bed of marinated apples and then just turned it over.

I really love the cake. It is fluffy and angel-like as intended and has a deep seductive spice note to it and ofcourse the apples... they are indeed the star and they shine .. shine on like a crazy diamond... isn't Fall just the mood for some Floyd?!

And, now if you'll excuse me, am off for another slice.. It is tea time! :)


Apple Angel Cake

**
I used a souffle dish to bake. If you have a tube pan, go for the traditional look.

If the apples don't look caramelised enough when you turn the cake upside down, stick it in the oven for 5 minutes at the highest temperature on the top rack.

**
4 macintosh apples
1-2/3 scant cups of flour
1 cup sugar
1 T honey
3 egg yolks
2 egg whites
2-1/2 scant tsp of baking powder
1/2 tsp salt
2/3 cup oil
6 T apple sauce
1/2 tsp + 1/2 tsp cinnamon
juice of half a lemon
1/2 cup of toasted almonds, chopped


Peel, core and dice the apples. Toss them in a mixture of honey, 1/2 tsp of cinnamon and a teaspoon of lemon juice. Set aside and let marinate until ready to bake.

Sift together the dry cake ingredients except sugar. In another bowl, cream the yolks and sugar. Add in the oil and apple sauce and whisk to incorporate well. Add the dry flour in three parts, whisking the batter each time to mix completely.

In a clean bowl, whips the whites till they form stiff peaks. Gently fold in 1 tablespoon of batter into the whipped whites to loosem them. Add whites in two parts to the batter, gently folding just enough to mix and until there are no streaks of the whites visible in the batter.

Quickly fold in a third of the apples and the nuts into the batter in just 3 turns. Do not over mix; the cake will lose the fluffiness.

To assemble, place the remaining apples in one layer at the bottom of the baking pan. Pour the batter over the apple layer. Bake at 350 degrees for an hour and a half or until a toothpick inserted in the middle comes out clean.


Tea with Mom - Dates & Nuts Spice Cake


I was thinking about what to make for High Tea, the October Monthly Mingle event hosted by Meeta of What's for Lunch Honey and Aparna of My Diverse Kitchen. Then I read this post by one of my favorite bloggers Deeba, who aside from being a fabulous baker is a full time mom with two adolescent kids.


The post made me laugh and also brought back memories of my own teenage years. Honestly, and I am sure my mom will concur, they were anything but turbulent but I did have my rebellious moments! My chosen mode of attack was the hunger strike. Frankly, my stomach was the only instrument in my control, but, inadvertently (scout's honor!), I think I chose THE most effective weapon I could have. I don't think my mother would have succumbed as much to tirades and tantrums as my stubborn refusal of nutrition.

Perhaps, if I had made a rational argument for my cause, I could have avoided much heart burn (mine from a growling stomach and hers from my strike), but, that somehow never seemed an option at all. On the flip side how rational an argument can you make when you are stuck between being a child and wanting to be a grown-up?! :).

Anyway, despite all those teething pains, I think my mom is proud of who I am now and what I became and all that would not have been possible without her support and her discipline :). So,I thought it would be fitting to dedicate this post to my mother and every other mom out there with a teenage child going through the transition into maturity.

My mom is not very fond of sweets but I am. And, in the fashion of true compromise, I decided to make something sweet but not too sweet. For as long as I remember, mom would buy Lion dates packet for me (because I was low on hemoglobin). So, I made a date cake with lots of nuts and raisins and a hint of spice. It's best eaten warm with a cup of flavorful tea and a lot of gossip and catching up! :)

Here is to my mom and every other in the world. Because, no one will ever love us like our mothers!! :))

Dates & Nuts Spice Cake

3/4 cup all purpose flour
3-1/2 T butter
3/4 cup date paste or chopped pitted dates
3 T roasted chopped cashew nuts
handful of raisins
1 tsp five spice
1/4 tsp baking soda
4 T brown sugar (if you like it sweeter, you can add a couple more)
1 egg yolk
1/4 cup + 1 T water

Pre-heat the oven to 350 degrees.

Sift the flour, spice, baking soda together. Toss in the chopped nuts and set aside. In a small pan, combine water, butter, sugar and date paste. Over low heat, cook the mixture until the butter has melted, sugar dissolved and the mixture is smooth. Fold in the raisins. Remove from and cool for 10 minutes.

Add the date mixture and the yolk to the flour mixture and combine well. Pour into a greased 4 inch spring form pan and bake for 30 - 35 minutes until cake is springy to touch.

Let the cool for 10 minutes in the pan and then transfer to a rack. Sprinkle powdered sugar over the top and serve warm with butter.