yeast

Pâté et Pain - Daring Cooks Bake in June

Chicken & Mushroom Terrine with Italian Bread 2

Yes indeed! We were asked to bake this month for the Daring Cooks Challenge. I am not all sure if it should not have been one for Daring Baker's but, I suppose, given it is a savory dish, it was a cooking challenge?!....

Our hostesses this month, Evelyne of Cheap Ethnic Eatz, and Valerie of a The Chocolate Bunny, chose delicious pate with freshly baked bread as their June Daring Cook’s challenge! They’ve provided us with 4 different pate recipes to choose from and are allowing us to go wild with our homemade bread choice.

We were challenged to make atleast one Pâté from the listed options and one bread of our choice. Most of the recipes for pâtés use liver, which, I quite dislike. So, I scoured around for a recipe that did not use innards and such. Quite accidentally, I remembered a book I had bought a while back in an effort to make chicken more fun to eat (for me!). There I found a recipe for a Terrine made with chicken meat and mushrooms...
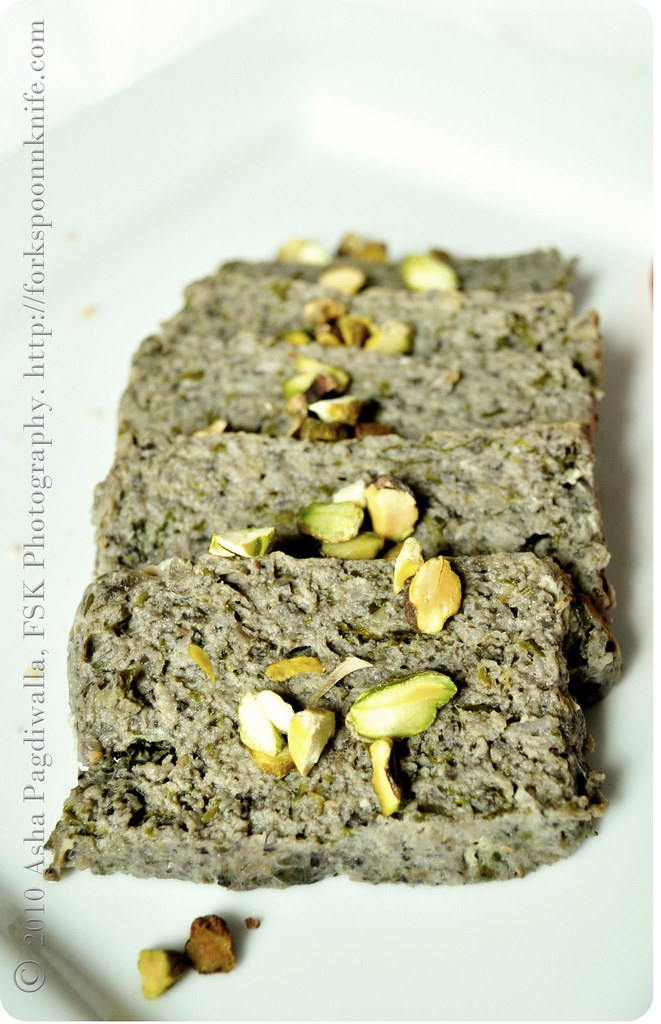
Chicken & Mushroom Terrine

There is some debate on what is and isn't a Pâté. You may have noticed, I mentioned Terrine before; that's what I made..

Our hostesses said - Technically, a terrine is a baking recipient, usually ceramic or porcelain, with a lid – but it can also refer to the contents of the recipient. And some of the pâtés we looked at were designed to be unmolded onto a dish and then sliced, while others were meant to be left in the jar or baking dish they were prepared in, and merely used as a spread.

Wiki concurs - In French or Belgian cuisine, pâté may be baked in a crust as pie or loaf, in which case it is called pâté en croûte or baked in a terrine (or other mold), in which case it is known as pâté en terrine.

Italian Bread

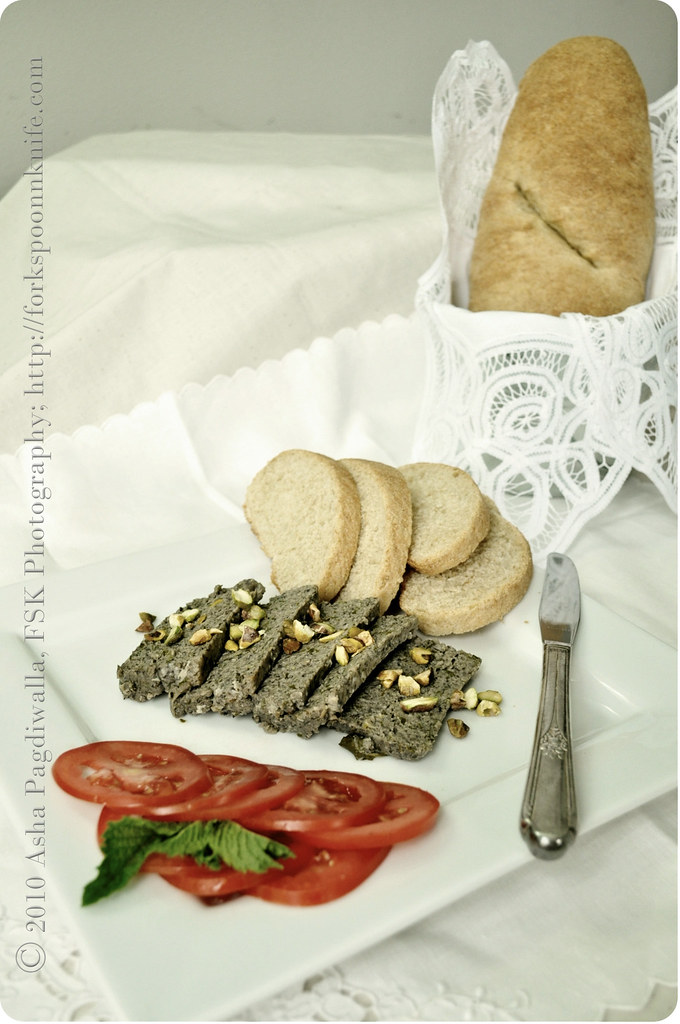
I decided to proceed with my Chicken and Mushroom Terrine recipe! For authenticity, I did bake it in a porcelain mold... I used chicken thigh and leg meat and combined it with red wine sauteed portobellos. Now, the recipe I was adapting called for fresh herbs and since I was making this late in the night, I was a bit short on most herbs.

I used what I had, which made for interesting flavors. I used mint and Fenugreek. Fenugreek is a bitter herb that is used a lot in Eastern cuisine. We use the leaves and seeds for cooking and it's bitterness is supposed to be good for the digestive system (or perhaps that was just made up so children would eat it!). Nevertheless, it does have much nutritional value.

As to the bread, Mr.FSK does not much gravitate towards the crusty varieties. So, I chose a bread with a softer crust. I have wanted to try baking an Italian loaf and this seemed the opportune moment. I followed Peter Reinhart's recipe to the T (Although I did substitute a third of the flour with whole wheat). We loved the bread. It was soft, filling and flavorful. And, the house was filled with such lovely aromas! :))
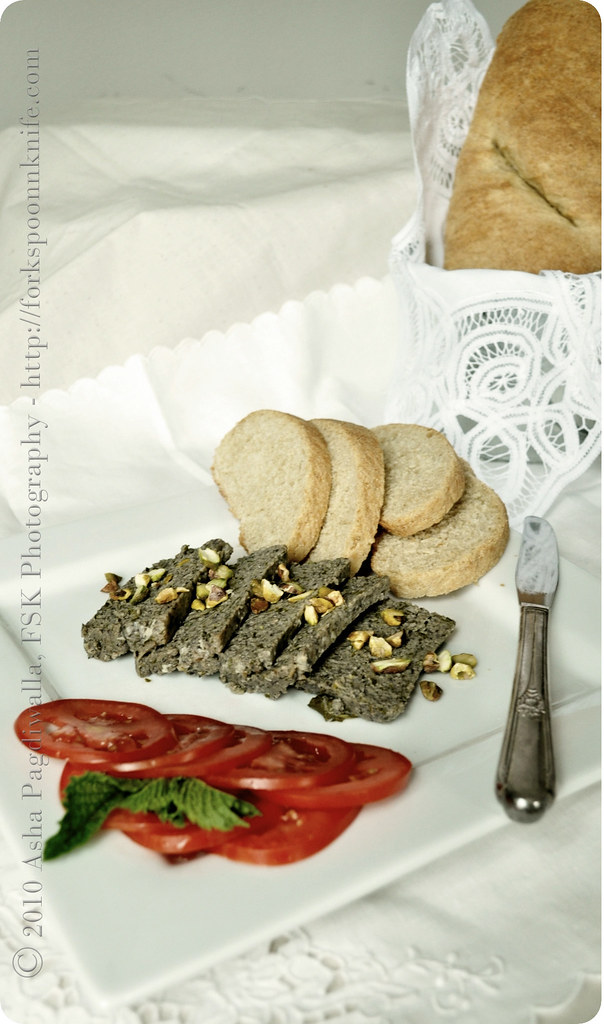
Chicken & Mushroom Terrine with Italian Bread

Verdict: A fun challenge, especially since I love to bake, even though, it was a bit hot around here for this exercise. I enjoyed the pâté but, perhaps, because I did not use the fattier innards, it was a tad dry and not creamy like I am used to it being. If I ever get the courage to cook liver and such, I may give it another try.. The bread, on the other hand, is definitely a repeat! :)

P.S. : I am sending my Italian loaf to YeastSpotting..


Chicken and Mushroom Pâté

2 shallots, chopped
2 generous cups, mushrooms, chopped (no stems)
1/4 cup dry, red wine
2 chicken thighs, skinned and chopped
1 egg
2 T fresh breadcrumbs
2 T chopped mint
4 T chopped fenugreek

optional: For serving, pistachios, tomatoes and mint

Preheat oven to 350F.

Cook the shallots and mushrooms with wine in a sauce pan over low heat until the vegetables are soft and the mixture is dry. Transfer to a food processor along with the chicken, egg, breadcrumbs and seasoning and process coarsely. Add the herbs and pulse briefly.

Spoon into greased molds and smooth the surface. Cover with foil and bake fpr 30-35 minutes until juices are no longer pink. Remove from oven and place a weight on top leave to cool and then chill.

Serve with roasted pistachios, thinly sliced tomatoes and garnished with mint.

Weekday Lunch - Pizzich

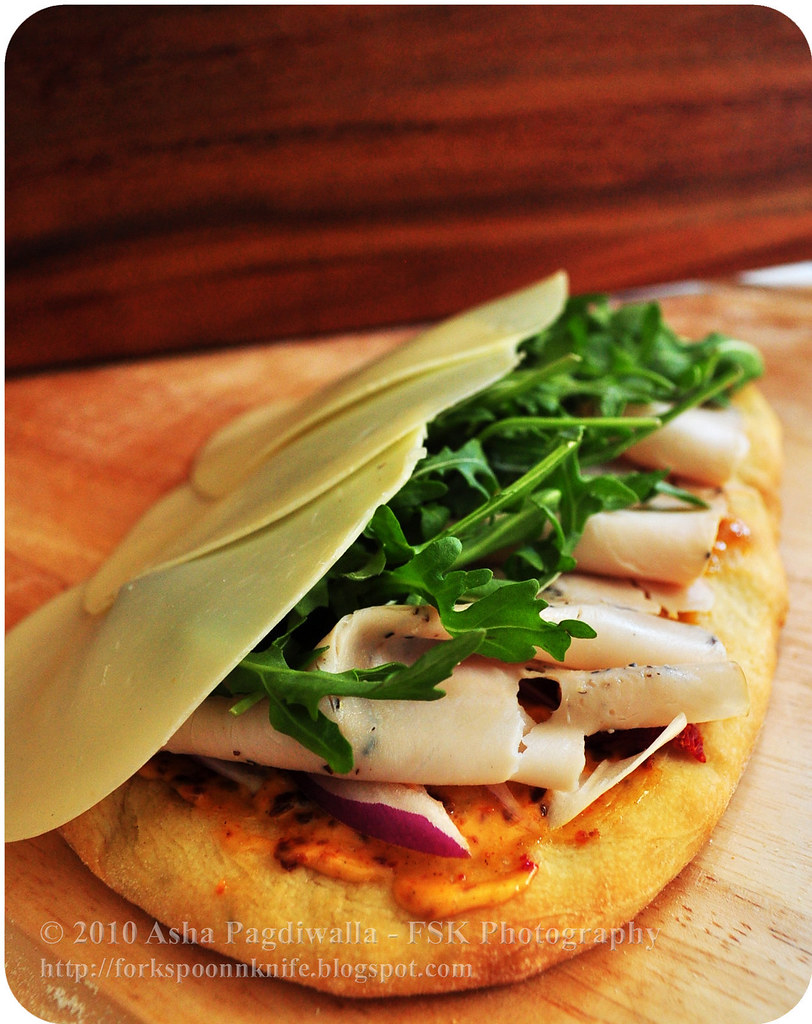
Pizzich assembly copy

I am not much of a solo eater.. I mean, I really don't like it or see the point of it. These days, unfortunately, I am on my own at meal times, a lot more than I'd like. Mr.FSK is travelling most of the week, which, means I fend for just myself, which, not only is boring but downright inspiration-sapping...

I can easily get by the day with cereal, instant noodles or at the most, easy to make Indian snack items, which, really make quite a satisfying meal! But, this week, I really craved something more substantial. And, I didn't even mind putting in all that effort for just me!

So, I made a open face sandwich on a pizza style flat bread base; and hence, the name Pizzich! Over the bread, I slathered spicy aioli (made with spicy sundried tomato paste, mayo and lemon juice), smoked pepper turkey, arugula, more sundried tomato, red onion. Then, in the cooling oven (from the flat bread making), I melted provolone cheese and we were all set for a simple yet sumptuous lunch!

Pizzich assembly - side view


Flat Bread
(makes 2 sandwich bases)

1 cup all purpose flour + more for dusting
1/2 tsp yeast
1/2 tsp salt
1/3 cup warm water + more if needed
1 T olive oil

Stir dry ingredients, including yeast, in a large bowl. Add water and olive oil, stirring mixture into a ball. Knead the dough for a minute or two until you get a nice elastic dough. Transfer the dough into a lightly oiled bowl, turn to coat all over. Cover the bowl with plastic wrap and leave it in a warm place till it doubles in size (one to two hours).

When the dough has risen, gently punch it down with the palm of your hands. Fold the dough into an approximate ball shape, and let it sit under that plastic wrap for 20 more minutes.

Divide the dough into two parts. Stretch each part into an approximate oval shape of the length you would like. Transfer to a baking sheet and bake in an oven pre-heated to 450F for 10-15 minutes until a bit puffed and golden.

Remove and arrange sandwich. If you want to melt cheese, stick the assembled sandwich back into the oven for about 3-4 minutes, long enough for it to melt and you are all set with a scrumptious lunch!

This flat bread is being sent to my favorite Yeastspotting team!

Chocolate and Fruit Spiced Bread... And a Reminder

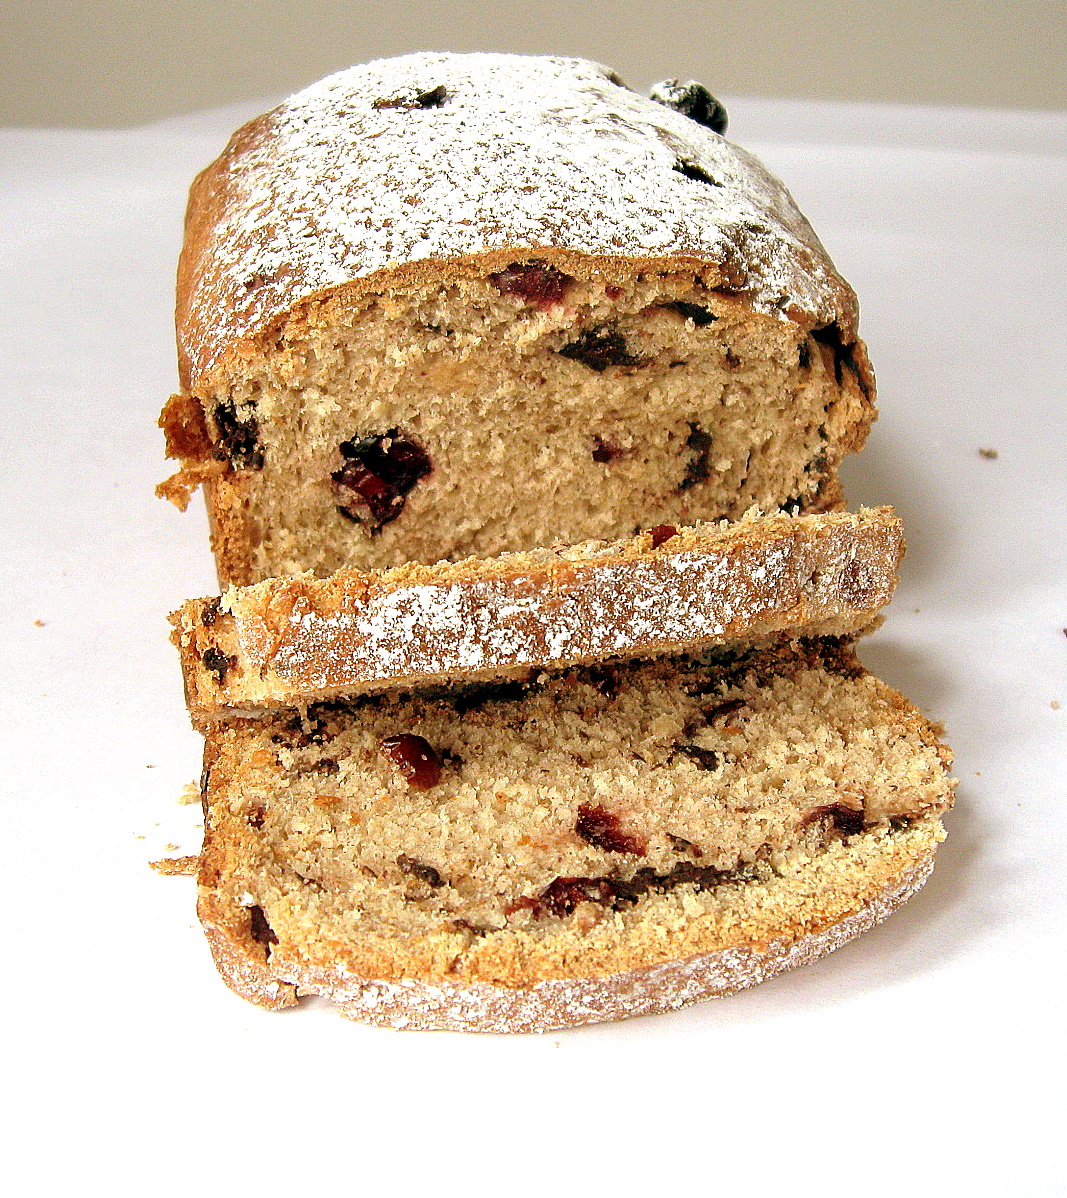
Choc fruit Spice Bread close up

The weather is rather unpredictable these days. One day it's bright and sunny and the next grey and snowy keeping one largely stuck indoors. Though I must say, I was rather proud of myself yesterday for having trudged through the city slush to the gym!! Anyway, such eccentricities aside, what I usually feel like doing is cuddling with a hot cuppa, reading food blogs and dreaming of all lovely things I can bake...

The aromas and warmth wafting from a fresh baked something can make even a dungeon feel comfortable! So it is natural that one's thoughts trend that way when the outside is muggy and dis-spiriting. Don't get me wrong, snow is beautiful and all that but I am not a winter person and add to that the city can make even beauty turn beast! So, after the first delusional joy that fresh snow brings, reality kicks in and you realize that reaching somewhere with wet sneakers is NOT cool..

Ah well! Clearly I can't wait for the weather to thaw. In the meantime, I am going to try to be shiny and sunny by popping things out of my oven!:) So yesterday, on one such day, I decided to bake bread. Trolling through the net, I came across a lovely recipe on Bon Appetit. It had fruit, chocolate and warming spices in it - So perfect!


And, it came to me just in time for Meeta's Monthly Mingle submission. This month's event is hosted by lovely Jamie and she chose the theme to be Bread and Chocolate. Not a surprise, given it's Jamie, non?! :) So anyway, the thought of the baking this made me happy.

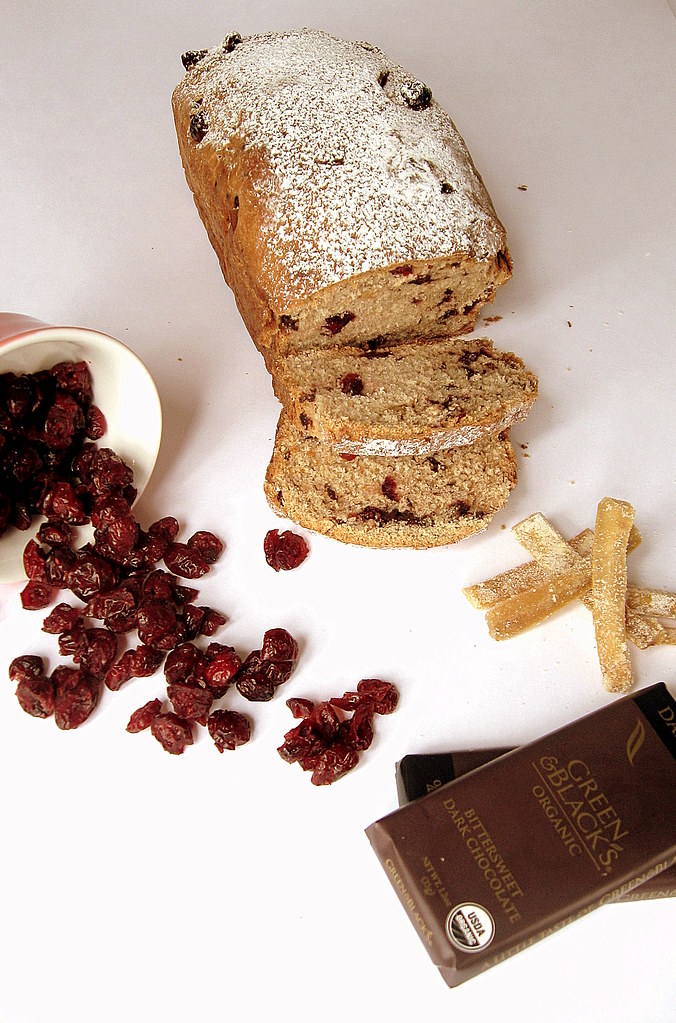
I used dried cranberries and some diced candied pomelo peels that I had made earlier this month when I saw the pomelo on the grocery shelves and pounced on it. You see, so many people had been raving about the said fruit, it seemed a blasphemy that I hadn't tried it yet. Well, anyway, the fruit was consumed and not liked very much, I must add... It is TART!! For me, fruits need to be sweet. Oranges are the end of my sweetness rope.

Bread + cranberries + citrus peel + chocolate

In it's defense, the candied peels taste good. It's like eating a sour patch candy; you scrunch up your face, shake your head, swallow and then reach for more. They added a nice touch of tang to the bread. For the warmth I added fresh cinnamon and nutmeg - typical winter spices...

After glutenifying overnight, shaped into a log this morning (I woke up early.. Not for this purpose, I swear!) and rising to double, the dough went into the oven. As soon as it hit the heat, the aromas arose like ghosts in the dark. Ah! such heartwarming smells filled my apartment.. Sweet, spicy, warm, enveloping.. I could just picture it like in cartoons; the tempting swirls of aromas intoxicating me with optimism. I was doing taxes while it was baking. It made even that seem not so bad! :)

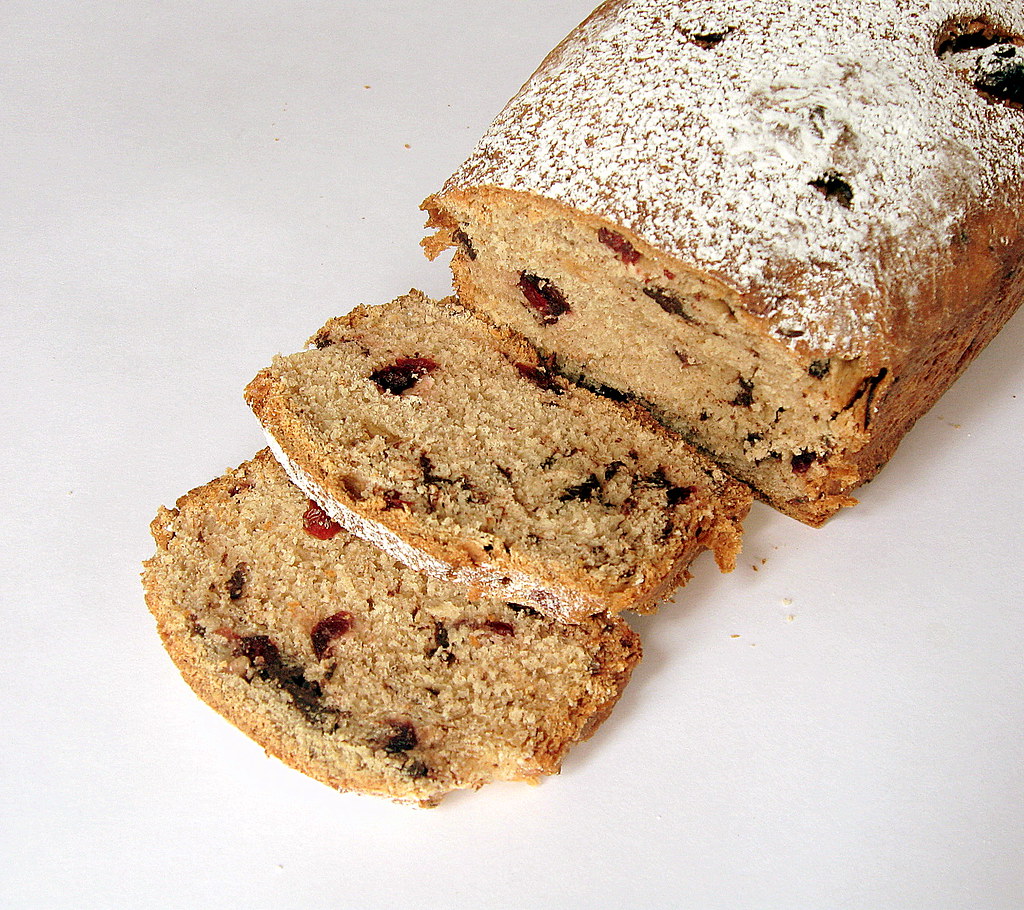
Choc Fruit Spice Bread Slices

So there, I am happy the day was snowy, I got to make this bread (not to mention give cause to take pride in myself)... Because, it's awesome!!! It has a nice cake like texture which makes it perfect tea accompaniment. Now that I mention it, am off to have a slice with my tea now.. ciao people! :)

Oh and before I sign off, I just wanted to leave a gentle reminder about the FSK Cafe event - Same Notes, Different Highs. This month's ingredients to highlight (in two distinct flavor profiles) are Tomato, Mozzarella and Basil. The deadline for submission is March 15, 2010. For details about the event and how to submit an entry please visit my original announcement here.

Also, sending this bread to our friendly, neighbourhood Yeastspotting team!


Chocolate and Fruit Spiced Bread
(adapted from
Bon Appetit)

1/2 cup warm whole milk
1 envelopes active dry yeast
1/4 tsp plus 1/4 cup sugar (add more if you like it sweeter)
1- 3/4 cups all purpose flour + more for dusting and while kneading
1-1/2 tsp ground cinnamon
1 tsp fresh grated nutmeg
1 tsp salt
1 large egg, room temperature
3 T unsalted butter, room temperature

2/3 cup mixture of dry fruits (I used cranberries and diced pomelo peel)
1 1.2 oz bitter sweet chocolate, rough chopped

Stir milk, yeast, and 1/4 tsp sugar in small bowl and let stand until mixture bubbles, then stir.

Meanwhile, keep ready flour, sugar, nutmeg, cinnamon and salt in a medium bowl. Add the yeast mixture whisking (I used a wire whisk. If you have a Kitchen aid then use the paddle attachment) the liquid around until dry shaggy mass forms, scraping down bowl occasionally, about 2 minutes. Add the egg and whisk until incorporated and it comes together into a moist soft dough that.

Add butter by 1 1/2 tablespoonfuls and incorporate fully before adding more. This was a bit tricky. I had to use a bit more flour so the dough did not keep slipping out of my hand. But persevere and it'll know who is boss!

Let dough rest in bowl 10 minutes (dough will become less sticky). Mix chocolate and dry fruits in a bowl. Place the dough in large bowl. Sprinkle chocolate mixture over dough and knead just until incorporated. Transfer dough to a large buttered bowl. Cover with plastic wrap and let dough rise at room temperature until almost doubled in volume. Punch dough down; cover with plastic wrap and refrigerate overnight.

Butter a 9x5-inch metal loaf pan. Turn cold dough out onto work surface. Form dough into a log about 9 inches long. Place the logs in prepared loaf pans. Cover pans with plastic wrap. Let dough rise until almost doubled in volume.

Position the oven rack in center of oven and preheat to 400F. Brush tops of risen bread loaves with butter. Pop into oven and lower the heat to 375F. Bake until top crust is deep brown and tester inserted into center of each loaf comes out clean, about 35 minutes. Remove from oven; let loaves rest in pans 5 minutes. Cool on rack to room temperature.

Dust with powdered sugar, slice and enjoy!

Greek Mezze for Daring Cooks February 2010

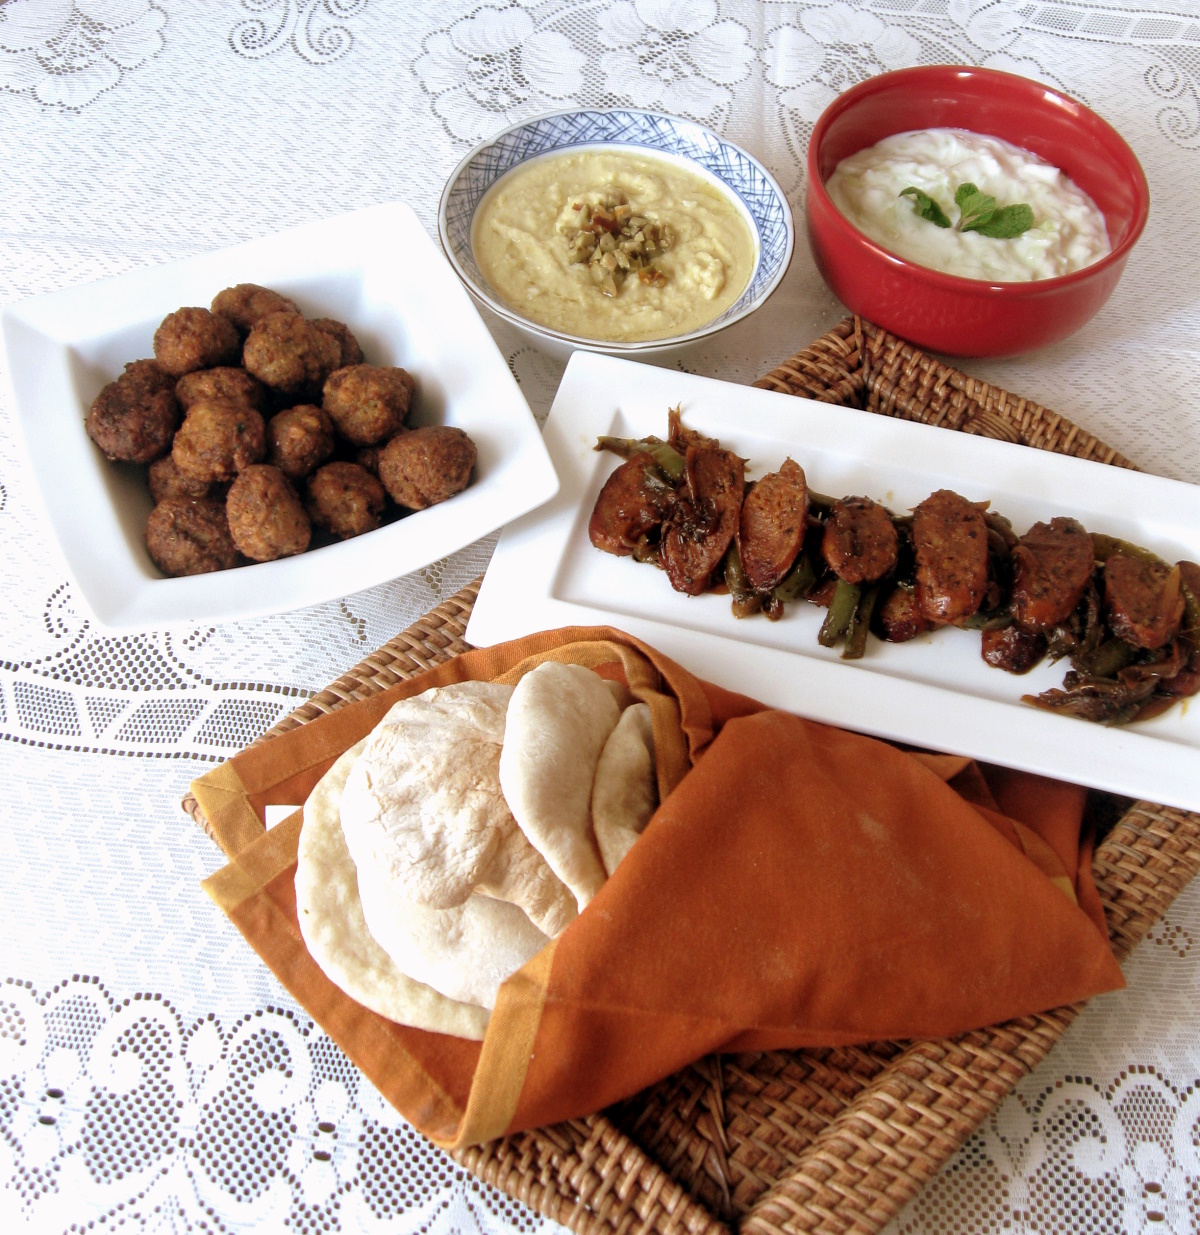
Greek mezze

I am a variety person and much prefer nibbling on many different things than just indulging in one. You can call me flighty all you want, but I say, my way is more fun! So, I was super excited when I found out we were to make Mezze Table for the Daring Cooks February edition.

The 2010 February Daring Cooks challenge was hosted by Michele of Veggie Num Nums. Michele chose to challenge everyone to make mezze based on various recipes from Claudia Roden, Jeffrey Alford and Naomi Dugid.

Here are a few words from our hostess about the concept of Mezze -

The challenge is to prepare a Mezze (pronounced “mez-ay", although many people seem to pronounce it as "mezz”) Table including, but not limited to, homemade Pita bread and Hummus. If you’re not familiar with mezze, it’s more of a style of eating than a specific recipe or recipes. Mezze is a bunch of small dishes served all at once—sort of like the Middle Eastern version of Spanish Tapas. It can be served as appetizers before a meal, or as the meal itself.

Pita Bread

As soon as it was announced on the 17th, I started researching on Middle Eastern Tapas ideas. The mandatory part of the challenge included the pita bread and hummus made from scratch and the rest of the table was left to our imagination. As you know, that last part runs really wild in my case. So, I spent hours poking around the internet and reading recipes and had drafted a sample menu in my head by midnight.

Then, the next part was to figure out whether I should make this a party and share the creations with friends or take the safe option and make a couple's meal. Mr. FSK has this notion that it isn't polite to make my friends guinea pigs, so it's usually the tried and tested when we entertain. But the serious cook in me would really like some variety (there I go again!) in taste-testers!

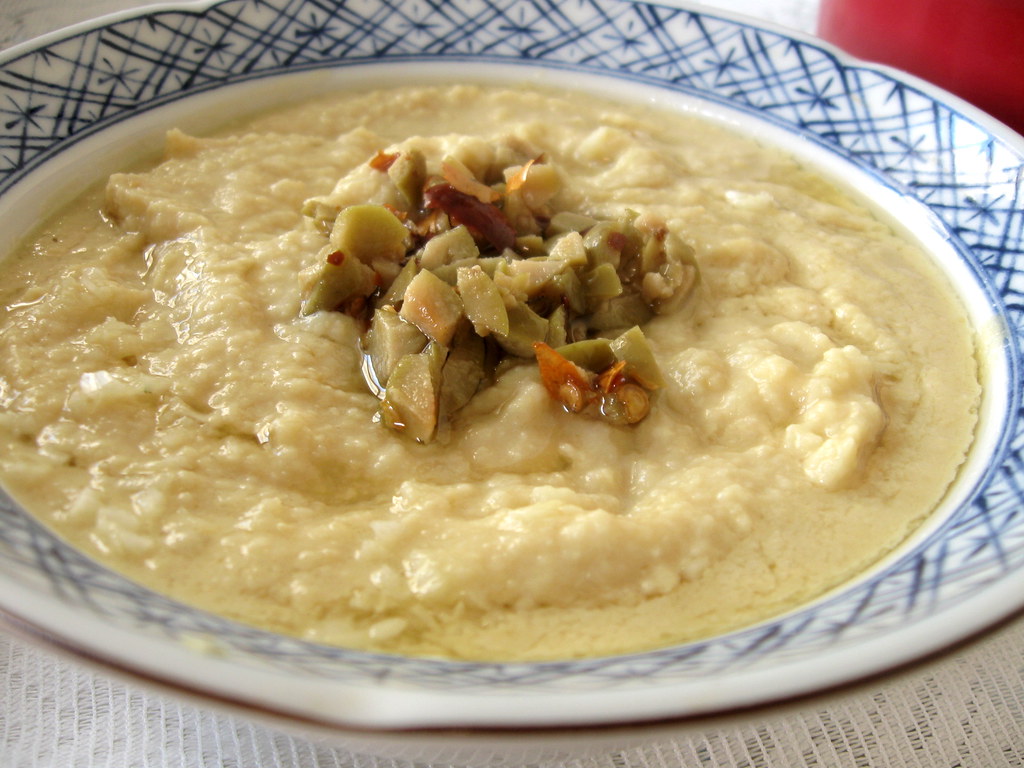
Olive Sesame Humm

Anyway, I thought about it for a bit and then pushed it all to the back burner as life and its business (not to mention the cold bug in between) took me by a storm. Suddenly, it was three days to day of posting and I wasn't any close to creating the Table as when we had the initial discussion a month back! :OO

I panicked! I had too much to do on my plate - the velvet cake for the Velveteers challenge and then the mezze. As it usually happens though, things just worked out and I even got my wish for a non-hub person pass verdict.

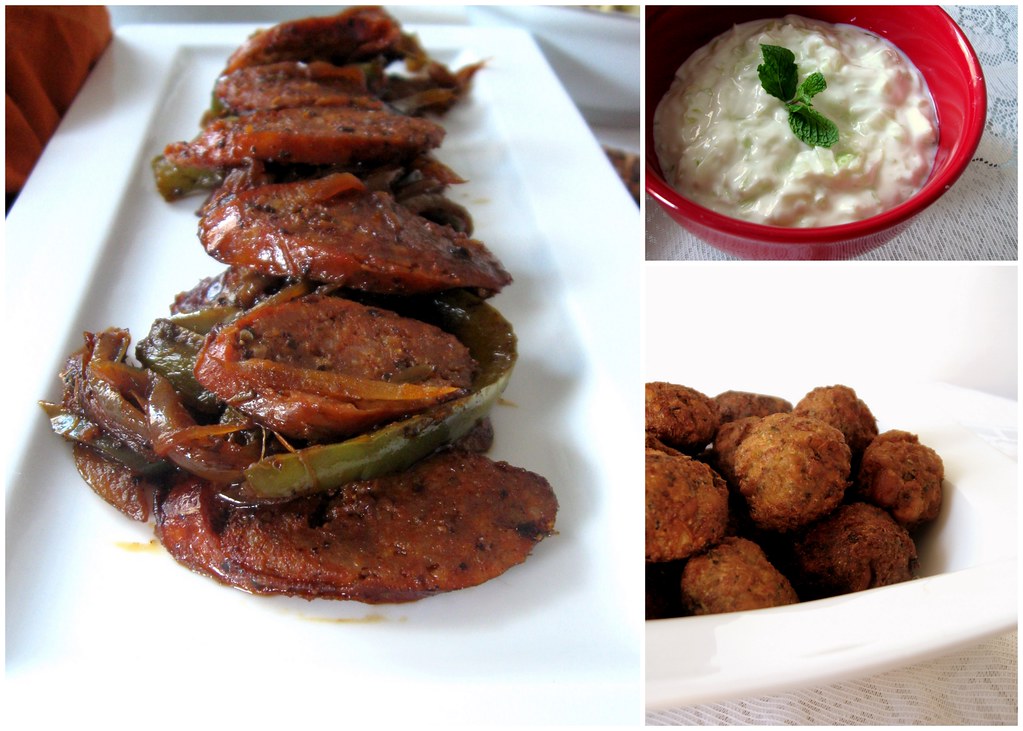
Mezze collage - Spicy sausage, falafel, Tzatziki

I created the mezze dishes today for lunch. A friend of ours who recently moved to the city, gallantly volunteered to be the other sampler. Although, we had a somewhat late lunch, it was all done and done well. For my table, I made the pita bread and hummus as required, also cucumber Tzatziki, Falafels and my version of Spetzofai (spicy sausage with peppers and onions)

Mezze in plate

The Verdict: It was rather easy to put together the table and indulge your fancy as well. The falafels came out well as did the bread (although, it did not puff up as elegantly as it is supposed to). I loved the Tzatziki but would skip the garlic in it next time. I think the one item, I would include the next is a Greek chopped salad. I like it when they fill a pita sandwich with it and then top with the other stuff.

Nevertheless, I do believe I enjoy the Table at a restaurant a lot better than at home.... It's more relaxing and things stay warm! :)

Also, sending the Pita Bread to our friendly,neighbourhood Yeastspotting team!


Tzatziki

2 cups strained yogurt (I strained overnight)
2 cloves of garlic, minced
1/2 cup grated or finely chopped cucumber
2 tsp lemon juice
pinch salt

Fold in the cucumber and garlic into the thick yogurt. Sprinkle salt and stir in the lemon juice. Chill until serving time


Falafel
(Adapted from
Epicurious)

1 cup dried chickpeas
1/2 large onion, roughly chopped
2 T chopped fresh coriander
2 T chopped mint
1/2-1 tsp dried hot red pepper
4 cloves of garlic, minced
1 tsp cumin powder
1 tsp baking powder
4 T flour + more if needed
salt to taste
vegetable oil for frying

Soak the chickpeas in a large bowl in enough cold water to cover them by at least 2 inches. Let them sit overnight. Pulse together the drained, uncooked chickpeas, onions, mint, cilantro, salt, hot pepper, garlic and cumin. Process to a meal like consistency.

Sprinkle in the baking powder and four tablespoons of the flour, and pulse. Add enough flour so that the dough forms a small ball and no longer sticks to your hands (I didn't have to). Turn into a bowl and refrigerate, covered, for several hours.

Form the chickpea mixture into one-inch balls. Heat 3 inches of oil to 375 degrees in a deep pot or wok and fry the balls three at a time till golden brown.

Spicy Sausage in Peppers and Onions

3 chorizo sausage links
1/2 large red onion, julienned
1/2 large green bell pepper, julienned
1 tsp dried oregano
salt to taste

Saute the sausage in a non-stick pan until cooked. Remove the sausages and let cool. Meanwhile, saute the onions and peppers in the sausage drippings until soft. Cut the sausages on a diagonal bias and add to the onion-pepper mixture. Sprinkle salt and oregano and cook for a few minutes.


For the Pita Bread and Hummus recipes, please click
here.

Mushroom Focaccia

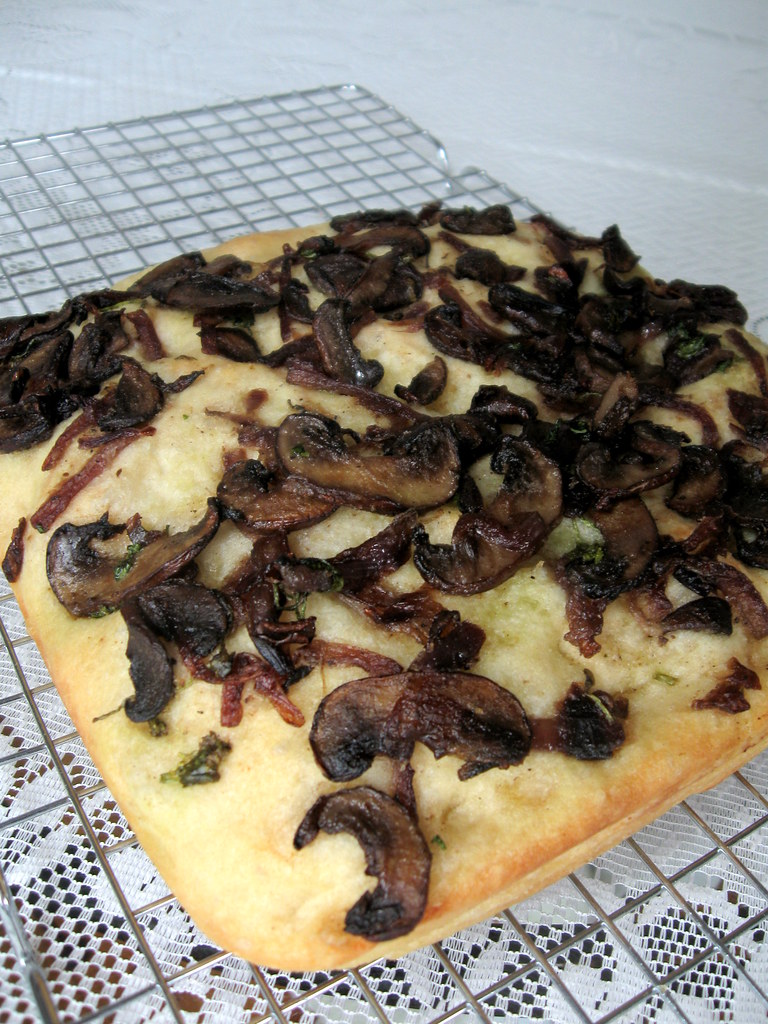
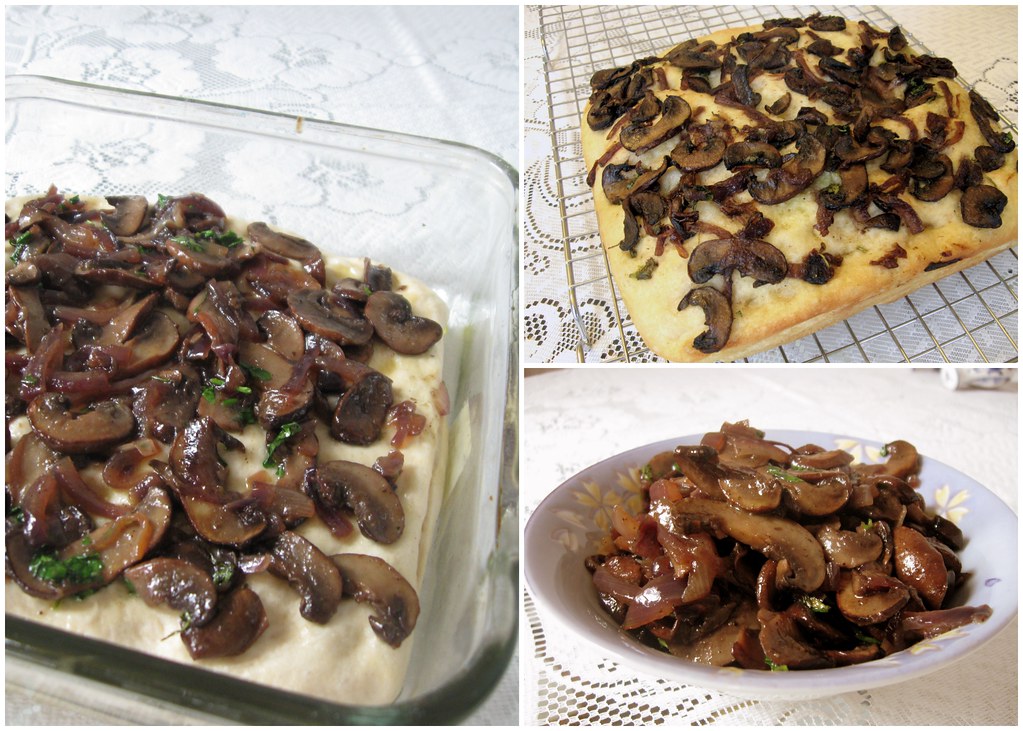
Whole Mushroom focaccia

What do you do when you go to a book store? Do you go with a plan and a list of titles that you want to look up/buy? Do you go there with a vague idea of browsing around, have a cup of coffee, bite a sample off a few a books, while your time and just you know, spend a lovely afternoon in the company of words?

Well, I belong to the latter (clearly there was no doubt of that given the previous sentence!!:D). So, yeah, I am guilty of thumbing through quite a few intoxicating fresh with ink pages and walking out happy without having bought a single thing. In my defense, I almost always buy coffee and snacks, I am not much of the crouch in the corner kind....Anyway, I find it so much more satisfying to turn pages than click away on sites. So libraries and book stores are my happy places.. :)

cartoon credit: cartoonstock.com

A few days back, Melody of the gorgeous Gourmet Fury, had shouted out the theme for the latest version of her Beet 'n Squash You series - Battle Mushroom! Mushrooms are one of my favorite ingredients to play with. So, I was looking forward to creating something for the battle!


So, there it was, in the back of my mind; I had promised her an entry this month. And, I wanted to do something with bread (Yeast is a heady culinary aphrodisiac, don't you think?!). So I mulled over breads with mushroom inside or outside and finally settled on focaccia. Why?! Just because it's one of my all time favorites, Mr. FSK simple loves it, it was the first ever bread I made (so has that sentimental pull ;-)) and for some odd reason I was seeing a lot of focaccias in the food blogosphere and that peer pressure is simply hard to resist! :D

Focaccia collage

I have heard much about Peter Reinhart and his book The Bread Baker's Apprentice. Not owning a copy, I skipped off to nearby B&N, to do some research and yes, shamelessly copy the recipe! In passing, I found another book on breads whose name I have honestly forgotten. So, I took down both recipes. Peter's needed a bit more mothering than the other and since I was running a bit short on time, I chose the mysterious other recipe with a few suggestions from Peter's. I promise to make a note of the name next time I scrounge around in B&N and update you guys.

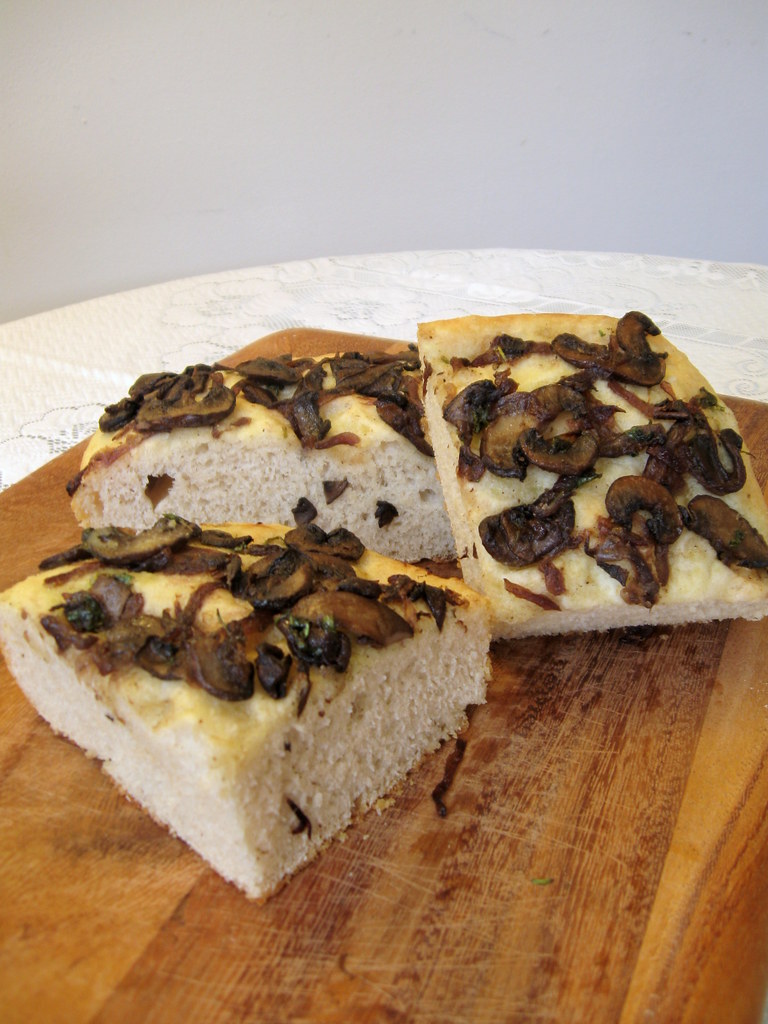
So, anyway, I made a simple, no-frill focaccia topped with lightly sauteed mushrooms. Clean flavors, letting the mushrooms play the dominant flavor, as was intended for the contest. The thing about this recipe is that its starts of with a base for making ciabatta and then modifies it for focaccia. Which is kind of good value - two birds with one stone and all that. Anyway, my point was that the bread comes out denser than usual in looks but still as light as air. Ofcourse, you can also spread it thinner, it get the more traditional look!

Mushroom focaccia sliced

Also, sending this our friendly,neighbourhood Yeastspotting team!


Mushroom Focaccia
(makes one 10 inch round)

Biga
1/2 cup (2.13 oz) bread flour
1/6 cup (1.3 oz) warm water
pinch of instant yeast

Dough
Scant 2 cups (1/3 lb + 3.2 oz) bread flour
5/6 cup water
1/3 T salt
5/12 tsp instant yeast
Biga (from above)

1/2 cup sauteed mushrooms
1/3 cup olive oil

To make the biga:

Disperse the yeast in water, add flour and mix until just smooth. Biga should be stiff and dense but add a few drops of water if too stiff. Cover twith plastic and leave for 12-16 hours at about 70F. When ready, the biga will be domes and just beginning to recede in the center.

For the dough:

Add all the ingredients to mixing bowl except the biga. Mix to incorporate. As the dough starts coming together, add the biga in chunks. Dough will be sticky and slack. Continue mixing till there is some gluten developed but the dough is still loose and sticky. Internal dough temperature should be 75F.

Place dough in an oiled bowl, cover with oiled plastic wrap and let rise for 30 minutes. Turn the dough onto a floured surface and gently pat into a rectangle. Fold the dough business letter style along the long edge. Spray the top with oil, dust with flour, cover with wrap and let rest for another 30 minutes. Repeat process 2 more times.

After the final 30 minutes of bulk fermentation, above, transfer to a 10 inch cake pan that has been generously oiled with olive oil. Dimple the dough lightly with finger tips (only!) to spread the dough to the shape of the pan. Don't worry if it doesn't fit exactly; it will after rising.

Spread the sauteed mushrooms lightly over the focaccia. Pour 3/4th of the remaining oil evenly over the top. Cover with an oiled wrap and allow to ferment for an hour and a half until doubled in size. About 15 minutes before it is ready preheat oven to 475F.

Pour the rest of the oil over the top. Pop the pan into the oven, reduce heat to 450F and bake for 25 minutes until the sides and bottom are browned and crusty.

Transfer to rack and cool for a few minutes. Slice into a still warm focaccia, dip in fruity olive oil and relish!

Milk Bread and a touch of Nostalgia, Awards and Honest meme..

Bread sliced

When you live away from your childhood home, inevitably nostalgia hits you once in a while. And, then it isn't about "Oh I miss the sights of my beautiful country and all its exotic splendor (most of which, we took for granted while we were there and hence are still on the to-visit list!)" but silly stuff like the smell of sun dried laundry, some vague breakfast item mom made (and only the way she made it!), etc...

For Mr. FSK, it is Amul butter toast dipped in chai! :) Whenever we visit back home, he has it every morning; almost burnt toast slathered with salty Amul butter, dipped in hot lemon grass tea that my PIL makes (oh that tea!! Sighhhhh). The pure joy that spreads on his face when he takes a bite of the tea soaked crust is a sight to cherish! And oh! It has to be Amul butter! The brand is infamous for their catchy cur ads with the omnipresent "utterly-butterly" girl dishing out a thick slab of the salty deliciousness!


So, on a recent trip to the Indian grocery store, I spied a packet of the said butter and promptly picked it up. And, to complete the India reminiscence, I started hunting for a milk bread recipe because that is the bread that you invariably get in stores there. I still remember the "Milka" bread (South Indian brand) ads. I happened upon Smitten Kitchen's white batter bread and it looked so like what I wanted that I decided to try it out!

Bread and Amul butter

Bingo! The bread was almost close to home.. The texture fluffy and light, almost cake like but not quite. It doesn't make great sandwiches but is fantastic when slathered with butter and dipped in hot milky chai! :) And, yes, he had it that way and for the sake of humoring him, I did too..! Although, I will never develop a deep love for consuming it his way, it does make a great butter-toast bread!

I am also taking this bread to Jamie's birthday party! Ok, perhaps not for the party itself, but the morning after! :)). Jamie is hosting Bread Baking Day #26 and inviting breads for her birthday party. Here is wishing wonderful Jamie a fabulous year ahead with lotsa perfect bakes and more happy Mac Attacks!

Milk Bread Toast

Also, sending this our friendly,neighbourhood Yeastspotting team!


Milk Bread
(adapted from
Smitten Kitchen)
makes one 8x4 inch loaf

2 cups flour
1-1/4 tsp active dry yeast
1 cup milk
1/2 T sugar
1/2 tsp salt
2-1/2 T canola oil

Warm milk to 110F. Dissolve yeast in the warmed milk and let sit for a few minutes. Whisk together the salt, sugar and oil. Add the yeasted milk to this mixture. Beat the flour in to make a smooth batter. Note, emphasis on smooth. It take a few minutes and best done with a hand held whisk.

Pour into an oiled loaf pan. Cover with a oiled plastic wrap and let it rise to double in volume. When it's almost there, preheat oven to 425F. When ready, pop the pan into the oven, lower the temperature to 400F and bake for 30 minutes or until the internal temperature registers 210F.

Remove from oven and immediately unmold to cool on rack. If you leave it in the pan for too long, the bread steams on the sides and sogs up (no good!).

Slice, be generous with the butter and enjoy!


--------------------------------------------------------------------------------------------------------------


I also wanted to thank lovely Renee of Flamingo Musings for giving me a couple of lovely awards!! She is soo sweet!! And, I am going to pass it to a few of favorite bloggers. But before that I must apparently share a few honest things about myself, in no particular order. So here they are -

  1. Books are my other passion. If you are ever wondering what to gift me, books are always perfect!
  2. Ideal dinner dates would be hub, P.G Wodehouse and Hugh Laurie (if anyone knows him, set me up on a date puleeez!!)
  3. Favorite meal course - dessert.
  4. Love big dogs like labs and golden retrievers. Not a fan of the teeny breeds
  5. Love greenery, hiking, mountains and large water bodies
  6. Greatest inspiration - my late maternal grandfather
  7. Tennis is my favorite sport
  8. Favorite color - Red
  9. Former Coffee addict
  10. Don't want to change anything that has happened in my life so far :-)
And I am passing on these awards to these wonderful people I met and have gotten to know recently. They all have fabulous blogs that have provide a ton of inspiration!

Aparna of
My Diverse Kitchen
Pam of
The Cooking Ninja
Trissa of
Trissalicious
Alessio of
Recipe Taster
Mowie of
Mowielicious
Hilda of
Saffron and Blueberry
Meeta of
What's for Lunch Honey

Food for the soul - Hearty Minestrone with warm Herb Breadsticks


It is getting unreasonably cool out here. There was that lovely summer, then we ever so slightly flirted with beautiful fall and now it has all frosted over, almost. It is even snowing in some parts! Can you believe that?! Hey you, up there: "It's only October!! Lighten up, won't ya!". Oh well... siggh, like that' going to work.

But, what does help, is hot hot food, especially the slurpy variety. I am not really a soup person. In India, they are usually served as an appetizer and I felt that all that volume took away from my enjoyment of the main course. So, soup was the thing that kept me from the real food and inevitably was sent back by me untouched. Until I came to the US and discovered the joys of a hearty soup that was as warming as it was satiating!

Picture 035-2
And, what better than eating it with warm, fresh and well-buttered bread??! None, I say! The bread alone will win me over (you know my love affair with fresh bread :)). Ok, all that rambling start was to say that I made soup and breadsticks for dinner.

Minestrone is one of flexible Italian soups that are so easy on the cook. The list of ingredients is whatever firm vegetable you have on hand and canneloni beans to give the soup that heartiness; herbs to flavor and you are done! I made mine with carrots, potatoes, celery and beans flavored by a mix of Italian herbs. It doesn't get any simpler, does it?!

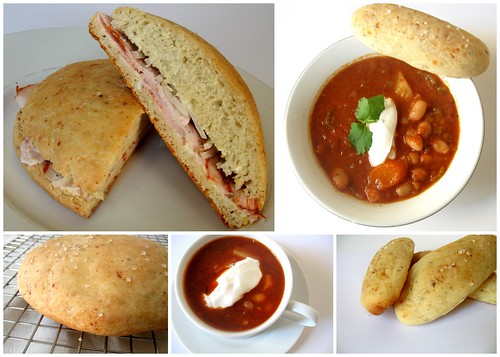
Collage

To go with that I made herb and parmesan breadsticks. I'll tell you a little secret. Made in larger sizes, they are fantastic for sandwiches; crusty on top and soft and spongy on the inside. I had one for lunch with peppercorn turkey, shaved onion and a streak of mayo. Perfect!

This post is also in support of BloggerAid Changing the Face of Famine. It is a community of international food bloggers determined to make a difference in aid of world famine. This month, as part of raising awareness about child nutrition and the School Meals Program, I am serving my soup in a cup to represent feeding one child a healthy and nutritious meal at school.


Also, this wonderful group of food bloggers have put together a cookbook, which is going to the printers very soon! So, here is wishing that the book is a huge success. Which means, all you readers out there, please do buy the book when it hits the stores and help us in our cause to feed every child.


On a related note, I would like to introduce the The Cookbook People who are donating cookbook software to BloggerAid (Imagine! you can inundate your friends and family with your many many recipes!!). They are also generously donating $20 to the School Meals Program for every BloggerAid member who includes them in their post.


Herb and Parmesan Breadsticks with Sea Salt crust
(10 bread sticks or 4 individual sandwich rounds)

1-1/2 cup bread flour
1 heaping tsp active dry yeast
1 tsp sugar
3/4 tsp salt
1 T dried herb mix (I used oregano, thyme and rosemary)
1/4 cup grated parmeggiano reggiano
1/2 cup water at 110 F
1 T + 1 tsp melted butter
sea salt for garnish

In a mixing bowl, add the yeast and sugar to the warm water and let sit for 5-6 minutes till the mixture is cloudy. Add in everything else reserving 1 tsp of butter for later. Mix and knead the dough until you get a pliable, smooth dough.

Dump dough onto a lightly floured surface, divide the dough into 10 pieces. Roll into 4 inch logs. Place on a lightly greased baking sheet and let rest in a warm place for atleast 30 minutes until it has double in volume.

Note: If you are making individual sandwich rounds, divide dough into four and shape as desired before allowing to double.

Preheat oven to 375 degrees. Bursh the tops with melted butter and sprinkle sea salt. Bake for 20-25 minutes until light golden in color. Cool on rack. Serve warm.


Minestrone Soup

1 medium onion, finely diced
2 large cloves of garlic, minced
1 large chunk of ginger, grated
2 sticks celery, finely diced
1 cup carrots, in chunks
1/2 cup potatoes, in chunks
1 can cannelolini beans, drained and washed
1/2 cup crushed tomatoes
2 cups vegetable/chicken broth
1 tsp fennel seeds
1 T Italian seasoning
2 dry bay leaves
1 heaping tsp cumin powder
parmeggiano rind (optional)
salt and pepper to taste
Olive oil as needed
Sour cream and fresh parsley for garnish

Saute onions, celery and garlic until transluscent. Add the carrots and potatoes and saute for a couple of minutes. Add fennel seeds, herb mix, salt, pepper, bay leaves and the cheese rind (if using). Stir in crush tomatoes and broth. Bring to a rolling boil over high heat. Add in the beans, reduce heat to low and let it simmer for 30 minutes.

Just before serving garnish with fresh parsley and serve with a dollop of sour cream with a side of warm bread.

Off to YeastSpotting ...

The secrets of a delicious bread

OK, I confess. I find the complimentary warm bread and butter, the best indicators of what is to follow at a restaurant. If the bread hits the spot, then somehow everything else falls into place. And, I have never turned down a refill of my empty bread plate! Ever.

So, while perusing one of my favorite blogs, Smitten Kitchen, I was very motivated to make bread at home. Sometime back I had used one of SK's recipes for homemade pizza with much success. That experience redeemed bread making at home for me and while I have made pizza many times at home since then (but ofcourse! It's pizza!), I had yet to venture into the sphere of real breads.. And, I mean yeast bread that work on timetables and all the kneading and degas-ing and stuff..

I have always wanted to take a course on bread and pastry making but the three-digit price tags have daunted me. So, armed with a library copy of The Bread Bible and a simple looking recipe on SK, I decided to give it a try. And, for opening night, I chose, Potato and Rosemary Bread!

Now, I did my homework! I read up on the techniques and terms (like biga, sponge etc.) used in bread making and was reassured by Ms. Beranbaum (author of The Bread Bible) that hands are indeed sufficient tools for all the labor involved (and no, I did not get my excuse for making another purchase.. nevertheless..!). And most importantly, I realized that I have to plan to make most breads because they need some starter material (the biga, in this case) that needs to sort of ferment overnight to be at its prime!

But, I persevered. And the fruits of my labor were flavorful indeed. In truth, it was not that much effort really. There are a just few important things to keep in mind -
  1. Use fresh yeast - Yeast is a living organism that ferments the sugars into CO2 which creates the spongy texture of breads. So, the fresher it is, the more potent. I used the rapid rising variety.


  2. Be patient - Yes, it can be very hard for some of us to wait for the dough to become sufficiently elastic without biting nails or tapping foot, but patience has its merits. An under-risen dough will be tough and very dense.


  3. Beware the right starter/pre-ferment - Many breads need a starter or pre-ferment that kick starts the fermenting in the actual bread dough. Different breads need different types of starters that pre-ferment for different times. Plan your bread making with sufficient time for this starter.


  4. Knead just enough - The idea of kneading is to ensure that the ingredients, especially the yeast, is even spread around the dough for even rising. Stop kneading once the dough is supple and soft but not sticky. Do not over knead. It will make the dough very tough.


  5. Always test your dough - Although timings are given, they are only indicative. The only sure way of knowing if the dough is ready is to do a test. The simplest one that supposedly works for all breads is the Dimple Test; Make a dimple on the dough surface with your finger and the dough should not rise to fill it completely when you release.


  6. Test your oven temperature - Some ovens are good at retaining heat, and some sadly not, when the door is opened. This is terribly important in the first 10 minutes of baking as the yeast's fermenting process completes insides the hot oven during this time. So, if you think your oven is not very retentive, they pre-heat to 50 degrees higher and turn the temperature back down once the bread is in.


  7. Garnish into the dough, not on it - I learnt this hard way. If you are using something like rosemary, in this case, as a garnish on top of the bread, make sure it's fully embedded into the dough or it will burn in the oven.


  8. Let bread rest - More of the patience needed here, especially in the face of the wonderful aroma from the fresh bread. But, desist from slicing before it rests for the full time mentioned.

Potato and Rosemary Bread
(
adapted from Smitten Kitchen)

I made only one loaf, so it was bit tricky scaling down the measurements but some approximation is ok.

4 oz biga (recipe below)
1-1/2 cups bread flour + plus extra for kneading
1 tsp salt
1/2 tsp pepper
5/8 tsp rapid rising yeast
1/2 cup mashed potatoes
1 T olive oil
1 T chopped fresh rosemary
1/2 cup water at room temperature
Olive oil for brushing on top

Remove the biga from the refrigerator 1 hour before you plan to make the bread. Cut it into about 10 small pieces with a knife. Cover with a plastic wrap or damp towel and let sit for 1 hour.

Once the biga has thawed, stir together the flour, salt, black pepper, and yeast. Add the biga pieces, mashed potatoes, oil, rosemary, and water. Work the ingredients into a ball. Add more water, if necessary, or more flour, if the dough is too sticky.

Transfer the dough to a well-floured surface and knead for approximately 10 minutes, adding flour if needed, until the dough is soft and supple, tacky but not sticky. Gather the dough into a ball. Lightly oil a large bowl and transfer the dough to the bowl, rolling it around to coat it with oil. Cover the bowl with plastic wrap. Ferment at room temperature for approximately 2 hours, or until the dough doubles in size. Test the dough with the dimple test.

Line a sheet pan with parchment paper. Shape each of the larger pieces into a boule (oblong round) and place the dough on the parchment. Brush the dough with oil and cover loosely with plastic wrap.

Proof at room temperature for 1 to 2 hours (depending on the size of the pieces), or until the dough doubles in size. The dough should pass the Dimple test again.

Preheat the oven to 400 degrees F for 15 minutes with the oven rack on the middle shelf. Remove the plastic from the dough and lightly brush the bread with olive oil. You do not need to score these breads, but you can if you prefer.

Place the baking sheet in the oven. Bake the loaf for 20 minutes, then rotate the pan 180° for even baking. The bread takes 35 to 45 minutes total to bake. The loaves and rolls will be a rich golden brown all around, and the internal temperature should register at least 195°F (check the temperature).

(The loaf should make a hollow sound when thumped on the bottom. If the loaf is fully colored but seems too soft, turn off the oven and let them bake for an additional 5 to 10 minutes to firm up.)

Remove the bread from the oven and cool on a rack for at least 1 hour for loaves.


Biga
(~16 oz)

Biga will keep in the refrigerator for up to 3 days, or in the freezer for about 3 months. You can use it as soon as it ferments, but I prefer to give it an overnight retarding to bring out more flavor.

2 1/2 cups unbleached bread flour
1/2 tsp rapid rising yeast
3/4 to 1 cup water, at room temperature

Stir together the flour and yeast. Add water slowly, stirring until everything comes together and makes a coarse ball. It is okay if the dough is a bit sticky, you can correct for it when kneading. It is harder to add water once the dough firms up.

Transfer the dough to a well-floured surface. Knead for 4 to 6 minutes until the dough is soft and pliable, tacky but not sticky. Lightly oil a bowl and transfer the dough to the bowl, rolling it around to coat it with oil. Cover the bowl with plastic wrap and ferment at room temperature for 2 to 4 hours, or until it nearly doubles in size.

Remove the dough from the bowl, knead it lightly to degas, and return it to the bowl, covering the bowl with plastic wrap. Place the bowl in the refrigerator overnight.


This recipe has been yeastspotted!