daring kitchen

Pâté et Pain - Daring Cooks Bake in June

Chicken & Mushroom Terrine with Italian Bread 2

Yes indeed! We were asked to bake this month for the Daring Cooks Challenge. I am not all sure if it should not have been one for Daring Baker's but, I suppose, given it is a savory dish, it was a cooking challenge?!....

Our hostesses this month, Evelyne of Cheap Ethnic Eatz, and Valerie of a The Chocolate Bunny, chose delicious pate with freshly baked bread as their June Daring Cook’s challenge! They’ve provided us with 4 different pate recipes to choose from and are allowing us to go wild with our homemade bread choice.

We were challenged to make atleast one Pâté from the listed options and one bread of our choice. Most of the recipes for pâtés use liver, which, I quite dislike. So, I scoured around for a recipe that did not use innards and such. Quite accidentally, I remembered a book I had bought a while back in an effort to make chicken more fun to eat (for me!). There I found a recipe for a Terrine made with chicken meat and mushrooms...
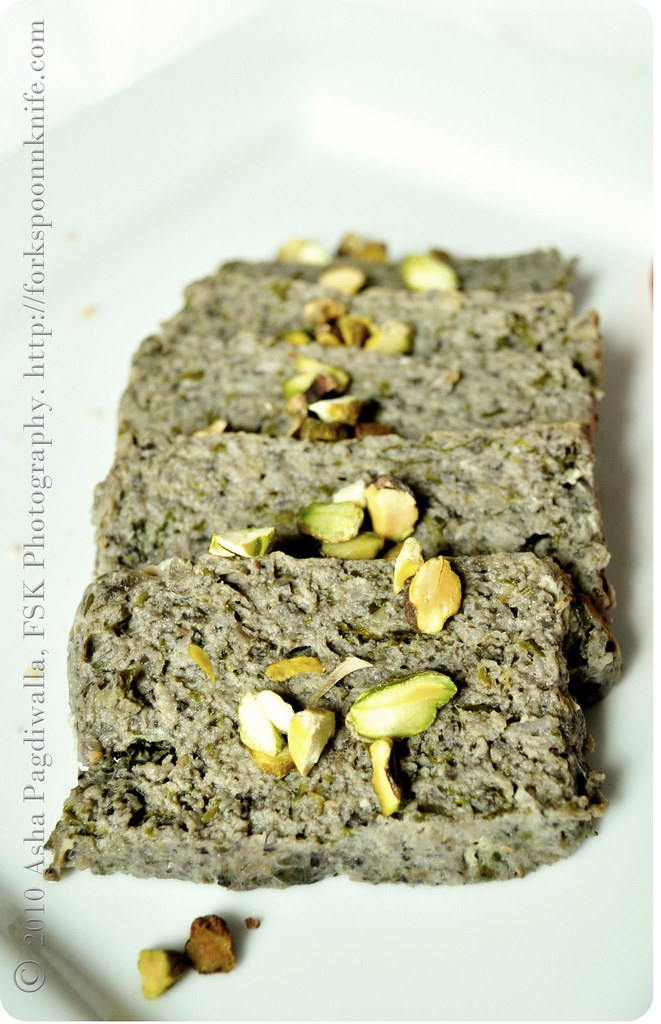
Chicken & Mushroom Terrine

There is some debate on what is and isn't a Pâté. You may have noticed, I mentioned Terrine before; that's what I made..

Our hostesses said - Technically, a terrine is a baking recipient, usually ceramic or porcelain, with a lid – but it can also refer to the contents of the recipient. And some of the pâtés we looked at were designed to be unmolded onto a dish and then sliced, while others were meant to be left in the jar or baking dish they were prepared in, and merely used as a spread.

Wiki concurs - In French or Belgian cuisine, pâté may be baked in a crust as pie or loaf, in which case it is called pâté en croûte or baked in a terrine (or other mold), in which case it is known as pâté en terrine.

Italian Bread

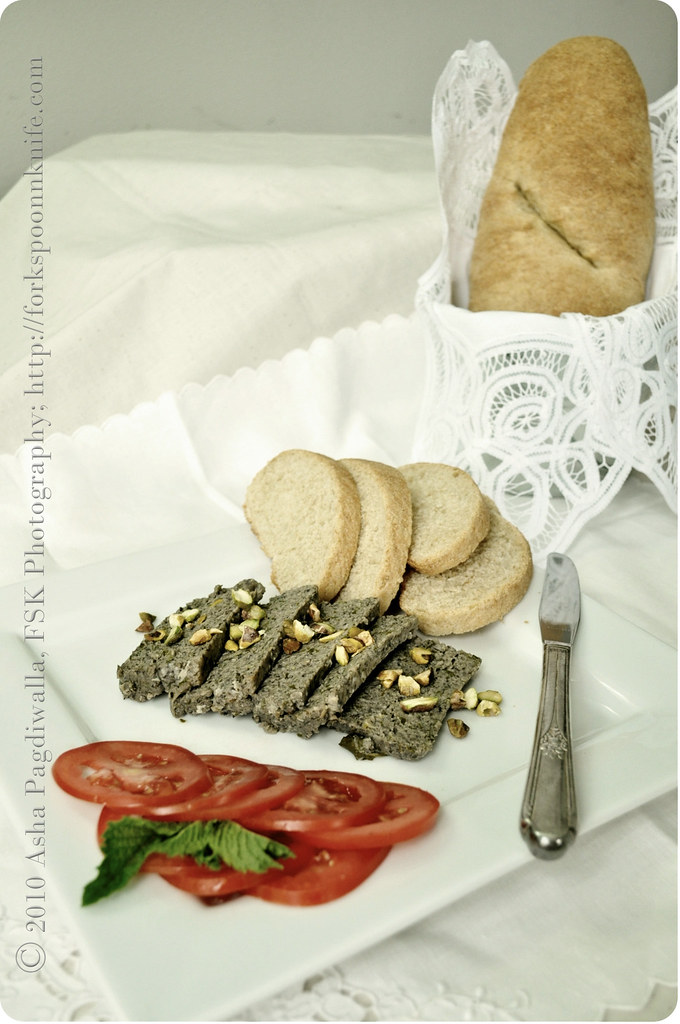
I decided to proceed with my Chicken and Mushroom Terrine recipe! For authenticity, I did bake it in a porcelain mold... I used chicken thigh and leg meat and combined it with red wine sauteed portobellos. Now, the recipe I was adapting called for fresh herbs and since I was making this late in the night, I was a bit short on most herbs.

I used what I had, which made for interesting flavors. I used mint and Fenugreek. Fenugreek is a bitter herb that is used a lot in Eastern cuisine. We use the leaves and seeds for cooking and it's bitterness is supposed to be good for the digestive system (or perhaps that was just made up so children would eat it!). Nevertheless, it does have much nutritional value.

As to the bread, Mr.FSK does not much gravitate towards the crusty varieties. So, I chose a bread with a softer crust. I have wanted to try baking an Italian loaf and this seemed the opportune moment. I followed Peter Reinhart's recipe to the T (Although I did substitute a third of the flour with whole wheat). We loved the bread. It was soft, filling and flavorful. And, the house was filled with such lovely aromas! :))
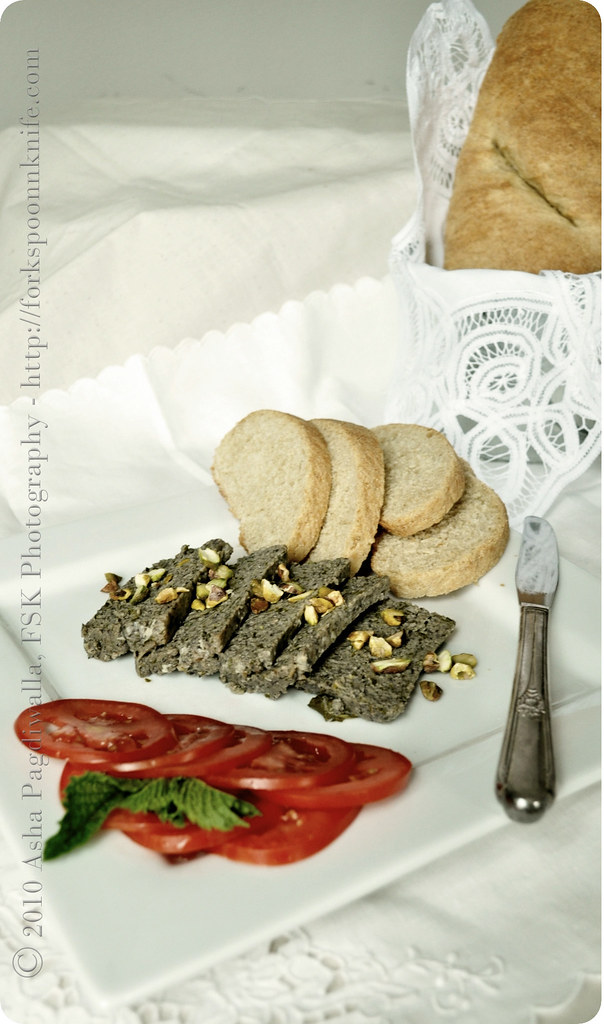
Chicken & Mushroom Terrine with Italian Bread

Verdict: A fun challenge, especially since I love to bake, even though, it was a bit hot around here for this exercise. I enjoyed the pâté but, perhaps, because I did not use the fattier innards, it was a tad dry and not creamy like I am used to it being. If I ever get the courage to cook liver and such, I may give it another try.. The bread, on the other hand, is definitely a repeat! :)

P.S. : I am sending my Italian loaf to YeastSpotting..


Chicken and Mushroom Pâté

2 shallots, chopped
2 generous cups, mushrooms, chopped (no stems)
1/4 cup dry, red wine
2 chicken thighs, skinned and chopped
1 egg
2 T fresh breadcrumbs
2 T chopped mint
4 T chopped fenugreek

optional: For serving, pistachios, tomatoes and mint

Preheat oven to 350F.

Cook the shallots and mushrooms with wine in a sauce pan over low heat until the vegetables are soft and the mixture is dry. Transfer to a food processor along with the chicken, egg, breadcrumbs and seasoning and process coarsely. Add the herbs and pulse briefly.

Spoon into greased molds and smooth the surface. Cover with foil and bake fpr 30-35 minutes until juices are no longer pink. Remove from oven and place a weight on top leave to cool and then chill.

Serve with roasted pistachios, thinly sliced tomatoes and garnished with mint.

Tiramisu for Daring Bakers February 2010

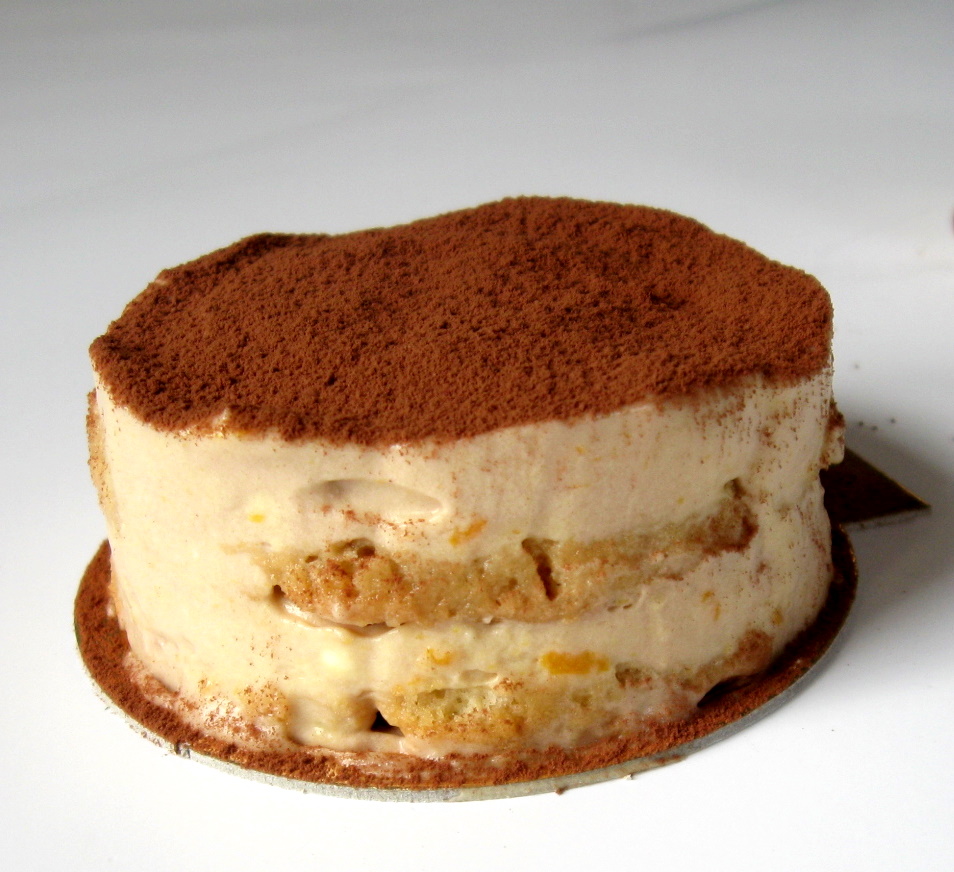
Tiramisu Close up

The February 2010 Daring Bakers’ challenge was hosted by Aparna of My Diverse Kitchen and Deeba of Passionate About Baking. They chose Tiramisu as the challenge for the month. Their challenge recipe is based on recipes from The Washington Post, Cordon Bleu at Home and Baking Obsession.

Weird, how someone, somewhere reads your mind, isn't it? Take for instance, this Daring Bakers challenge. I have been meaning to make Tiramisu ever since I first saw it so prettily displayed at our neighbourhood Italian bakery. Gorgeous individual portions of, what to me looked like, layered mousse and biscuits. I wanted to recreate all that lovely-ness. Now, just how did Deeba and Aparna know my inner mind workings, I don't know. Perhaps, there is some sort of metaphysical connection between us... Hmmmmm..

So, if you are wondering why I am rambling on about minds, metaphysics and such... It's just the influence of Dan Brown's latest in the Langdon series. He has opened my eyes to this whole new (to me) world of "Noetic Science". Apparently, the field really exists and not a mere figment of his imagination (oh!! soo many puns in that sentence!). I googled.. Even Wikipedia has an article on Noetic Theory (Quid Pro Quo!). The basic hypothesis (and belief) behind the science is that the human mind is capable of physical change through the power of thinking!

Rather cool, I think. Well, we'll just have to wait and see how much of it can be scientifically proven. So, anyway, the book is all over it. And Mr. Brown, being who he is draws a ton of parallels between it, the Masons and the religions of the world. Decent book; I am about two-thirds through it and while not compelling or un-put-down-able, it's an interesting read. Maybe, there will be a twist in the end...

Tiramisu

Anyway, back to the subject of the post, the Tiramisu. I chose to make individual portions for two reasons. One, that's how it looks in the store. Two, I had been looking for an opportunity to use the pastry rings that Deeba had sent me when I was in India. It's was a pre-ordained match - the rings and a challenge co-hosted by her! Circles within circles, or what! :)

I pretty much followed the recipe. The only changes I made were using rum instead of marsala wine for the zabaglione, rum-ed coffee for soaking the savoiardi, orange zest for flavoring (no extracts at all) and chocolate whipped cream because I had some left over from making something else. The last is why my cream doesn't look yellow but a more muddled color. But, take my word, it tasted fantastic!

It was rather an elaborate process, with many different components that all come together nicely for a rich dessert. The savoiardis were ok for me; a bit too eggy eaten as is but gave a nice sponginess and body to the tiramisu. The mascarpone was creamy and rich. And yes, I panicked when I was making it because it didn't seem to be doing anything but after the refrigeration, it firmed up so nicely! I made extra, so happy!

Tiramisu single

You know the funny thing; for all my wanting to make tiramisu, I honestly don't remember tasting one or if I have (as Mr. FSK insists), it's actual taste. So, I don't know how this creation compares to the store. But, it was real good, stand alone!

Now, the litmus test is a couple of friends who just love Tiramisu. I saved a portion for them. My fingers are crossed and I'll keep you updated on the results! :) Meanwhile, enjoy my creation and visit the Daring Kitchen for everyone's gorgeous creations!!

The recipe below includes the tweeks I made for the individual portions.

Tiramisu
(Recipe source: Carminantonio's Tiramisu from The Washington Post, July 11 2007)
Makes 3-4 individual serves depending on size

For the zabaglione:
1 large egg yolks
1.5 T sugar
1/8 cup rum
1/2 tsp orange zest

For the vanilla pastry cream: (this makes twice the amount needed)
1/4 cup sugar
1 T all purpose flour
3/4 tsp finely grated orange zest
1 large egg yolk
3/4 cup whole milk

For the whipped cream:
1/2 cup chilled heavy cream (we used 25%)
1/8 cup powdered sugar
1/2 T unsweetened cocoa powder

To assemble the tiramisu:
1/2 cup brewed espresso, warmed
1 T rum extract
1/4 cup sugar
1/6 cup mascarpone cheese
20-25 savoiardi/ladyfinger biscuits (you may use less)
2 tablespoons unsweetened cocoa powder

To make the zabaglione:

Heat water in a double boiler. If you don’t have a double boiler, place a pot with about an inch of water in it on the stove. Place a heat-proof bowl in the pot making sure the bottom does not touch the water.

In a large mixing bowl (or stainless steel mixing bowl), mix together the egg yolks, sugar, rum and zest. Whisk together until the yolks are fully blended and the mixture looks smooth.

Transfer the mixture to the top of a double boiler or place your bowl over the pan/ pot with simmering water. Cook the egg mixture over low heat, stirring constantly, for about 8 minutes or until it resembles thick custard. It may bubble a bit as it reaches that consistency.

Let cool to room temperature and transfer the zabaglione to a bowl. Cover and refrigerate at least 4 hours or overnight, until thoroughly chilled.

To make the pastry cream:

Mix together the sugar, flour and zest in a medium heavy-bottomed saucepan. To this add the egg yolk and half the milk. Whisk until smooth. Now place the saucepan over low heat and cook, stirring constantly to prevent the mixture from curdling.

Add the remaining milk a little at a time, still stirring constantly. After about 12 minutes the mixture will be thick, free of lumps and beginning to bubble. (If you have a few lumps, don’t worry. You can push the cream through a fine-mesh strainer.)

Transfer the pastry cream to a bowl and cool to room temperature. Cover with plastic film and refrigerate at least 4 hours or overnight, until thoroughly chilled.

To make the whipped cream:

Combine the cream, cocoa and sugar in a mixing bowl. Set aside for 5 minutes. Beat with an electric hand mixer or immersion blender until the mixture holds stiff peaks. Set aside.

To assemble the tiramisu: (individual portions)

Place the pastry rings/molds on base. Mix together the warm espresso, rum extract and sugar in a shallow dish, whisking to mix well. Set aside to cool.

In a large bowl, beat the mascarpone cheese with a spoon to break down the lumps and make it smooth. This will make it easier to fold. Add the prepared and chilled zabaglione and pastry cream, blending until just combined. Gently fold in the whipped cream. Set this cream mixture aside.

Now to start assembling the tiramisu.

Working quickly, each ladyfinger in the sweetened espresso, about 1 second per side. They should be moist but not soggy. Immediately transfer each ladyfinger to the inside of the dessert ring, placing them side by side in a single row. You may break a lady finger into two, if necessary, to ensure the base of your dish is completely covered.

Spoon some of the cream mixture on top of the ladyfingers, then use a rubber spatula or spreading knife to cover the top evenly, all the way to the edges. Repeat to create one or more layers, alternating the ladyfingers and the cream mixture for each layer. Clean any spilled cream mixture; cover carefully with plastic wrap and refrigerate the tiramisu overnight.

To serve, carefully remove the plastic wrap. Run a sharp paring knife along the inner edges of the ring and ease it up. The tiramisu will stay on the base. Sprinkle the top with cocoa powder using a fine-mesh strainer or decorate as you please.


Mascarpone Cheese
(Source: Vera’s Recipe for Homemade Mascarpone Cheese)
This recipe makes twice the amount you need for the Tiramisu

1 cup whipping (36 %) pasteurized (not ultra-pasteurized), preferably organic cream
1/2 to 1 T fresh lemon juice

Bring 1 inch of water to a boil in a wide skillet. Reduce the heat to medium-low so the water is barely simmering. Pour the cream into a medium heat-resistant bowl, then place the bowl into the skillet. Heat the cream, stirring often, to 190 F. If you do not have a thermometer, wait until small bubbles keep trying to push up to the surface.

It will take about 15 minutes of delicate heating. Add the lemon juice and continue heating the mixture, stirring gently, until the cream curdles. Do not expect the same action as you see during ricotta cheese making. All that the whipping cream will do is become thicker, like a well-done crème anglaise. It will cover a back of your wooden spoon thickly. You will see just a few clear whey streaks when you stir.

Remove the bowl from the water and let cool for about 20 minutes. Meanwhile, line a sieve with four layers of dampened cheesecloth and set it over a bowl. Transfer the mixture into the lined sieve. Do not squeeze the cheese in the cheesecloth or press on its surface (be patient, it will firm up after refrigeration time).

Once cooled completely, cover with plastic wrap and refrigerate (in the sieve) overnight or up to 24 hours.


Savoiardi Biscuits/ Ladyfingers
(Source: Recipe from Cordon Bleu At Home)
This recipe makes approximately 24 big ladyfingers or 45 small (2 1/2" to 3" long) ladyfingers.

3 eggs, separated
6 tablespoons /75gms granulated sugar
3/4 cup/95gms cake flour, sifted (or 3/4 cup all purpose flour + 2 tbsp corn starch)
6 tablespoons /50gms confectioner's sugar,

Preheat your oven to 350 F (175 C) degrees, then lightly brush 2 baking sheets with oil or softened butter and line with parchment paper. Beat the egg whites using a hand held electric mixer until stiff peaks form. Gradually add granulate sugar and continue beating until the egg whites become stiff again, glossy and smooth.

In a small bowl, beat the egg yolks lightly with a fork and fold them into the meringue, using a wooden spoon. Sift the flour over this mixture and fold gently until just mixed. It is important to fold very gently and not overdo the folding. Otherwise the batter would deflate and lose volume resulting in ladyfingers which are flat and not spongy.

Fit a pastry bag with a plain tip (or just snip the end off; you could also use a Ziploc bag) and fill with the batter. Pipe the batter into 5" long and 3/4" wide strips leaving about 1" space in between the strips.

Sprinkle half the confectioner's sugar over the ladyfingers and wait for 5 minutes. The sugar will pearl or look wet and glisten. Now sprinkle the remaining sugar. This helps to give the ladyfingers their characteristic crispness. Hold the parchment paper in place with your thumb and lift one side of the baking sheet and gently tap it on the work surface to remove excess sprinkled sugar.

Bake the ladyfingers for 10 minutes, then rotate the sheets and bake for another 5 minutes or so until the puff up, turn lightly golden brown and are still soft. Allow them to cool slightly on the sheets for about 5 minutes and then remove the ladyfingers from the baking sheet with a metal spatula while still hot, and cool on a rack.

Store them in an airtight container till required. They should keep for 2 to 3 weeks.

Greek Mezze for Daring Cooks February 2010

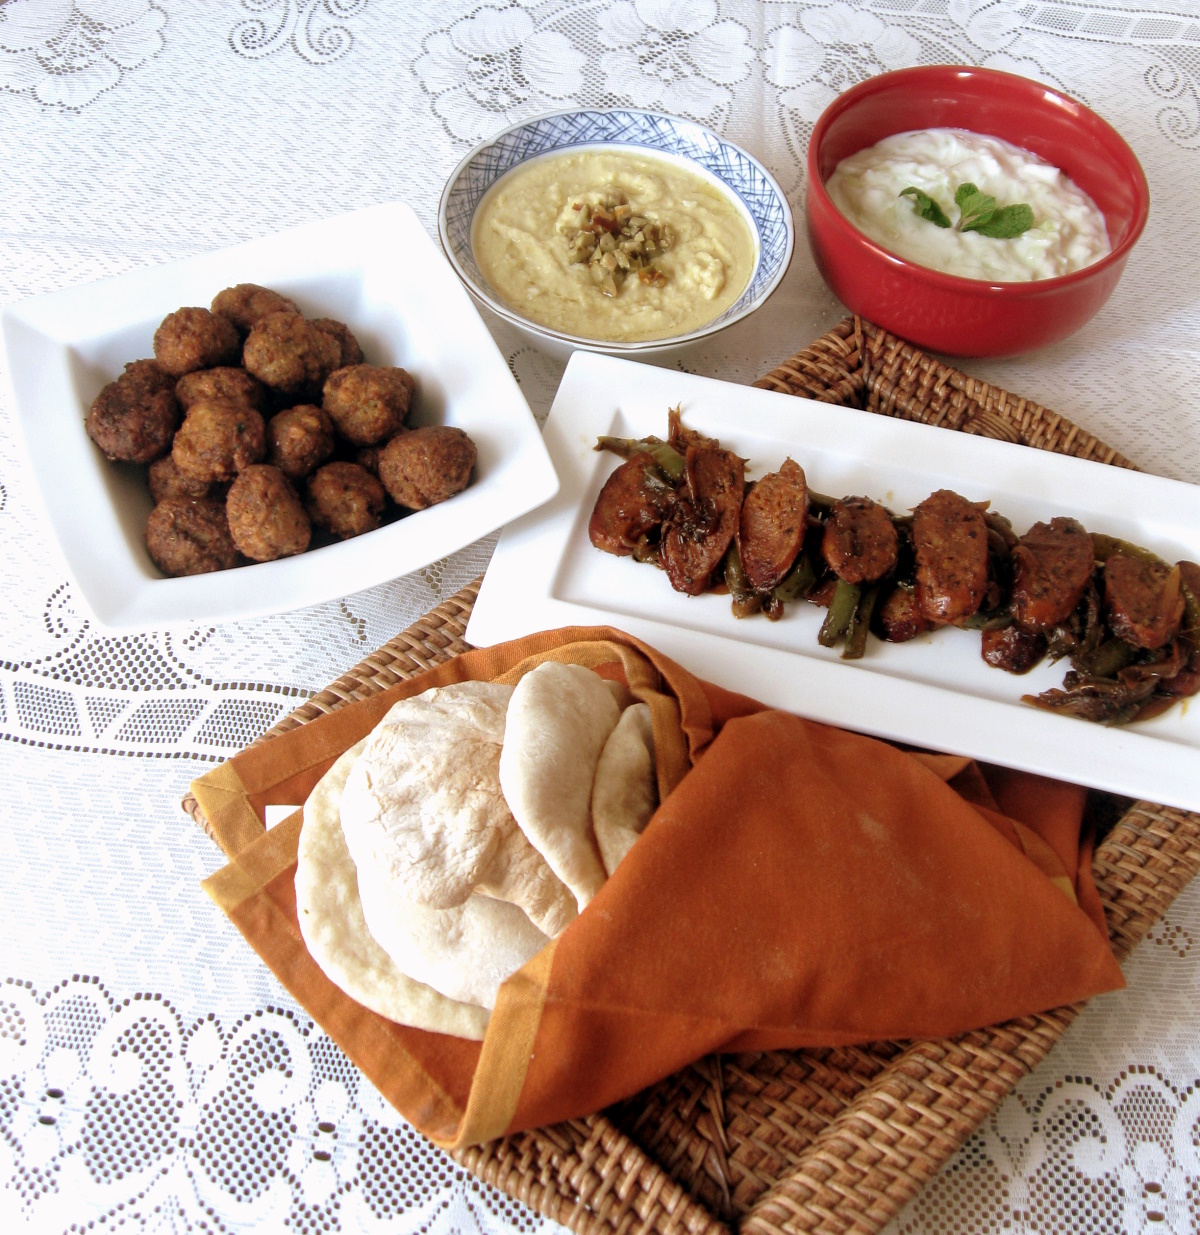
Greek mezze

I am a variety person and much prefer nibbling on many different things than just indulging in one. You can call me flighty all you want, but I say, my way is more fun! So, I was super excited when I found out we were to make Mezze Table for the Daring Cooks February edition.

The 2010 February Daring Cooks challenge was hosted by Michele of Veggie Num Nums. Michele chose to challenge everyone to make mezze based on various recipes from Claudia Roden, Jeffrey Alford and Naomi Dugid.

Here are a few words from our hostess about the concept of Mezze -

The challenge is to prepare a Mezze (pronounced “mez-ay", although many people seem to pronounce it as "mezz”) Table including, but not limited to, homemade Pita bread and Hummus. If you’re not familiar with mezze, it’s more of a style of eating than a specific recipe or recipes. Mezze is a bunch of small dishes served all at once—sort of like the Middle Eastern version of Spanish Tapas. It can be served as appetizers before a meal, or as the meal itself.

Pita Bread

As soon as it was announced on the 17th, I started researching on Middle Eastern Tapas ideas. The mandatory part of the challenge included the pita bread and hummus made from scratch and the rest of the table was left to our imagination. As you know, that last part runs really wild in my case. So, I spent hours poking around the internet and reading recipes and had drafted a sample menu in my head by midnight.

Then, the next part was to figure out whether I should make this a party and share the creations with friends or take the safe option and make a couple's meal. Mr. FSK has this notion that it isn't polite to make my friends guinea pigs, so it's usually the tried and tested when we entertain. But the serious cook in me would really like some variety (there I go again!) in taste-testers!

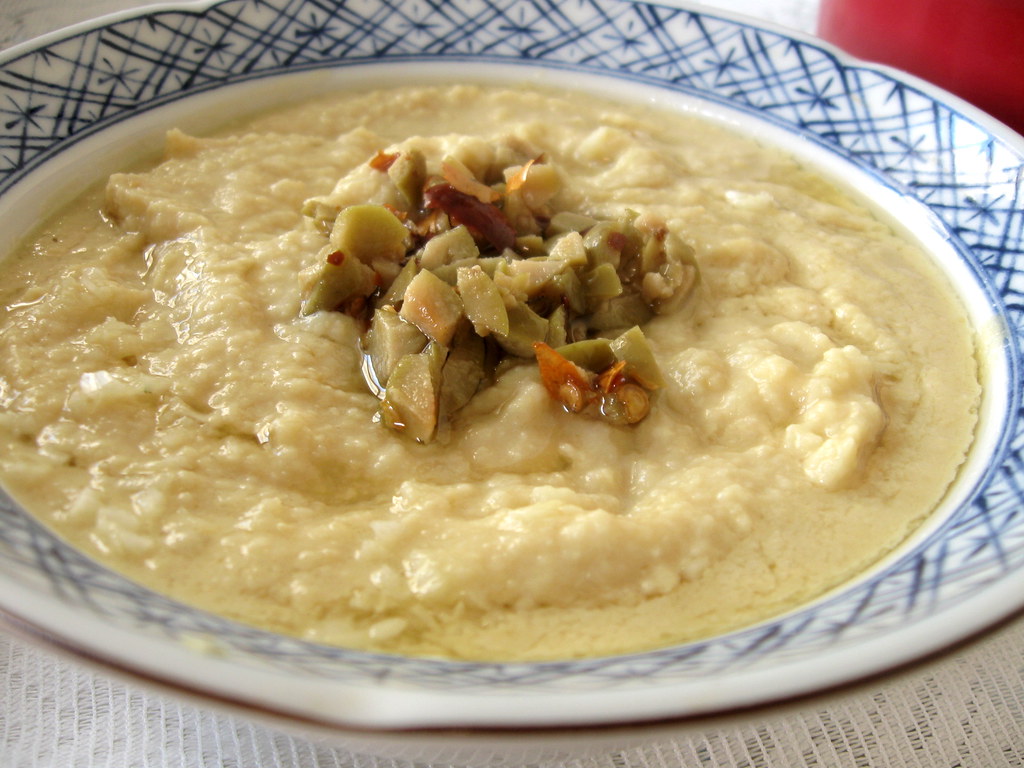
Olive Sesame Humm

Anyway, I thought about it for a bit and then pushed it all to the back burner as life and its business (not to mention the cold bug in between) took me by a storm. Suddenly, it was three days to day of posting and I wasn't any close to creating the Table as when we had the initial discussion a month back! :OO

I panicked! I had too much to do on my plate - the velvet cake for the Velveteers challenge and then the mezze. As it usually happens though, things just worked out and I even got my wish for a non-hub person pass verdict.

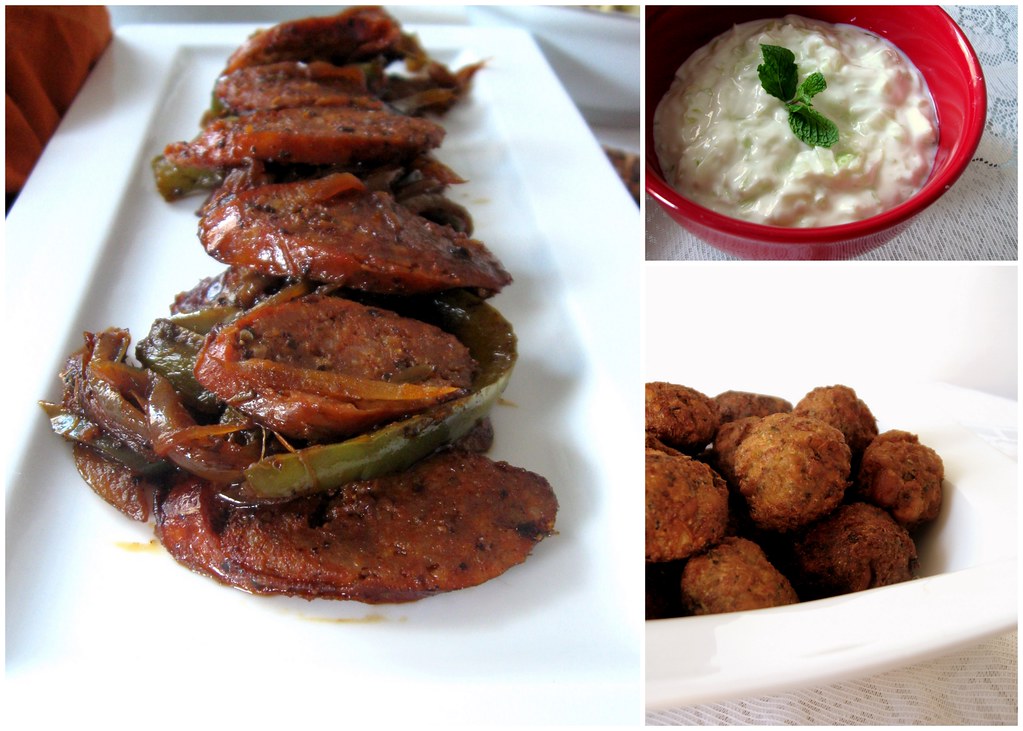
Mezze collage - Spicy sausage, falafel, Tzatziki

I created the mezze dishes today for lunch. A friend of ours who recently moved to the city, gallantly volunteered to be the other sampler. Although, we had a somewhat late lunch, it was all done and done well. For my table, I made the pita bread and hummus as required, also cucumber Tzatziki, Falafels and my version of Spetzofai (spicy sausage with peppers and onions)

Mezze in plate

The Verdict: It was rather easy to put together the table and indulge your fancy as well. The falafels came out well as did the bread (although, it did not puff up as elegantly as it is supposed to). I loved the Tzatziki but would skip the garlic in it next time. I think the one item, I would include the next is a Greek chopped salad. I like it when they fill a pita sandwich with it and then top with the other stuff.

Nevertheless, I do believe I enjoy the Table at a restaurant a lot better than at home.... It's more relaxing and things stay warm! :)

Also, sending the Pita Bread to our friendly,neighbourhood Yeastspotting team!


Tzatziki

2 cups strained yogurt (I strained overnight)
2 cloves of garlic, minced
1/2 cup grated or finely chopped cucumber
2 tsp lemon juice
pinch salt

Fold in the cucumber and garlic into the thick yogurt. Sprinkle salt and stir in the lemon juice. Chill until serving time


Falafel
(Adapted from
Epicurious)

1 cup dried chickpeas
1/2 large onion, roughly chopped
2 T chopped fresh coriander
2 T chopped mint
1/2-1 tsp dried hot red pepper
4 cloves of garlic, minced
1 tsp cumin powder
1 tsp baking powder
4 T flour + more if needed
salt to taste
vegetable oil for frying

Soak the chickpeas in a large bowl in enough cold water to cover them by at least 2 inches. Let them sit overnight. Pulse together the drained, uncooked chickpeas, onions, mint, cilantro, salt, hot pepper, garlic and cumin. Process to a meal like consistency.

Sprinkle in the baking powder and four tablespoons of the flour, and pulse. Add enough flour so that the dough forms a small ball and no longer sticks to your hands (I didn't have to). Turn into a bowl and refrigerate, covered, for several hours.

Form the chickpea mixture into one-inch balls. Heat 3 inches of oil to 375 degrees in a deep pot or wok and fry the balls three at a time till golden brown.

Spicy Sausage in Peppers and Onions

3 chorizo sausage links
1/2 large red onion, julienned
1/2 large green bell pepper, julienned
1 tsp dried oregano
salt to taste

Saute the sausage in a non-stick pan until cooked. Remove the sausages and let cool. Meanwhile, saute the onions and peppers in the sausage drippings until soft. Cut the sausages on a diagonal bias and add to the onion-pepper mixture. Sprinkle salt and oregano and cook for a few minutes.


For the Pita Bread and Hummus recipes, please click
here.

Trout en Croute for Daring Cooks

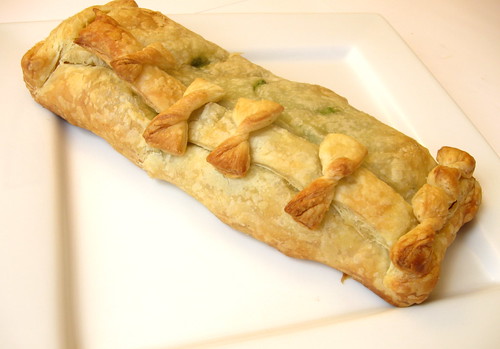
trout en croute

The last week of November was quite hectic. I was travelling soon after and there were so many bakes to finish before I could take leave of my oven. As it also happened to be the Thanksgiving week, the time pressure was more. Amidst the dinners and entertaining, I had to find time to complete the month's challenge for Daring Cooks!! Fortunately, this month's challenge was easy enough to put together and completely stress-free, so, I just about managed it! :)

The 2009 Daring Cooks challenge was hosted by Simone of Junglefrog Cooking. Simone chose Salmon en Croute (or alternative recipes for Beef Wellington or Vegetable en Croute) from Good Food Online.

You will notice that my title says trout and not salmon. Well, I just took some creative liberties with the protein element. You see, when I went to the fish stall, the trout looked way more appealing and fresher than the salmon. Besides, salmon to me is best eaten raw in sushi form. Butter poached salmon from steak houses have just put me off the cooked fish. Also, trout is a softer fish than the salmon and I think that worked really nicely with the sauce in this dish.

Picture 001-1

Anyway, happy as a beaver, I set off on making lunch. I had the pastry dough ready. I used store bought dough (I know that is blasphemous to all you conservatives out there but when is time is short... :)). I made the cream sauce with cream cheese, arugula, basil and spinach flavored lightly with lemon zest.

Packed and trimmed, with those neat little bows (cute, aren't they?!), the fish in pastry looked really pretty and ready for the oven. Thirty minutes later, I took it out, in heavy anticipation. Simone's sample photos of the challenge looked so beautiful, so true to the adage of eating with your eyes first. Unfortunately, I was in for a disappointment. My cooked pastry looked nothing like Simone's!! For some reason, it was neither glamorous looking nor young and taut as hers.

like

Nevertheless, I put my disappointment at the back of my mind and set about photographing, so we could get on with the eating. My heart was heavy but it lightened quite a bit once I took a bite of the dish! It was awesome! Light and flaky, the trout had absorbed the flavors, from the sauce, well. I had been generous with packing the sauce in the pastry, so we did not even need more on the side.

All the while, there was the nagging question in my subconscious mind about the lackadaisical appearance of the pastry. It was only later in the evening that the answer came to me. You see, as I was reading the recipe for the short crust pastry, it somehow stuck in my mind that it was like puff pastry. So, I had wrapped the fish in puff pastry. Only later, as I was mulling over the recipe, did it strike me that it was like tart crust, not puff pastry!! So there, mystery solved. Next time, I will be sure to use the right pastry. LOL!

trout en croute close up

Interestingly, the dish reminded me very much of a Parsi dish that my MIL makes, Chutney Fish. It is of similar concept; the chutney is made with coriander, green chillies and a hint of tamarind, the fish (usually pomfret) is generously coated with it and then wrapped in a banana leaf and steamed. It's incredibly delicious!

Btw, if you would like a complete en croute meal, check out my Curried Egg Pastry Cups for appetizer and Brie en Croute for dessert.


Salmon en Croute
(serves 4)

5.2 ounces/150 gr Mascarpone or creamcheese
0.6 cup/4.2 ounces/120 gr Watercress, rocket (arugula) and spinach
17.6 ounces, 500 gr Shortcrust pastry
17.6 ounce/500 gr Salmon/trout fillet (skinless)
1 egg

Heat the oven to 200°C/390 F. Put the mascarpone or cream cheese in a food processor with the watercress, spinach and rocket and whizz the lot until you have a creamy green puree. Season well.

Roll the pastry out so you can wrap the salmon in it completely (approx. 2-3 mm thick) and lay it on a buttered or oiled baking sheet (it will hang over the edges). Put the salmon in the middle. If it has a thinner tail end, tuck it under. Spoon half of the watercress mixture onto the salmon.

Now fold the pastry over into a neat parcel (the join will be at the top, so trim the edge neatly), making sure you don’t have any thick lumps of pastry as these won’t cook through properly. Trim off any excess as you need to. Make 3 neat cuts in the pastry to allow steam to escape and make some decorations with the off-cuts to disguise the join if you like. Brush with the egg glaze.

Bake for 30 minutes or until the pastry is crisp and browned. To test wether the salmon is cooked, push a sharp knife through one of the cuts into the flesh, wait for 3 seconds then test it against the inside of your wrist; if it is hot, the salmon is cooked. Serve with the rest of the watercress puree as a sauce.

Shortcrust pastry

While this is not mandatory to do, I highly recommend making your own shortcrust pastry as it is very simple to do! As mentioned in the notes; please make sure to not add too much water as that is the key to having a successful shortcrust pastry.


450 gr (15.8 ounces or 3.2 cups ) of plain all purpose flour
200 gr ( 7 ounce) cold butter
pinch of salt

Sift the flour into a large bowl, add the butter and rub in with your fingertips until the mixture resembles fine breadcrumbs. If you have a food processor you can use that as shown in the above video.

Stir in the salt, then add 2-3 tbsp of water and mix to a firm dough. Knead the dough briefly and gently on a floured surface. Wrap in cling film and chill while preparing the filling.

For best results make sure the butter is very cold.

Going Japanese for Daring Cooks - Sushi


Ohayo! Genki Desuka?

Have I ever told you that I lived in Tokyo?! Well, I did..for about eight months, when I first started working post b-school. I enjoyed every minute of it; even during those months of 14 hour workd days and I still did not know enough people to hang out with to make the most of the few days of down time. Eventually, ofcourse, there was a gang, late Friday nights and weekends extended with laughter, travel and exploration of a land whose language we did not speak and where English wasn't common!!

You would wonder how life could be fabulous when it was difficult to communicate. Oh! we managed... with much help from the locals who were so willing to help us and more importantly understand us. I have honestly never experienced better service in any other place I have been to. Such meticulous care is given to everything, even the smallest component; things are made so delicate and subtle; there is beauty in every small item and much pride in making it....


And, the food?! Words alone cannot do justice. I was told that since Japan imports everything, they maintain a very strict quality control. Stores were filled with such fresh produce that one of my favorite pastimes was to go grocery shopping! Even the plastic wrapped 24 hour convenience store buns were so flavorful and good.

Recently, a dear friend visited me from Tokyo and she brought this absolutely fantastic persimmon from there for us; that was the most succulent fruit I have bitten into in 4 years! Even Mr. FSK agreed and decided that my raves, about the place, were credible, after all! :-)

So, when I saw that the Daring Cooks challenge for November was Sushi, it instantly took me on a nostalgia trip and hence that long introduction! Bear with me... I can wax on the topic for eternity (these days my hub tunes out the instant I mention Tokyo! LOL).


The November 2009 Daring Cooks challenge was brought to us by Audax of Audax Artifex and Rose of The Bite Me Kitchen. They chose sushi as the challenge.

Perhaps the most cliched Japanese dish adopted by the West is the sushi. As it happens, I had a lot of Japanese food in my time in the country but had sushi only once. Goes to show just how much more there is to the cuisine :)

When I first moved to the US, I refused to eat sushi for almost a year because everyone in Tokyo told me that the American sushi does not compare. So, I held on to the fading memory of that bite of sweet rice and fresh fish even in the face of being called snooty and uppity and all those nasty things! (twenty-somethings can be soo hurtful with words, don't you agree?!)

Eventually, I caved... I couldn't find much other ode to the cuisine (that wasn't heftily priced) and I really needed my Japanese fix. It has become one of our favorite things to have and fortunately, there is a great sushi place just next door to us!


Here are a few words from our hostesses about the challenge:

Although sushi in various forms has been around for fourteen centuries, the modern version was invented in Japan in the 1800’s where a 'hand-formed' sliced fresh fish and vinegared rice ball was eaten as a snack food. Nowadays, sushi is made with various seafood, meats and vegetables, raw and cooked.

The challenge is in four parts:-
Part 1: Making proper sushi rice – you will wash, rinse, drain, soak, cook, dress, and cool short grain rice until each grain is sticky enough to hold toppings or bind ingredients. Then you will use the cooked rice to form three types of sushi:
Part 2: Dragon sushi roll – an avocado covered inside-out rice roll with a tasty surprise filling
Part 3: Decorative sushi – a nori-coated rice roll which reveals a decorative pattern when cut
Part 4: Nigiri sushi – hand-shaped rice rolls with toppings


Yep.. I, actually we, made them all. We played good tag team, with me doing the rice and assembling and Mr. FSK bringing in his expert rolling skills. We went with eel and shrimp as the protein item with cucumber and mayo for additional garnish.


The verdict: While it was fun to make it at home and perhaps a good party/group exercise, it does not compare to the restaurant experience. In the time that I took to just make the rice, we could have had a whole meal at the table. Besides, it is definitely more cost effective to eat out...

One day, I want to go back for a visit with Mr. FSK and share with him all that I enjoyed...I would definitely recommend a trip or a long stay in Japan! It is an experience par none. The natural beauty is spectacular and if you are a foodie, you are in for a happy, happy ride...

Please visit the Daring Kitchen for the recipe, tips and tricks to making sushi and see the wonderful creations by other daring cooks!

Arigatau Gozaimasu!!!

Daring Bakers - Vols-au-Vent


I am sooo excited!! I recently joined the Daring Baker's group and this month I completed my first challenge. Daring Kitchen is a great collection of culinary enthusiasts who challenge themselves to create some exotic item every month. I have been following some of my favorite bloggers recreating some fabulous baked goods and I finally decided to take the plunge! :)

The September 2009 Daring Bakers' challenge was hosted by Steph of A Whisk and a Spoon. She chose the French treat, Vols-au-Vent based on the Puff Pastry recipe by Michel Richard from the cookbook Baking With Julia by Dorie Greenspan.

Oohhh!! Puff pastry... How many times have I happily used the frozen ones from the store for a quick appetizer, canapes or dessert?! It is one ingredient that is a staple in my freezer. And, now, I appreciate the effort and skill required to get that rectangular piece of dough that transforms into the beautifully flaky and richly buttery pastry.

Some background on puff pastry from our hostess:

Puff pastry is in the ‘laminated dough” family, along with Danish dough and croissant dough. A laminated dough consists of a large block of butter (beurrage) that is enclosed in dough (détrempe). This dough/butter packet is called a paton, and is rolled and folded repeatedly to create the crisp, flaky, parallel layers you see when baked. In the hot oven, water in the dough and the melting butter creates steam, which expands in the trapped air pockets, forcing the pastry to rise.


A vols-au-vent, as you might have guessed from the photo, is a pocket/cylinder of puff pastry that is filled with savory or sweet filling. Depending on which course you want to serve them, they can be of appetizer or main course sizes. I have a

I decided to do bite sized savory and sweet portions for this challenge. Now, that was another challenge! I pondered over what filling to make for like a week, even dreaming up flavors in my sleep. (yes, yes, I know.. I am that crazy!). Finally, I settled on mushroom mousse and shrimp orzo filling for savory and a simple lemon pudding for sweet.

Mousse just seemed to go with the French-ness of the pastry. And, mushrooms automatically lend themselves to little bites. I kept the mousse simple using just sauteed mushrooms and shallots and folding in goat cheese (which, I picked up at a Dutch festival in the city) to create the texture of the mousse.

I thought my first batch of pastry did not puff up as prettily as the store bought dough does. I tried again. The result wasn't very different and I suspect that it was because I halved the recipe and so, the measurements got skewed in the process and the butter was over processed into the dough. So, note: If you are planning to make puff pastry using this recipe, make the whole batch and then use as much as you want. Puff pastry freezes very well, so you don't have to worry about it spoiling.

For second take, I took inspiration from my lunch! I had planned on making pasta for my lunch and I thought "Why not serve little bites of pasta in a pastry!". I mean pasta gets universal acceptance and the pastry casing just added that bit of elegance that carried it off as an hors d'oeuvre! :)

For the pudding, I used instant pudding mix (I did say simple!) and tuned up the lemon flavor with fresh zest. Topped off with dark chocolate shavings, it was just about sweet enough for a bite!

So, now that the challenge is done, I must say while it was an interesting experiment, I think I will stick with the store bought sheets henceforth ....

Please visit the Daring Kitchen, to see what other bloggers have designed for their vols-au-vents!


Mushroom Mousse Vols-au-Vents

10 2-1/4" vols-au-vent shells(recipe here)
1 pint cremini mushrooms, chopped
2 shallots, chopped
2 oz goat cheese, room temperature
1 tsp milk
1 tsp chopped chives for garnish
1/4 tsp paprika
1/2 tsp dried oregano
salt and pepper to taste

Saute the shallots and mushrooms in a tablespoon of olive oil until the water evaporates. Season with salt, pepper, paprika and oregano. Let the mixture cool and then blend in the food processor to a smooth paste. Whip the goat cheese with a teaspoon of milk until light and airy. Fold in the mushroom mixture into the cheese. Fill a piping bag fitted with a star tip (I used Ateco #864).

Pipe the mousse into warm vols-au-vent shells. Garnish with chives and serve immediately.

You can truss this recipe up by sautee-ing the mushrooms in white wine and using mascarpone or creme freche instead of goat cheese.


Shrimp Orzo Vols-au-Vents

6 2-1/4" vols-au-vent shells
handful of orzo
2 cups lobster/shrimp/clam stock
3 T marinara sauce
1.5 T sour cream
3 shrimps sliced vertically
1/2 tsp cajun seasoning
1/4 tsp dried parsley
salt and pepper to taste
fresh grated parmigianno regianno for garnish

Cook the orzo until slightly underdone in the stock. Heat the marinara sauce and add the drained pasta to it. Cook for a minute or two until pasta is cooked. Off the heat fold in the sour cream. Meanwhile, toss the shrimps in salt, pepper, cajun seasoning and dry parsley and saute until cooked.

Spoon pasta into the vols-au-vent shells. Top each with a shrimp slice, garnish with fresh grated parmigianno and serve immediately.