main course

"IKEA" Braised Chicken Casserole

I did not really plan this post right after that

nordic last one

. It just happened that I went to IKEA last weekend. And, this is the perfect dinner to make while assembling furniture.

I have a confession to make. I really like IKEA. Actually, not the store, just the stuff. Oh yes, I know the furniture is not the real thing. I am not a fan of the bleached wood patterns. I know they are not sturdy and you get what you pay for. I know it is cheap and that is the main thing for many people and sometimes, functional and cheap is all you are looking for, like I did this time {Work table for $49 and assembled in 5 minutes! Beat that!}. Oh and the worst, the damn lines are snaking no matter what time of day or day of week you go. There is simply no gaming that system.

IKEA Brooklyn
The Coffee Lab, Bayridge

Coffee Lab, Bayridge, Brooklyn

Having said that, what I LOVE about IKEA stuff is how independent and strong it makes me feel. In short, DIY, in the most masculine of worlds; wood, furniture, power tools. It gives me a heady thrill. Ok, I don't have drills. I have to depend on my skinny forearm power for put things together. But, the rivulet of sweat that runs down my face as I put my weight into tightening the screws is a fabulous high. I love putting together stuff. IKEA gives even tiny people like me the stilts of being bigger and stronger, because they make it light, efficient and simple. Oh right, when you are on a budget or constantly moving, it is a great affordable alternative. Also, from experience I know IKEA stuff lasts longer than Walmart and BedBathandBeyond products but less than Crate and Barrel or West Elm ones.

So, that is why, despite the annoyance of navigating the store, I actually look forward to it. I am tired and worn out by the time check out is done but immediately after I perk up in anticipation of putting the piece together. I will even happily glad handle awkward pieces up four flights of stairs because I want to get cracking on it asap.

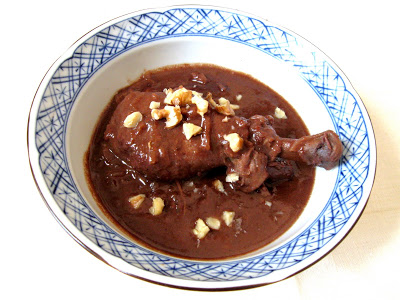
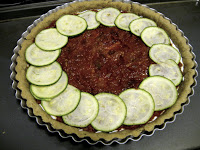
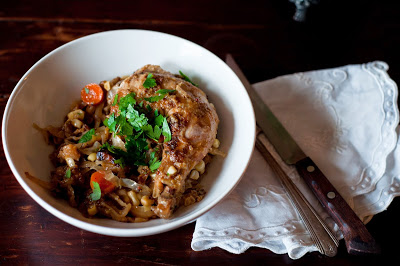
It was however dinner time by the time I got back. So, I of course, had to deal with a soon to be rumbling belly before my hedonistic and validation seeking mind could be served. Now, it had to be something that does not involve active stove engagement, obviously. Casserole, it was to be then. In the oven. Chicken hinds browned crisp in rendered pancetta topped with shredded cabbage, onion, fresh sweet corn went into a cast iron dutch oven. Topped with mustard, white wine, chicken stock and finally some homemade Apple-rosemary chutney, it bubbled away serenely for about an hour and half while I set up putting together the office/studio area, rearranged a bit of this and that around the house.

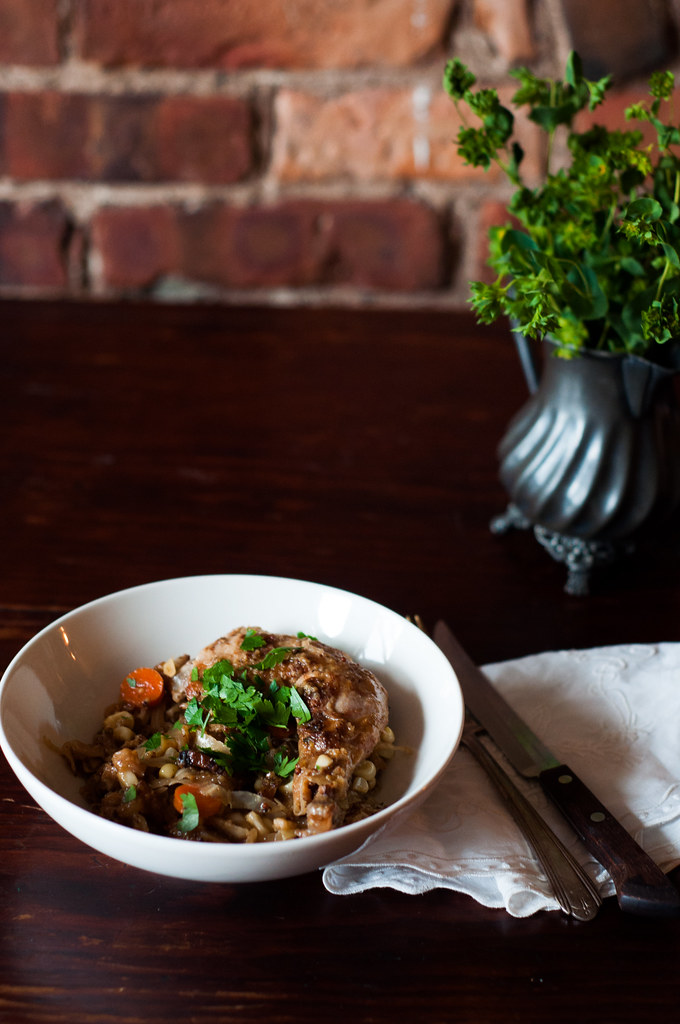
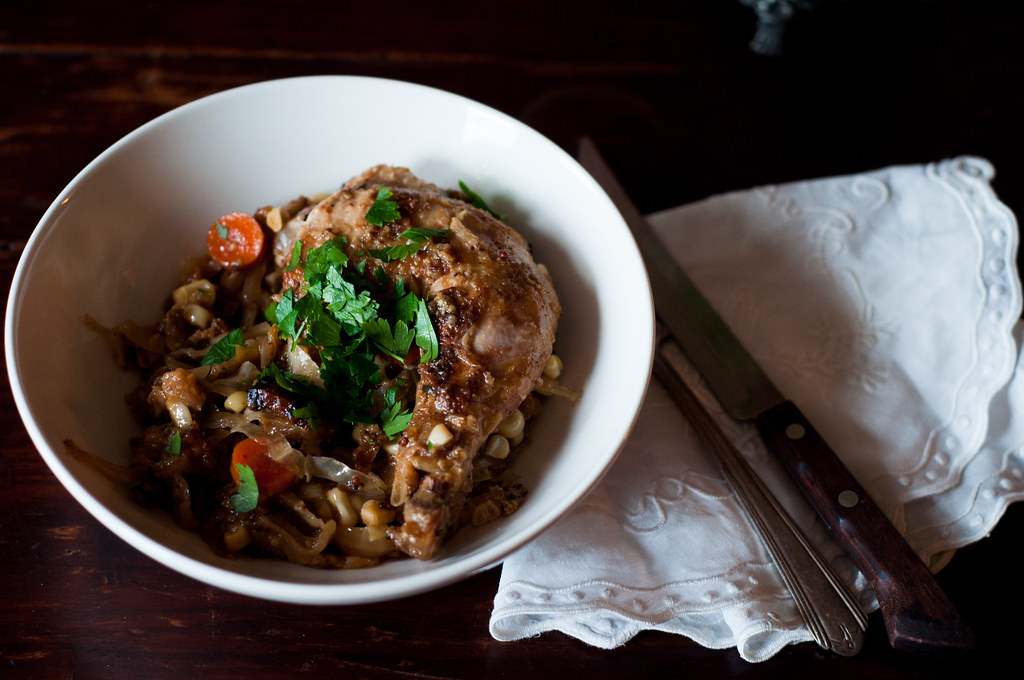
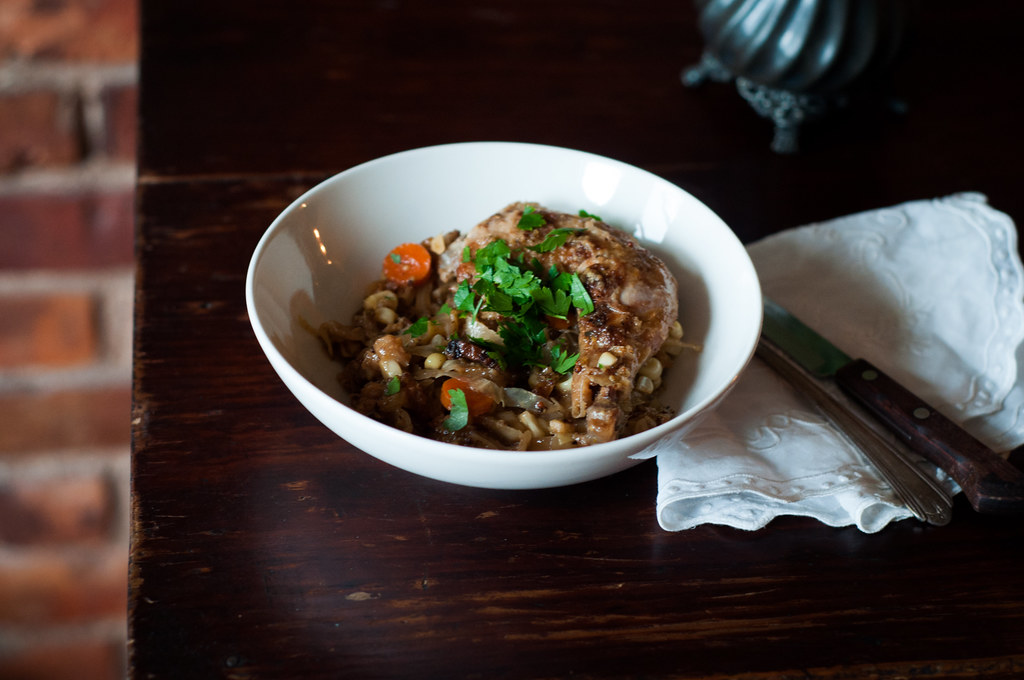
I was just about done in that time and I was ready and ravenous to dig into a succulent leg of slow cooked chicken sitting atop a generous serving of cabbage and onion braised in the juices of the dish rendered tender but still with a bite. It was perfect. I had earned it. And, it took me about 10 minutes of effort in all. I browned the chicken while prepping the vegetables and so they all came together at the same time. Brilliant I think.

This would be a fantastic meal for a crowd too or even with pork shoulder or leg of lamb. You will have to cook these meats longer but the flavors are surreal. And, because of the circumstance, I think this shall forever be called the

IKEA

Braised Chicken Casserole

;-)

One Year Ago:

Roasted Butternut Squash and Pear Soup

Two Years Ago:

Saffron Aioli

Three Years Ago: Not much to say, apparently

Four Years Ago:

Filipino Chorizo Croquetas

Related post:

Quick Adobo Chicken

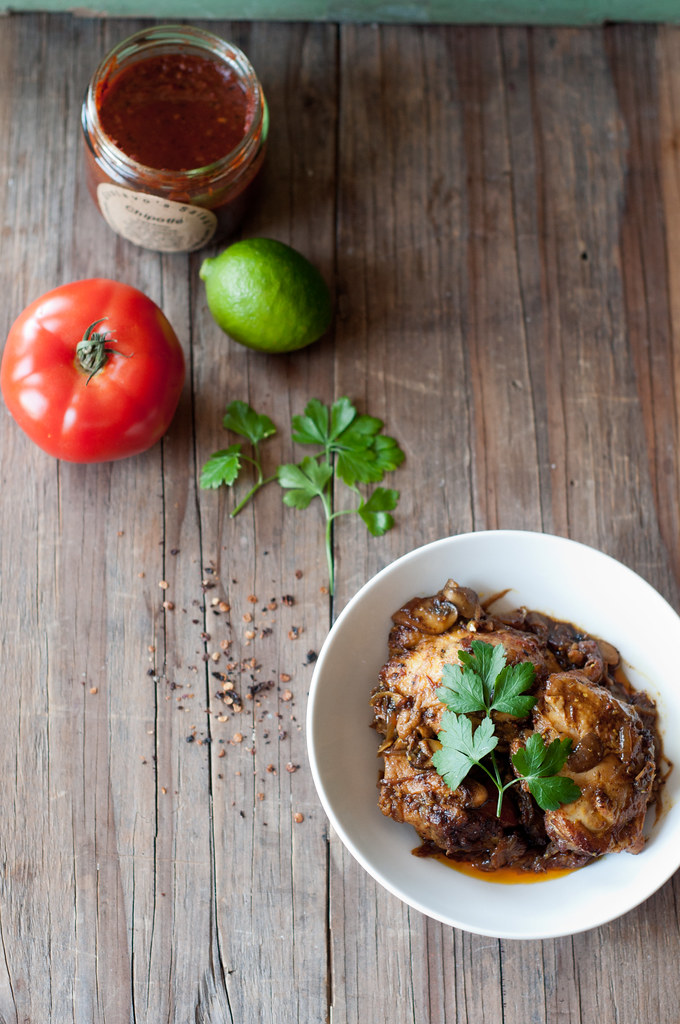
Quick Chipotle Chicken

Find the recipe in the Summer Issue of NOURISHED Magazine. Use links on sidebar to access.

"IKEA" Braised Chicken Casserole

{Note: If you linger over anything in this recipe, take the time to nicely brown the chicken skin. Because it is a slow cooking recipe, if you don't crisp the chicken skin first it becomes rather uninspiring to eat in the end.}

3 small chicken hinds (thigh + drumstick), with skin and bone

2 T pancetta

1/2 head of small cabbage, shredded

1 medium yellow onion, sliced

a carrot or two, sliced

1 ear of fresh sweet corn, kernels removed

4 T of Dijon mustard

3 T of grainy sweet mustard

1/3 -1/2 cup of apple chutney or other preserved fruit

half bottle of white wine

1/2 cup stock

salt, pepper and oil as needed

Preheat oven to 400F.

Over medium heat, render the pancetta till crisped in a dutch oven. Rub salt, pepper and little dijon all over the chicken. Add the seasoned chicken parts, skin side down. Turn the heat up and let it sit for 3-4 minutes until nicely browned. Turn the protein to brown on the other side as well.

Remove from heat. Lifting each piece, distribute half of the shredded vegetables under the chicken and the remaining on top. Season with salt and pepper. Distribute the mustard around the top. Pour over the wine and stock.

Cover and braise in the oven for atleast an hour and recommend for hour and half.

Raise the temperature to 450F. Remove the cover and continue roasting for 15 minutes.

Rest for a few minutes and serve. You can also top with sour cream if desired.

Mediterranean Baked Red Snapper and Aussie Trivia


Ok! Let's start with a trivia question from my trip. Tell me where the below photo was taken ...

Picture 603-2 copy

While you ponder the photo, let me just say .. I am back! :) Well, I seem to be saying that every other month!! Hmmm... Anyway, after almost a month away from home (and my kitchen) I am back to wearing clothes from the closet rather than the crumpled suitcase stuff. OK! I really can't complain... We spent all that time living in 5 star hotels and luxurious resorts. Still, I am glad to be back on home ground..

The travelogue is due.. I am still sifting through the pile of photos I took during the trip. Meanwhile, I did not want to be absent from my space here. I have not yet gotten into the full swing of cooking, photographing, posting... So, while I am still recovering from the jetlag, I leave you with a dish that I made before I left - Mediterranean Whole Baked Red Snapper.

Mediterranean Whole Baked Snapper

I found some gorgeous snapper at my seafood store and immediately grabbed one. I love snapper, one of the few fishes I can eat without a fuss! It's mild flavored, cooks easily, can be flavored with pretty much any seasoning and when fresh has a slight sweetness that is quite enticing..

I have a fascination with cooking fish whole. I don't often do it but I love the way it looks on the table (ofcourse ignoring that eye!). For this one, I made a simple Mediterranean influenced marinade with olives, coriander, garlic, capers and olive oil. To make a complete meal of it, I baked the fish with red peppers and red onions. The juices from the fish and marinade flavor the veggies as well making it a nice wholesome meal. I served this fish over lemon rice .

Mediterranean Whole Baked Snapper

Indian Inspired Carrots and Lentil Soup

Carrot and Lentil soup 3

Sometimes, there is nothing better than a simple soup to satisfy the soul. A soup that is easy to make, with familiar flavors but presented differently, that warms you from the inside on a cold, cold day.

Weekends are mostly lazy time. There are days when I wake up with a whole elaborate meal planned out in my head all dreamed up over the course of my restless sleep, muttering about ingredients and sauces and stuff. And, more often, I wake up and open the refrigerator hoping there is something that can be whipped up into something else without a whole lot of effort.

So, when I saw the bag of sweet carrots and pretty much nothing else in the fridge, I stared at it for a while. The idea of heading to the grocery for more stuff didn't appeal. It was one of those muggy mornings and even around noon I was still too groggy (we live such happening Friday nights, you see... slothing in front of the tube and mindlessly watching re-runs of Grey's Anatomy.. very exciting stuff!).

Carrot and Lentil soup-1

Anyway , for as long as I remember, I have not like cooked carrots. I just don't like the texture. So, well, finally, after what seemed like eternity (now that I think back.. at that time.. it seemed much more spontaneous..), it struck me that I could make soup with perhaps something else to add more body to it. More foraging and hazy thinking later, I had an 'Aha' moment. Why not make a dal type soup with carrots. Perfect! It's simple to make. I love dal flavors and it's different without being shatteringly jolting...

So, there it was.. a simple soup with red lentils and pureed sweet carrots with a touch of garam masala for spice and extra warmth. Poured over day old crusty bread and topped with Parmesan it was a fabulously easy lunch and so satisfying too!


Carrot and Lentil Soup

1/2 cup red lentils, washed and drained
1 cup sweet carrots
1/2 medium onion, diced
1 clove of garlic, minced
1/2 tsp turmeric powder
1 tsp cumin powder
1/4 tsp garam masala
1 cup water
fresh grated parmesan, as needed
day-old baguette (optional)
salt and pepper as needed
olive oil for garnish


Par boil the carrots in a pot. Drain the carrots and reserve the cooking liquid. Cook the lentils in the carrot water with the turmeric until completely cooked.

Meanwhile, saute the onion and garlic in olive oil. Add the cumin and garam masala and cook for a couple of minutes. Add in the carrots and lightly toss to coat with the spices. Once the dal is cooked, add it to the mixture. Cook for 5 more minutes to allow the flavors to blend.

Puree the mixture to the consistency you like. Add the puree back to the pot along with the water and bring to a boil. Simmer on low for 10 minutes. Season to taste.

To serve, place a couple of pieces of day old crusty bread at the bottom of the bowl. Pour the hot soup over the bread. Drizzle a bit of olive oil and garnish with sliced raw carrots and parmesan.

Sunday Brunch: Baked Eggs with Vegetable & Ham Hash, Sweet Potato Scones with Blood Orange - Maple Sauce

Baked Eggs + Hash close up

We are the typical lazy, Sunday brunch couple; late Saturday nights spent in company of friends or just each other, waking up close to noon on Sundays, just in time for early lunch or as is common in these parts - Brunch.. The only difference between us and scores of other NY-ers is that we don't drink and we don't do the long brunch lines (unless ofcourse we plan to do just that with friends). So, our typical first meal of Sunday is not eggs benedict with a side of OJ and strong coffee; more like a leisurely chai with many many glucose biscuits and then regular lunch.

Last night, I had a sudden craving for a typical NY style brunch with the eggs, muffins et all. But, all my craving did not overpower my abhorrence of standing in line in the freezing cold and smiling about it! So, it was to be Brunch at home, cozily warm and leisurely lazy.. no need to wake up early to beat the rush at 11:30! YAY!

Sweet Potato Scones with blood orange maple sauce

My menu - Eggs with hash, breakfast scones and fruit. Rummaging around the net and in my pantry and fridge, I found inspiration, sweet potato, ham and half a head of cauliflower. Passing by Chocolate Shavings, I found this lovely recipe for baked eggs. From there, it was simple stretch of imagination to incorporate what I had on hand (Early morning shopping is a strict no-no!)..

Now, cauliflower ranks rather amongst my least favorite vegetables. Mr. FSK knows that. Yet, for some reason, whenever I send him out to the grocery store, he comes back with a head of it (:OO!!), leaving me with a frown on my face (so not good for my looks!) and having to come up with ideas to consume it before it gets wrapped in deathly fungal hallows.. sighh.. I do like cauliflower with cheese (lot of it), so I figured, it would work well in a hash where it's flavors are not dominant.. So, that's one down...

Baked eggs over hash

There isn't a good wholesome hash without potato. So that went in too. Then, the ham just fit in right along! To go with that, I wanted a cheese that would melt, become gooey and perfectly satisfying. I had provolone and fresh mozzarella on hand. I chose the latter because.. well, because I just felt like it! :-)

There! I had my first item - Potato and Cauliflower Hash with Mozzarella topped with Baked Eggs.

Sweet Potato Scones

My perfect brunch has to have a little sweet element to it. Usually I order french toast and nibble on hub's eggs. Today, I decided to go with scones. After my first success with the British breakfast item, Orange Yogurt Scones, I have just been hooked to them in general.

Sweet Potato is the chosen ingredient for this month's Beet 'n Squash You, hosted by Melody and Leela. Drawing inspiration from pumpkin spice scones, I chose to accompany my egg dish with Sweet Potato and Cinnamon Scones topped with a Blood Orange & Maple Sauce.

I had to plan the brunch a bit and manage time and all that. But, hey, it was well worth the effort. Sitting down with a full plate of baked eggs and hash, fresh warm scones and sauce and a some refreshing fruit was just the perfect way to start the Sunday! :))

Have a great week everyone! :)

Brunch Plate


Baked Eggs with Potato, Cauliflower and Mozarella Hash
(serves 2)

2 eggs
1/2 medium red onion, julienned
1 clove garlic, minced
1/8 lb cured ham (any kind you like)
1 small russet potato, boiled
1/4 cup cauliflower, flowerlets
3 T fresh parsley, finely chopped
1 tsp italian seasoning
1 tsp paprika
3 T light cream
2 mozzarella rounds, 1/4 inch thickness, width to fit your ramekins
salt, pepper, olive oil as needed

Garnish:
sprig of parsley
2-3 cherry tomatoes, sliced thin

Toss the cauliflower in a little oil, salt and pepper and roast in a 350F oven for 15 minutes until crisp and cooked. Meanwhile, in a skillet and lightly saute the ham in a little oil. Add the onion and garlic and saute till soft. Season with salt, pepper and other seasoning. Add diced, cooked potato and toss for a couple of minutes. Remove from heat and transfer to a mixing bowl. Toss in the roasted cauliflower and set aside to cool until ready to assemble.

Just before assembling, add the cream and parsley to the hash mixture and stir to incorporate. Brush the inside of two 10 oz ramekins with butter. Divide half of the hash mixture equally between the two ramekins. Layer the mozzarella over this. Top with the remaining hash mixture.

Break the eggs one at a time in a small bowl and gently transfer to the top of the ramekins. Sprinkle a pinch of salt to season the egg. Cover with foil (to ensure that the yolk doesn't cook faster than the whites). Bake at 350F for 20-25 minutes until the egg is set and whites are cooked.

Garnish ramekins with the tomato slices, parsley and tiny sprinkle of paprika. Serve immediately.


Sweet Potato Scones with Blood Orange and Maple Sauce

1 cup cake flour
2/3 T baking powder
1/4 tsp baking soda
1/4 tsp salt
1 tsp ground cinnamon
3 T brown sugar
3-1/2 T very cold butter, diced
3 T heavy cream
1/4 cup sweet potato puree
butter and sugar for brushing and sprinkling

In a medium bowl, sift together the flour, baking powder, soda, salt and cinnamon. Using a pastry cutter or two knifes, cut in the cold butter so the mixture resembles a coarse meal. In a small bowl whisk together cream, potato puree and brown sugar.

Add the wet mixture to the dry and bring together to a form a crumbly dough. Scrape the dough to a lightly floured surface and bring together to form a dough ball. Pat to form a circle of about 1 inch thickness. Wrap in plastic and refrigerate for atleast 30 minutes.

When ready to bake, remove dough and thaw for 5 minutes. Then roll it out on a floured surface to 1/2 inch thickness. Using a cookie cutter of your choice, cut out scone shapes. Place on parchment paper. Brush the tops with butter and sprinkle sugar.

Bake at 400F for 15-20 minutes, until the tops are golden and a toothpick comes out clean when inserted.

Cool for a few minutes on the rack. Serve warm topped with Orange-Maple sauce


Blood Orange and Maple sauce

1 blood orange, juiced
1 T maple syrup
1 T sugar
1/8 tsp corn starch

Over medium heat, bring the above ingredients to a boil. Whisk in the corn starch. Lower heat and let simmer for 2 minutes. Remove from heat and cool to warm. Pour over scones and serve.

Trout en Croute for Daring Cooks

trout en croute

The last week of November was quite hectic. I was travelling soon after and there were so many bakes to finish before I could take leave of my oven. As it also happened to be the Thanksgiving week, the time pressure was more. Amidst the dinners and entertaining, I had to find time to complete the month's challenge for Daring Cooks!! Fortunately, this month's challenge was easy enough to put together and completely stress-free, so, I just about managed it! :)

The 2009 Daring Cooks challenge was hosted by Simone of Junglefrog Cooking. Simone chose Salmon en Croute (or alternative recipes for Beef Wellington or Vegetable en Croute) from Good Food Online.

You will notice that my title says trout and not salmon. Well, I just took some creative liberties with the protein element. You see, when I went to the fish stall, the trout looked way more appealing and fresher than the salmon. Besides, salmon to me is best eaten raw in sushi form. Butter poached salmon from steak houses have just put me off the cooked fish. Also, trout is a softer fish than the salmon and I think that worked really nicely with the sauce in this dish.

Picture 001-1

Anyway, happy as a beaver, I set off on making lunch. I had the pastry dough ready. I used store bought dough (I know that is blasphemous to all you conservatives out there but when is time is short... :)). I made the cream sauce with cream cheese, arugula, basil and spinach flavored lightly with lemon zest.

Packed and trimmed, with those neat little bows (cute, aren't they?!), the fish in pastry looked really pretty and ready for the oven. Thirty minutes later, I took it out, in heavy anticipation. Simone's sample photos of the challenge looked so beautiful, so true to the adage of eating with your eyes first. Unfortunately, I was in for a disappointment. My cooked pastry looked nothing like Simone's!! For some reason, it was neither glamorous looking nor young and taut as hers.

like

Nevertheless, I put my disappointment at the back of my mind and set about photographing, so we could get on with the eating. My heart was heavy but it lightened quite a bit once I took a bite of the dish! It was awesome! Light and flaky, the trout had absorbed the flavors, from the sauce, well. I had been generous with packing the sauce in the pastry, so we did not even need more on the side.

All the while, there was the nagging question in my subconscious mind about the lackadaisical appearance of the pastry. It was only later in the evening that the answer came to me. You see, as I was reading the recipe for the short crust pastry, it somehow stuck in my mind that it was like puff pastry. So, I had wrapped the fish in puff pastry. Only later, as I was mulling over the recipe, did it strike me that it was like tart crust, not puff pastry!! So there, mystery solved. Next time, I will be sure to use the right pastry. LOL!

trout en croute close up

Interestingly, the dish reminded me very much of a Parsi dish that my MIL makes, Chutney Fish. It is of similar concept; the chutney is made with coriander, green chillies and a hint of tamarind, the fish (usually pomfret) is generously coated with it and then wrapped in a banana leaf and steamed. It's incredibly delicious!

Btw, if you would like a complete en croute meal, check out my Curried Egg Pastry Cups for appetizer and Brie en Croute for dessert.


Salmon en Croute
(serves 4)

5.2 ounces/150 gr Mascarpone or creamcheese
0.6 cup/4.2 ounces/120 gr Watercress, rocket (arugula) and spinach
17.6 ounces, 500 gr Shortcrust pastry
17.6 ounce/500 gr Salmon/trout fillet (skinless)
1 egg

Heat the oven to 200°C/390 F. Put the mascarpone or cream cheese in a food processor with the watercress, spinach and rocket and whizz the lot until you have a creamy green puree. Season well.

Roll the pastry out so you can wrap the salmon in it completely (approx. 2-3 mm thick) and lay it on a buttered or oiled baking sheet (it will hang over the edges). Put the salmon in the middle. If it has a thinner tail end, tuck it under. Spoon half of the watercress mixture onto the salmon.

Now fold the pastry over into a neat parcel (the join will be at the top, so trim the edge neatly), making sure you don’t have any thick lumps of pastry as these won’t cook through properly. Trim off any excess as you need to. Make 3 neat cuts in the pastry to allow steam to escape and make some decorations with the off-cuts to disguise the join if you like. Brush with the egg glaze.

Bake for 30 minutes or until the pastry is crisp and browned. To test wether the salmon is cooked, push a sharp knife through one of the cuts into the flesh, wait for 3 seconds then test it against the inside of your wrist; if it is hot, the salmon is cooked. Serve with the rest of the watercress puree as a sauce.

Shortcrust pastry

While this is not mandatory to do, I highly recommend making your own shortcrust pastry as it is very simple to do! As mentioned in the notes; please make sure to not add too much water as that is the key to having a successful shortcrust pastry.


450 gr (15.8 ounces or 3.2 cups ) of plain all purpose flour
200 gr ( 7 ounce) cold butter
pinch of salt

Sift the flour into a large bowl, add the butter and rub in with your fingertips until the mixture resembles fine breadcrumbs. If you have a food processor you can use that as shown in the above video.

Stir in the salt, then add 2-3 tbsp of water and mix to a firm dough. Knead the dough briefly and gently on a floured surface. Wrap in cling film and chill while preparing the filling.

For best results make sure the butter is very cold.

Crab Curry; Updated to the new age


There is this comfort in the 'old' and the 'passed down'. Ok, not clothes and stuff but recipes, heirlooms, old wood furniture.. stuff like that.
There is that sense of treasure and also of family; the feeling of love and yes, the spirit of all those people who passed it along lovingly to you. It's like being wrapped up in a warm blanket, feeling all fuzzy and happy.

I did not explicitly ask my mother for her recipes. But, the food I make is significantly inspired by my mom's cooking, which, in turn drew hugely from my grand mom's and so on. So, albeit indirect, the flavors of my kitchen, today, have been passed down through the generations and it just makes such a wonderful bond; A way to remember those who have left us, except in memories, and feel close to those who live too far away to pop in for dinner.

Along the way, as it gets passed down, each recipe is so subtly modified by that generation's likes and tastes as each home chef adds her own personality to that treasured family recipe. And, surely, she is eager to as well! :)


The crab curry that I make is no exception. I simply love crabs and fresh ones are always the best. And the hub; he loves the crabs (not so much the work involved) but he loves the curry even more! :-) Every time I go to Chinatown (get all my seafood from there), I get some to make this curry that brings back memories of home, the smell of the salty air and sea and the lazy, indulgent Sunday afternoons.

The first time I saw live crabs sitting in a bucket in the store, I swooned.... under the waves of nostalgia. I had to make that curry. And, I did. It was too late to call my mom in India, so I just made the curry from memories and what my palate said would taste like mom's (Read that post here).

Since then, I have made the curry many times! And, over the course of time, modified it and added my own personality; subtly but makes it distinctly mine. The next generation will now get the same vintage flavors but with the twist of the new millennium! :)

Have a great week ahead!

Before you go, I just wanted to tell you that I am thrilled that Foodie Views is featuring my crab curry!!!! Please do check out their delicious photos and also while, you are there, a vote for me would be really nice! :D


To check out my other photos of Foodie Views, link here...

Crab Curry

6 medium crabs, cleaned
2 medium onions
3 cloves of garlic
nice chunk of ginger
3-4 ripe tomatoes
1/2 cup coconut milk
1/2 cup fresh grated coconuts
2 cups water
2 bay leaves, dry
2 tsp split gram, urad dal
1/2 tsp fennel seeds
2 tsp whole mustard seeds
1 tsp cumin seeds
1/2 tsp tumeric powder
6-7 fresh curry leaves
1 lime sized ball of fresh tamarind, or 5 T tamarind paste

For the dry roast:
6 dry red kashmiri chilies (these are of medium heat and give a wonderful red color)
2 dry hot chillies
1 T coriander seeds
1 T cumin seeds
7 cloves
1 stick of cinnamon
2 star anise
4 whole peppercorns

salt and oil as needed

Toast all the dry roast spices till they release their aromas; this intensifies their flavors. Remove to a bowl and cool. In a heavy bottomed pan, saute the onions, garlic, ginger and tomatoes in a little oil until soft and almost cooked through. Cool and process along with the roasted spices to a fine paste. Do not add water, there should enough moisture from the tomatoes.

In the same pan, add more oil and toast the split gram, mustard and cumin seeds till the mustard starts popping. Add the fennel seeds, curry leaves and bay leaves. Roast for a minute and then add the onion mixture. Cook until the oil seperates from the mixtures and there is no raw smell. Add the tumeric and mix well.

Note: Do not let the fennel burn or toast for too long. They can render a very bitter taste!

Meanwhile, if you are using fresh tamarind, soak in half cup of warm water and squueze out all the juice. Stir in the fresh grated coconut, coconut milk and water and bring to a rolling boil. Reduce heat and simmer for 20-30 minutes. Stir in the tamarind juice. Cook for 10 minutes. Add the crabs (body, legs and pincers). Cover and cook for another 20 minutes.

Let the curry sit for atleast a few hours (preferrably overnight) before serving. The crabs absorb the flavor from the curry and the curry itself will taste distinctly of crab; of the sea with a hint of the sweet crab meat.

Roasted Pumpkin Barley Risotto for Halloween

Pumpkin Risotto

Last weekend we went on a fall hike in upstate New York. It was a gorgeous, sunny Fall day and the leaves were almost glowing and the state park was overflowing with people wanting to perhaps become a part of that beauty, just like the two of us. I promise I'll post on that very very soon.. but for now we have a pumpkin story.

So, on the way, we stopped at a farm and picked up some yummy apples and a gorgeously bright orange pumpkin; a nice, cute sweet one. I have been waiting and waiting the whole month to make things pumpkin-y! I have all these ideas in my head for recipes. Anyway, I was really thrilled to find this fab looking pumpkin and decided to start off with risotto for Halloween.


I think of risotto as a luxury not only because it is tricky to make and can go wrong so easily but also 'coz it takes a lot of patience and constant attention. As comforting as it can be, I consider it a special occasion dish and for this haunted day, I thought I would take a wee bit more time to ward off the ghosts.

Risotto in

By the way, here is a bit of trivia. Pumpkins are used to ward off bad omens and spirits in India too! Any new endeavor; house, car, business, is kicked off by breaking a pumpkin (white ones there) for good luck. We also hang a pumpkin, with a big moustached face painted on it, over the building to ward off bad things...

Ok! back to my pumpkin dish. Risotto, as you know, is usually made with arborio rice, a short grain and very starchy strain of rice. But, I didn't use it. I made risotto with barley. Yep! I discovered barley in a soup sometime back and fallen in love with it ever since. It has the same creaminess when cooked slowly but it adds a wonderful earthy flavor to the dish.

Serving 1

So that's my short story. Had a wonderful lunch of it and now am off to a scary party and some more pumpkins (carving this time) ... :)) Wish you all a cheerfully scary Halloween and fun times trick or treating! :)

By the way, Renee over at Flamingo Musings has been hosting an awesome Halloween food event through this week. A bunch of foodies and food bloggies got together to make fun Halloween themed items. Check out what everyone made for the GreatHallowTweet at her site.


Roasted Pumpkin Barley Risotto

1 cup barley
4 cups of chicken stock (sub: vegetable stock)
1 cup pumpkin puree
1 small onion, diced finely
2 cloves to garlic, minced
big chunk of ginger. minced
1/2 tsp pink peppercorns
1/2 tsp dried thyme
1 tsp oregano
2 T fresh mint
1 tsp Worcestershire sauce
2 T butter
2 tsp cumin powder
2 T sour cream
salt and pepper to taste

Cut the pumpkin, clean out the innards and place cut face down in a baking dish with a 1/4 inch of water. Bake in a 400 degree oven for 45 minutes until the insides are soft and cooked. Scoop out the cooked flesh and puree with the tiniest bit of milk to make a smooth puree.

Saute the onions and garlic in butter until translucent. Add in the barley and toast for a couple of minutes. Season with salt, pepper, cumin, thyme and oregano. Add two cups of stock and cook until the liquid is almost absorbed. Stir in the pumpkin puree.

Add the rest of the stock in half cup measures and stirring until it is fully absorbed. Slowly the barley will become creamy as the starch releases. When you are done with all the stock, remove from heat and stir in the sour cream.

Serve immediately garnished with mint leaves and a drop of pumkiny-sour cream.

POM-tastic Koresht - e -Fesenjan!

Recently, I was sent a case of POM Wonderful juice by the company to taste and test recipes. As soon as I was told I was getting the product, I started dreaming up things to make with it. And, the first thing that popped into my head was Fesenjan, the rich Iranian special occasion dish made with pomegranate molasses and walnuts.

There used to be a lovely Iranian restaurant in Bangalore, named Sufi (now closed) that served Fesenjan on special orders. You had to call in a day ahead and let them know if you wanted to order it. No, no, it does not take that long to make but the flavors in the dish develop and mature the longer it sits and overnight is the minimum recommended. All these elaborate arrangements coupled with the fact that it is a dish reserved for occasions, in Iran, just drew the mystic aura around it and I wanted to recreate that at home. :)

Now, I love pomegranates. I remember my mother lovingly peeling the rind and cartilage off the fruit for her dearest daughter (that's Me..). Interestingly, this is one of those things that is also very good for you (what a lucky coincidence!). It is full of antioxidants and is beneficial to cardio-vascular health. You can read more about the health benefits of POM Wonderful juice here.

So, back to the Fesenjan. It really is a very simple dish getting it's flavors primarily from the ground walnuts and pomegranate reduction. The toasted walnuts are slightly bitter and the pomegranate is sweet and tangy at the same time. As the pomegranate juice reduces, the sweetness gets enhanced. The resulting gravy is rich, deep and yet subtle in flavor. I made it with chicken as it is traditionally made. You can also use lamb or beef.

Yes, I get the irony. Fesenjan is not a heart friendly dish but I do think it showcases the pomegranate very well indeed! :)

For more recipes using POM, please check out their website.

Koresht - e - Fesenjan

**
Fesenjan tastes better the longer it sits, atleast overnight. So, try to be patient and plan ahead.
It is important to cook the sauce until the oil renders from the nuts.
**

1-1/2 lbs chicken bone-in thigh and leg meat
1 large onion, sliced thin
2 cloves of garlic, minced
1/2 lb walnuts, toasted and ground
3-1/2 cups POM wonderful pomegranate juice
1/2 tsp cinnamon
1/2 tsp nutmeg
1-2 T sugar (depending on taste and sweetness of juice)
1/2 tsp cardamom powder
2 T lime juice
salt and pepper to taste
3 T olive oil

Brown chicken pieces in a heavy bottomed pan in 2 tablespoons of oil. Remove and reserve. Add some more oil and saute onions until soft. Add the garlic and saute for a few more minutes. Season with salt, pepper, cinnamon and nutmeg and fry for a minute.

Mix in the walnut paste into the onion mixture. Add the browned chicken pieces and toss to coat with the walnut and onion mixture. Stir in the pomegranate juice. Bring the mixture to a boil and then reduce heat to low and simmer for atleast an hour until the sauce is thickened, the walnuts release their oil and the sauce has reduced to about half the original volume.

Stir in lemon juice and sugar according to taste. Adjust seasoning if needed. Continue cooking for a 20 more minutes. A minute or two before taking off the heat, mix in the ground cardamom.

Let cool to room temperature and refrigerate overnight. Next day, if the sauce is too thick, stir in 1/2 cup of warm water and bring to boil. Serve over hot white rice, garnished with walnuts. I would have sprinkled some fresh pomegranate as well, but I did not have any on hand.

Oil tarts are in!


Yes, you read it right! Not butter.... oil. When I first came across the recipe for a tart shell with oil instead of butter on Passionate about baking, I was instantly inspired to make it! I have long wondered if oil could create that wonderful flakiness that is most loved about a butter crust. After all, the Indian paratha has a lovely flaky texture and is made with oil or ghee. So, armed with a recipe to help me out with the measures, I was ready to test my hypothesis .

Recently, a friend of ours introduced us to a small farmers' market in midtown Manhattan (52nd street between 8th and 9th avenues). Bang in the center of prime real estate, it carried fresh produce at admirably reasonable prices. When I found a butternut squash that was perfectly sized for two, I was sold!

As soon as I saw the squash, I decided to make roasted butternut squash tart with the new healthy version for the crust. That crust experiment unfortunately, did not go as well as I expected. As I followed the recipe, I felt that the dough was a bit dry and tough and it stayed that way after being baked as well. The tart filling was moist but the crust was way too hard. But, I did not give up. I decided to give the oil tart another chance, this time, with some modifications.

For take #2, I decided to make rosemary tart with a layered filling of ricotta, marinara and zucchini, like a lasagna. I made the crust with minced fresh rosemary. I also upped the amount of water and substituted half the olive oil with canola oil. The result was much better than the previous time.

The crust was soft, supple, light yet flavorful. But, it did not turn out flaky! A butter crust definitely has a better texture and arguably a richer flavor. However, I liked the oil crust quite a bit. It is a pretty good, much healthier version, which, is a whole lot easier to work with (especially with no constraint to work quickly to prevent the butter from melting!).


Oil Tart Crust
adapted from
here

1-3/4 cup spelt wheat flour
1 tsp salt
1/2 tsp pepper
1 tsp minced rosemary
1/2 cup + 2T ice cold water (I did this more on a add as you go basis. So it could be a bit more or less)
1/8 cup olive oil
1/8 cup canola oil
2 tsp oil

Sift together flour, salt, pepper and rosemary. Add the oil and mix it in with a fork. Add water slowly, mixing it in and kneading the dough until it comes together into a ball.

Turn the dough out onto a lightly floured work surface. Using a floured rolling pin, roll the out into a circle large enough to fit your tart pan. Transfer the dough carefully into the prepared pan and line it without stretching. Trim off the excess dough with the rolling pin. Refrigerate for atleast 30 minutes.

Blind bake the crust in oven preheated to 375 degrees for 15 minutes. Remove pie weights and continue baking for five more minutes. Dial down the oven to 350 degrees.

Fill the tart with filling of choice (suggested recipes below). Return to oven and bake for 30 to 40 minutes until the tart is fully cooked. If using mozzarella on top, reserve the cheese until the last 7 minutes, then sprinkle over and cook until the cheese is melted.

Remove the tart from the oven and cool for 5 minutes. Sprinkle the top with parmesan, chives or other garnish and serve.

Roasted Butternut Squash Tart

1 oil tart crust blind baked
1-1/4 cup homemade (or store bought) marinara sauce
1 cup roasted butternut squash dices
3/4 cup grated fresh mozzarella cheese
2 tsp chopped chives or scallions for garnish

Spread half the marinara sauce at the bottom of the tart shell. Top the layer with the roasted butternut squash pieces and then a half cup of grated mozzarella. Spread another layer of marinara sauce.

Bake for 30 minutes. Sprinkle the remaining cheese over the tart in the last 7 minutes and finish baking. Garnish with chives/scallions and serve.


Zucchini Lasagna Tart
adapted from
101 cookbooks

1 oil tart baked as above
1 medium zucchini thinly sliced
1-1/4 cups marinara sauce
1-1/4 cups ricotta cheese
1 T grated parmesan cheese

Spread half the ricotta cheese on the bottom of the tart. Then, spread a third of the sauce over it. Line the zucchini slices around the tart in an overlapping fashion.

Repeat the cheese, sauce and zucchini layers. Top of with the remaining sauce and bake for 30 to 40 minutes until tart is fully cooked.

Let tart rest for 5 minutes, garnish with grated parmesan and serve.

Simply good homemade pizza!


This is Act II of the great artichoke experiment. Read about Act I here.

I love pizza.. I mean who doesn't ?! If I could, I would eat it almost every other day. But, alas, things so good are hardly ever good for you. Now, exactly what about the pizza is bad? Oh, the gallons of grease, and piles of cheese, you say; all good tasting but sadly artery clogging stuff. But, what if you could actually control all that to the normal and acceptable (even by nutritionists!) levels ? If you could with some extra effort ensure that a pizza slice is as good-for-you a meal as any other that you make at home, would you do it? Ofcourse, without compromising on the flavor etc. etc....

If you are willing to go that extra bit, then you are in for a happy, happy surprise! I made pizza at home. Yes, from scratch. What else did you expect from me?! The base, toppings, the whole nine yards. Ok! I cheated on the sauce (got it out of a jar) but still.. there were all in controlled proportions.

The idea for a pizza was born out of a need to best incorporate the sauteed baby artichokes that I had made at home in Act I of the artichoke experiment (read here). I really would not have even considered making the pizza base at home if not for browsing some of my favorite food blogs, in particular Smitten Kitchen. She makes bread-making sound so easy that I decided to give it second chance. You see, the first one didn't go so well...

Many months ago, I had made rosemary focaccia at home. It came out really nice and all that and I made wonderful mediterranean sandwiches with it. But, for some reason, I felt that it was way too much effort. Ever since, I have not attempted to make any yeast-bread at home at all. Until now... This is also the first recipe of SK's I was trying out. So, well, much hung in the balance (for whom?! well, I suppose for me!.. and the artichokes!)..

Once I set about it, I was really surprised to see how easy it was. Yes, it does take time and it isn't a 30-minute meal but let me assure you, it is worth every minute. It made me wonder why I thought all this was a painful process in the first place (note the vague 'for some reason' in the last para). But, well, happily I have been corrected of my faulty notion. And, from this day forward, I swear to give any other yeast bread more than a passing shot in my kitchen!

So, once the dough was all set, I rolled it out into a 10 inch round and topped it up with some really healthy stuff and no grease! As I mentioned, the primary aim of the pizza was to make use of the sauteed artichokes from earlier. So that was the star. To complement the artichokes, I used marinara sauce base, red onion slices and soft goat cheese. I love the combination of artichokes and goat cheese. So, instead of the usual mozzarella, I went mediterranean all the way. Simple, clean flavors.. that's the way I like it...

It was delicious! And, the best part, it was even healthy. So, I can really have it every other day as I would like to.. except for the dough-making ofcourse. But, nevertheless, more often than before and with my own choice of toppings! Yippee! :)


Homemade Pizza
Pizza base recipe from Smitten Kitchen
( 1 small, thin crust pizza, serves two)

For the base:
1 -1/2 cups of flour
1 tsp salt
3/4 tsp active dry yeast
1/2 cup lukewarm water + a bit more, if needed
1 T olive oil

Toppings:
1/2 cup marinara sauce
1/3 cup sauteed artichokes
3 oz goat cheese crumbled
1/2 small onion julienned

To make the pizza base, stir dry ingredients, including yeast, in a large bowl. Add water and olive oil, stirring mixture into as close to a ball as you can. Dump all clumps and floury bits onto a lightly floured surface and knead everything into a homogeneous ball.

(If you find the dough difficult to work with, leave it in a lightly-floured spot, put the empty bowl upside-down on top of it and come back in 2 to 5 minutes. The dough should be a lot more pliable now.)

Knead the dough for a minute or two. Lightly oil the bowl, put the dough back in, turn it over to coat all sides. Cover the bowl with plastic wrap and leave it in a warm place till it doubles in size (one to two hours).

When the dough has risen, put it back on the floured counter and gently press the air out of it with the palm of your hands. Fold the dough into an approximate ball shape, and let it sit under that plastic wrap for 20 more minutes. The dough will be pretty elastic so you can stretch it bit and fit into a ball shape. It will retain shape once formed.

After 20 minutes, dump the dough back onto the floured surface and roll it out into a 10 inch round. It will be a thin (NY style!) base and I love it best that way!

Spread the marinara evenly over the base leaving a half inch border. Sprinkle the toppings (red onion slices and artichokes) generously around the pizza. Top with crumbles of goat cheese. Brush the exposed edge of the base lightly with olive oil and sprinkle some over the pizza to keep it moist.

If you have a pizza stone, then preheat in the over at 500 degrees and ease the pizza onto it. If not, then place a baking sheet upside down in the oven rack and preheat. Ease the prepared pizza onto a piece of parchment paper and place on the back of the baking sheet. Bake at 500 degrees for 10 minutes until edges are golden brown and crisp. Remove to platter.

Let the pizza rest for a minute or two (this step is excruciatingly painful but perseverance pays! :) ). Cut slices and dig in!